
 The sun is beginning to shine and weather is beginning to get warmer. And, we all know what that means…it’s time for some spring cleaning. This is the perfect time to make your home on wheels spotless, inside and out. Spring cleaning your RV is all about a fresh start and looking forward to the next adventure.
Here’s an RV spring cleaning checklist to help get you started:
Inspect Your RV
- Before you clean, inspect your RV. Check for holes and deterioration that may need to be fixed by a professional repair service.
- Inspect the roof for leaks. Most minor problems can be fixed using the right sealant.
- Look under the vehicle for gas or fluid leaks. If there is a leak, note the location and color and ask a certified technician to inspect your vehicle.
Exterior Wash
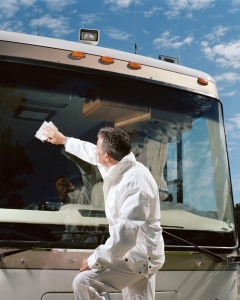 Wash your RV with a good quality RV-specified cleaner to keep your RV shiny and protected. Do not use dish soap or detergent as it is too harsh and could damage the finish of your unit.
- Using a pressure washer is one of the most effective ways to wash down the outside of your RV
- Spray your unit before applying suds. Be sure the sponge and towels are free of abrasive dirt before scrubbing.
- Use specialized cleaner for your tires and trim

Interior Inspection and Cleaning
- Wash interior of unit with mild soap and lukewarm water
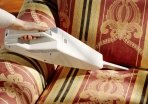 Vacuum carpet, upholstery and door panels
- Wash all removable cushions and window treatments
- Polish and protect the dashboard and other vinyl areas
- Turn on all lights and replace bulbs as necessary
- Check the operation of all appliances
- Check for insects
- Open all windows/roof vents to air out inside – clean and wipe with warm water and liquid dishwashing soap
- Open windows and shades
- Lubricate hinges, locks, and moving parts
- Change batteries in clocks and smoke detectors
- Remove moth balls and rodent bait from interior and exterior compartments

Get Organized
- Start with one area at a time and don’t move on until it’s completed. Hopping around from one area to another only adds to the disorganization.
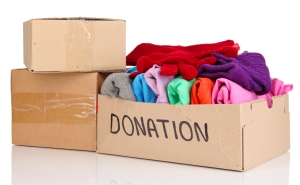 Place 4 bins in the area; 1 for items to keep, 1 for recycling, 1 for items to donate and 1 for trash/shredding.
- Don’t hesitate. Look at each item and determine its worth. If you don’t use it, you don’t need it.
- Go through each drawer, cabinet, shelf, and closet sorting items into bins as you go.
- Look around. If the area seems cluttered, consider moving out non-essential items such as an extra lamp, chair or table.
- Once an area is complete, replace items from the “to keep” bin in an organized manner.
- Repeat steps for each room.
- Take the items in the “to donate” bin, such as clothes, blankets, linens, and children’s toys, and put them into a sturdy garbage bag and take to a local community center, church, homeless shelter, or abuse center, as soon as possible.
- Other donated items such as old grills, dishware, glassware, cookware, electronics, and any other item that may be used can be dropped off at collection centers.
- The “to recycle” bin speaks for itself. Drop items off at a local collection center.
- Toss items from the “trash/shredding” bin that are no longer usable, and shred any paperwork containing identifying information.

Spring cleaning your RV takes some time but will definitely be worth it. And remember, if you spring clean every year, it will be that much easier the next year. Happy Trails!


Have been a member for years and will be forever. They are always there for me.
LikeLike
Thanks so much for the kind words. You are right, we will always be there for you!
Safe travels.
LikeLike
Extremely helpful article! It gives me a lot of useful information on how to settle my cleaning plan. Thanks for sharing
LikeLike
Thanks for explaining how you should clean your RV. You mentioned that you should always inspect your RV before cleaning so that any problems can be fixed. Maybe it could be good to regularly inspect your RV so that the slightest hint of a problem can be addressed quickly, keeping your RV in good condition.
LikeLike