There are many reasons why you may want to create a home web server. These range from basic uses (e.g., storing data, web hosting, home automation, as a video game server) to those that are more advanced (e.g., running a Tor node, private email, chat, creating a customized VPN server).
I’ve been setting up own servers for the past 10 years. And in this guide, I’ll walk you through everything you need to know to set up your own server for web hosting.
Table Of Contents
Quick Summary
 Setting up your own server for web hosting involves selecting the right hardware, installing a server operating system, configuring your server software, and setting up a static IP address.
- The process requires a good understanding of computer hardware, networking, and server management. It also involves ongoing maintenance to ensure security and performance.
- While setting up your own server can provide more control and customization, it’s important to weigh the benefits against the potential challenges and costs, including energy consumption, security risks, and technical difficulties.
 Setting up your own server for web hosting involves selecting the right hardware, installing a server operating system, configuring your server software, and setting up a static IP address.
Make Sure Your Connection Is Suitable For Web Hosting
For DIY web hosting, you’ll need an internet connection to handle large volumes of web traffic. Both your download and upload speeds are important.
Make sure you test these because a residential internet connection may offer you a high download rate, but its upload speed may be sluggish.
Your upload speed is how fast you can upload your data to your website each time a visitor stops by.
If more than one person visits your website at the same time, they’ll need to share this connection. Search engines also look at this when determining where to list your site in their results pages.
This is why some web hosts pride themselves on being great for SEO.

Having a server at home requires you to have a strong enough internet connection to meet the needs of the expected web traffic.
To do this you’ll need to check your internet connection speeds with a speed test tool like Speedtest.net. This tool is fast, free, and available worldwide so it provides accurate results.
Many ISPs provide residents with a good download but poor upload speeds. You’ll need at least 25 Mbps of download speed and 40 Mbps of upload speed to run one or two websites.
If you want to stream very high-quality videos, you’ll need at least 100 Mbps of download speed and around 10 Mbps of upload speed. Make sure that your ISP doesn’t have any data limits set on your internet connection either.
Additionally, you don’t want your data usage capped or throttled. If your internet connection doesn’t meet these standards, you’ll need to change providers before you can set up your own home server.
Choose Your Hardware
Once you’re certain that you have a suitable connection, it’s time to get the right hardware.
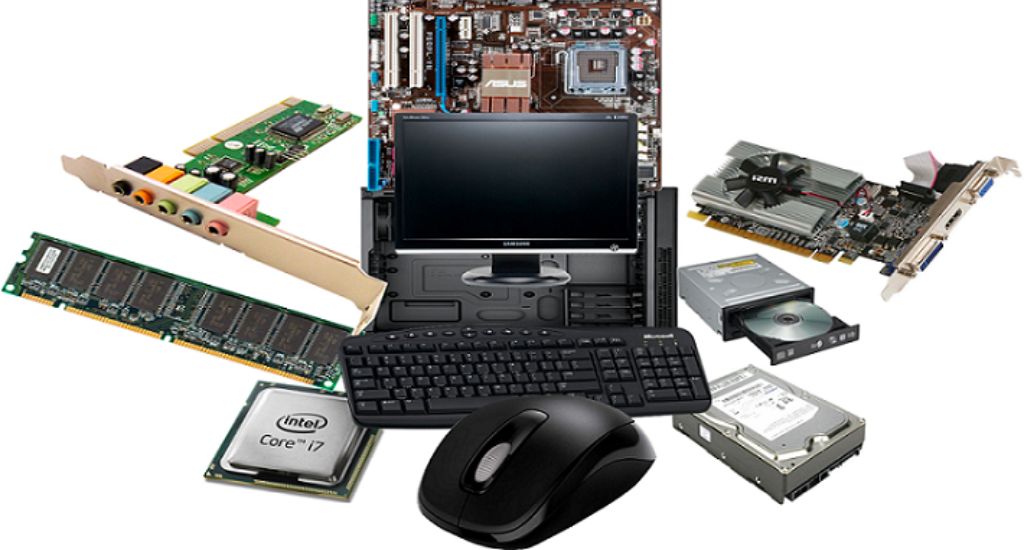
The main thing you’ll need is a dedicated PC. While you can use either an old PC or laptop, a PC works best since you need to connect additional cables (e.g., Coaxial, twisted pair cables, optical fiber) and switches (either a 5 or 8-port Gigabit switch) to it.
The computer you’re using needs to have enough storage space to house a 60 GB hard drive with at least 25 GB of free space, a dual-core processor of at least 2 GHz and 2 GB RAM, a USB port and a DVD drive.
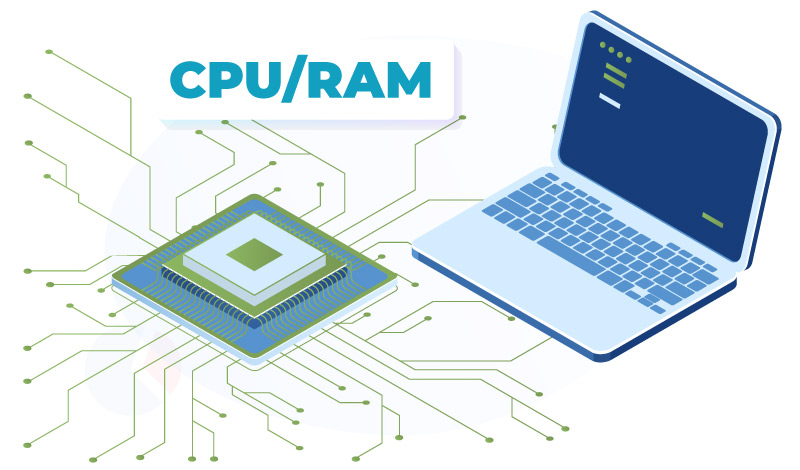
This is why a newer, faster computer works best since it performs better and has more processing power. This doesn’t mean that an older PC won’t work.
To determine what type of PC you need, you should ask yourself:
- How many users will you have?
- Do you need a lot of storage space?
- Will you need a lot of processing power?
You should also consider buying a rack (a supporting framework that holds your computer) so you can keep everything organized.
Choose Your Operating System (OS) And Install It
This is a critical step in the process of setting up a server at home.
One of the major differences is whether you want to pay for a Windows license or save money by using Linux which is a free, open-source program. Linux servers are also much more customizable. Let’s take a moment to compare the two.
Linux
According to ZDNet, 96.3% of the top one million servers are using Linux. [1] This is because it’s free and easy to use and customize. Linux servers are also more secure with far fewer malware opportunities for hackers to exploit.
![]()
However, they aren’t invincible. You still need to keep your software updated and everything properly configured.
There are also some programs that Linux won’t work with but the majority of Windows programs will run on it through a program called WineHQ.
Windows
To create a server at home using Windows, you’ll need to purchase a license. This guarantees you’ll receive long-term support for any issues you encounter.
You can also conveniently fix any technical issues through a system recovery. Other benefits include automatic system updates, support of numerous apps, and the fact that it’s beginner-friendly.
![]()
However, it has its disadvantages like being more expensive and more vulnerable to malware.
Most people will opt for Windows server operating systems at home. This is because Windows is a system that most people are familiar with. Therefore most of what’s discussed in this article will be for Windows servers.
The one exception is where we discussed the difference between Windows and Linux servers. The remainder of this article will tell you how to set up a Windows home server.
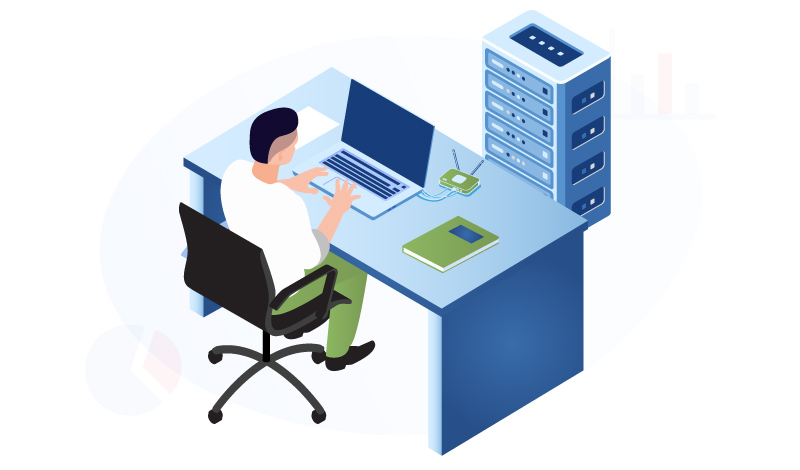
Set Up And Configure Your Server At Home
Once you have the right hardware and connection and choose your operating system, it’s time to set up your software.
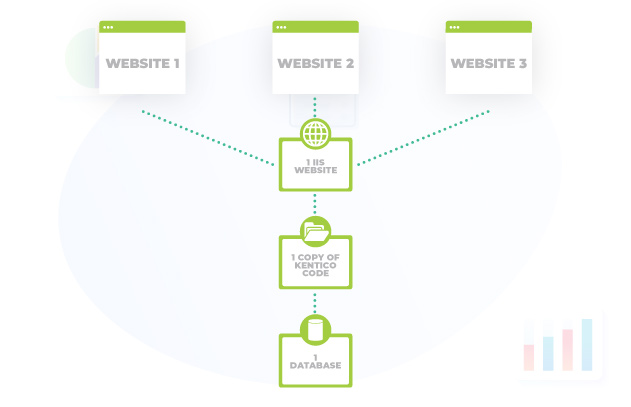
How this is done depends on what operating system you’re using, whether an open source operating system or a proprietary one. With Windows, you’ll want to install Internet Information Services (IIS), a web server add-on.
With Linus, you’ll want to install either Apache, Lighttpd, or NGINX. Apache is the most well-known. You can also install Apache on a Windows web server.
If you are still unsure about which one to use, check out our guide on Nginx vs Apache.
The installation process for these programs requires you to open up the ports on your home router and your firewall.
This allows traffic to travel back and forth on your own web server. The two most essential ports for web traffic are ports 80 and 443 so make sure they aren’t blocked.
Once you’ve set up your web server and configured it for web traffic take a moment to ensure it works simply by visiting it through a web server. If you encounter a test page you’ll know that it’s time to install your own website’s files.
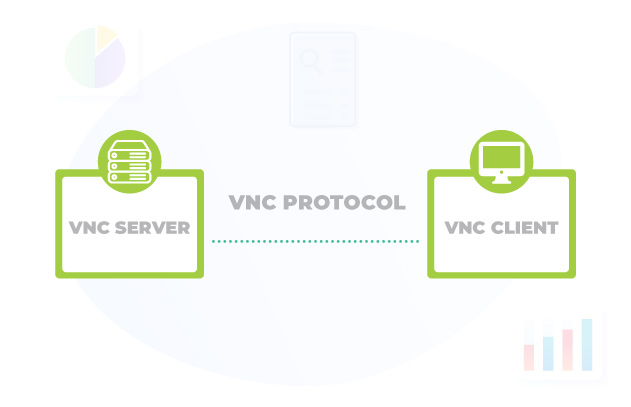
Set Up Virtual Network Computing (VNC)
A VNC allows you to have remote access to another computer. With VNC access you can operate the computer you’re setting up your new server on.
All the resources (e.g., printers, drives) will be accessible to you just like it would if you were sitting at the computer.
So, whether you want remote access to a computer or provide remote tech support, you’ll need to set up VNC.
Setting up your VNC isn’t difficult. You’ll need to know either the computer’s IP address or its fully qualified free domain name and password.
Once you have this information here are the steps you must take for setting this up on a Windows system:
- Go to RealVNC and sign up for a free “home subscription” account.
 Go to
Go to - Download and install RealVNC on the remote computer. Make sure to keep the default options.
 Download and install RealVNC on the remote computer. Make sure to keep the default options.
- Sign in to the VNC app and create a password for it. You can use the vncpasswd command to change your password at any time.
 Sign in to the VNC app and create a password for it. You can use the vncpasswd command to change your password at any time.
- Set up your router’s settings for port forwarding (a.k.a., translation).
 Set up your router’s settings for port forwarding (a.k.a., translation).
- Map your dynamic IP to a hostname so that when your internet service provider (ISP) changes your IP address (which they frequently do) your server won’t crash. You can get a free Dynamic DNS from Dynu.
 Map your dynamic IP to a hostname so that when your internet service provider (ISP) changes your IP address (which they frequently do) your server won’t crash. You can get a free Dynamic DNS from
 - Download client software onto the computer where you have your Windows license to ensure that your hostname remains mapped.
 Download client software onto the computer where you have your Windows license to ensure that your hostname remains mapped.
- Download and install VNC Viewer on your local computer. If you’re using Mac OS or have the Safari browser you can skip this step.
 Download and install VNC Viewer on your local computer. If you’re using Mac OS or have the Safari browser you can skip this step.
- Use your VNC viewer to access your remote computer.
 Use your VNC viewer to access your remote computer.
Although this may sound challenging, it’s actually quite easy to do. You’re simply installing a server package then configuring your own home server so you can start using it.
Install File Transfer Protocol (FTP)
FTP is a standard communication protocol. What this means is that it’s how you’ll transfer files from your dedicated hosting to your visitors.
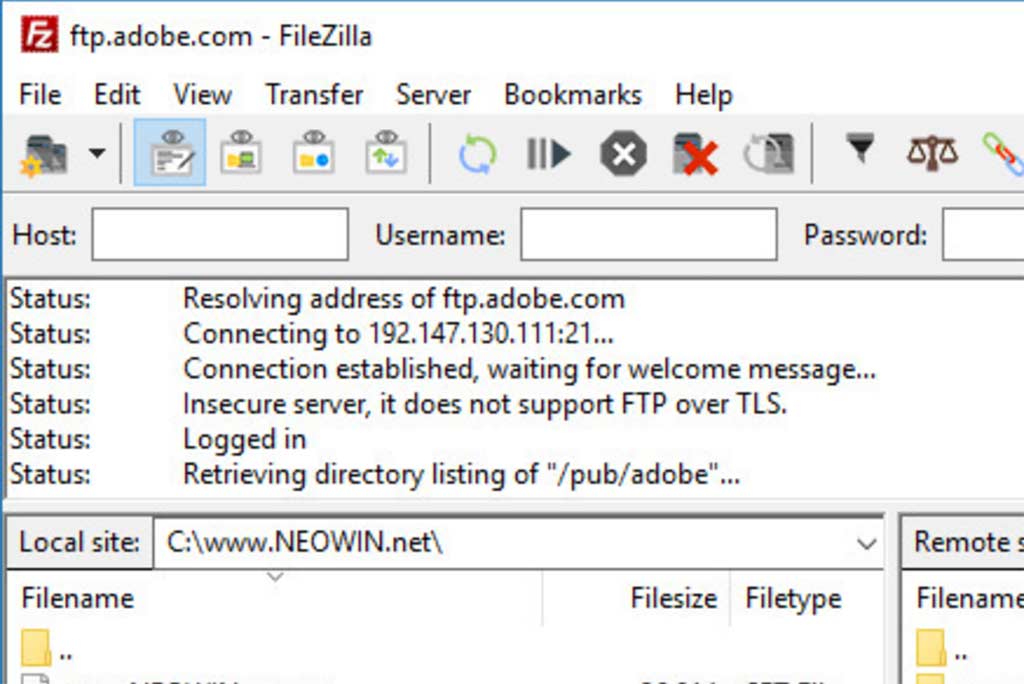
Installing FTP on your own server is important. Not only do you need to install FTP but you also need to activate FTP server. Doing so creates a private cloud that you control. Once created your website files will be transferred quickly.
There are a few types of FTP you can use for your website files. These include:
- FTP is the basic, encrypted form that most web browsers accept
- FTPS is SSL/TLS encrypted that’s widely used but not accepted by a lot of the major web browsers.
- FTPES is the upgraded version of TLS/SSL encryption. Although it’s more firewall friendly it isn’t supported by most major browsers it’s still preferable.
Setting up a home server with an FTP isn’t difficult. In fact, the installation process is fairly simple. You need to:
- Open your control panel and click on system and security.
- Click on administrative tools.
- Double-click the internet information service (IIS) manager shortcut.
- Go to the connections panel and right-click on sites.
- Select the add FTP site.
- Find where it says FTP site name and assign your server a short name.
- Go to your control directory and find where it says physical path.
- Click on the folder where you want to store your FTP files.
Now that FTP is installed you’ll want to configure it for your users. Before you get started, consider how many users you want to allow to have access to your FTP server.

When you create your server you may want to configure FTP users so multiple people have access. To do this you’ll need to:
- Go to the sites section.
- Double-click the authorization rules option.
- Click add allow rule.
- Select either all users or specified users. This will allow you to specify how many users can access your FTP server.
After all of this, you’ll still need to configure and activate your FTP server to fit your specific needs.
For instance, you may want to take additional steps to ensure server security. Once you’ve done this you can start using it. [2]
Install HTTP
Once you have your hardware and FTP server in place, it’s time to set up the web hosting software for your own server at home. In order to have fully operational software, you need to install the correct LAMP software stack.
This means that you need to install Apache, MySQL, and PHP so that you can set up HTTP. When your LAMP software stack is set up your server can communicate with the databases and your site’s data that are stored on your web hosting.
After installing Apache, MySQL, and PHP you’ll have an HTTP (Hypertext Transfer Protocol) server which is a powerful tool for production usage. It’s also simple enough to use for local development, learning, and testing.
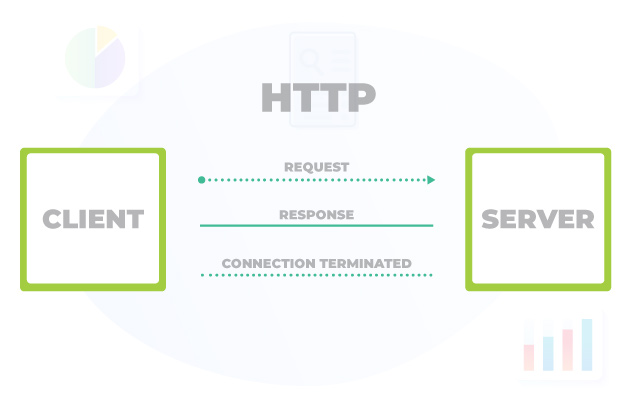
There are four versions of HTTP (HTTP/0.9, HTTP/1.0, HTTP/1.1, HTTP/2.0). You’ll want to choose the one that’s the most suitable with the other hardware and software you’ve installed on your home web server and find the installation package for it.
When you get the HTTP package the installation is simple. It’s similar to installing any other program or app on your computer. Simply follow the instructions on your screen and you’ll quickly install the HTTP support.
Set Up DNS Entries
The Domain Name System (DNS) is a directory service that provides mapping from a network’s host to its numerical address. Before you can start using the Domain Name System on your own server you must install and configure it.
Preliminary Requirements For DNS Configuration
Before you configure your DNS there’s some basic information you’ll need. This information isn’t necessary if you’re setting up a server for internal use only.
Otherwise, here’s what you’ll need:
- Your domain name
- The hostname and IP address of each server (including WWW servers, mail servers, FTP servers, public access servers, et.) that you want name resolution for
You’ll also need to verify that the following conditions are true:
- Your operating system is properly configured because the DNS service for Windows relies on the correct configuration of the operating system and its service (e.g., TCP/IP)
- Make sure you have allocated the proper disk space
- Ensure that all of your disk volumes use the NTFS file system
Configuring Your DNS Zone
To create a DNS zone you need to:
- Go into Server Manager and click IPAM.
- The IPAM client console will appear and you’ll want to go to Monitor and Manage (in the navigation panel).
- Click DNS and DHCP Servers.
- Click Server Type.
- Click DNS. This will bring up a list of all the DNS servers that are managed by IPAM.
- Find and right-click on the server where you want to add a zone.
- Click Create DNS zone to open the dialog box.
- Go to General Properties then select a zone category and a zone type.
- Enter a name in the zone name.
 Enter a name in the zone name.
- Go into Advanced Properties and select the appropriate values for your deployment.
 Go into Advanced Properties and select the appropriate values for your deployment.
- Click OK.
 Click OK.
Install DNS
Once you create DNS zones you’re ready to install DNS on your server at home. To do this:
- Find and open the Windows Components Wizard (Click Start then Control Panel)
- Click on Add or Remove Programs.
- Click on Add or Remove Windows Components.
- Select the Networking Services check box.
- Click Details.
- Go into the Subcomponents of Networking Services and select the Domain Name System (DNS).
- If prompted, in Copy files from, type the full path of the distribution files.
Once you’ve completed this process DNS will begin installing.
Configure DNS
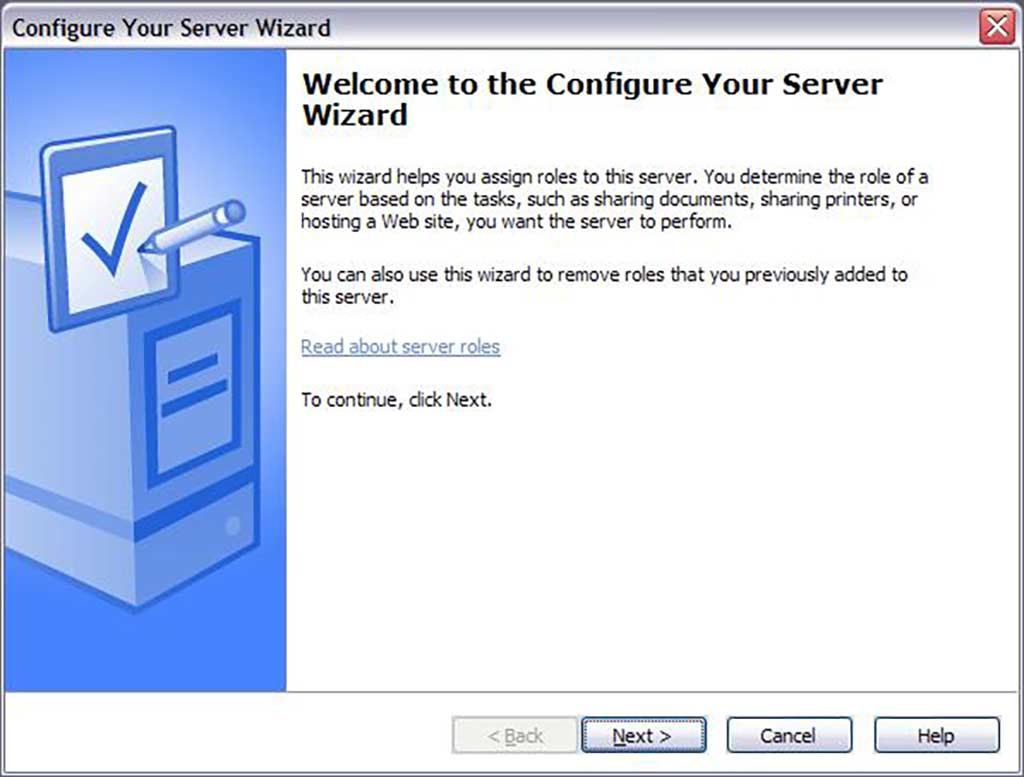
There are 5 things you must do to configure your DNS server:
- Open the Configure Your Server Wizard software.
- Click DNS server.
- View and confirm the options you selected on the Summary of Selections page.
- Make sure you see two options: Install DNS and Run the Configure a DNS Wizard to configure DNS. If so, click next. If not, click back to return to the server role page, click DNS, then click next.
After your DNS service is installed it’ll determine whether you have a static IP address or if it’s been configured automatically.
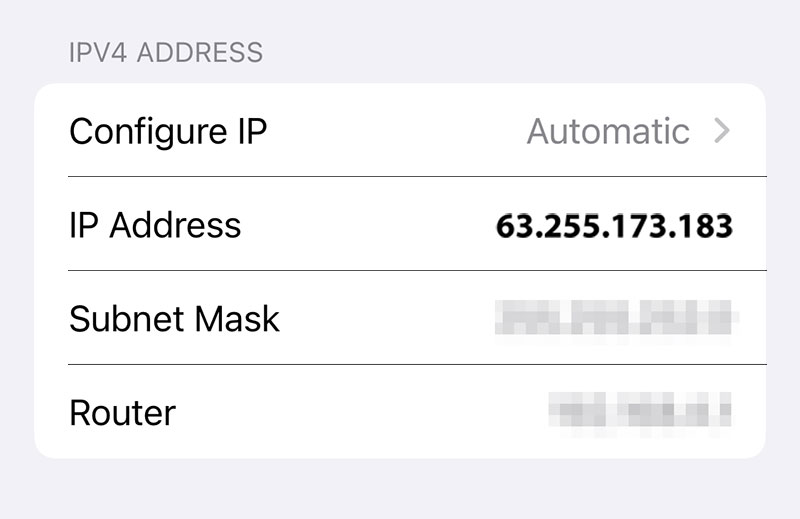
For servers that automatically obtain the IP address, the Windows Components Wizard will prompt you to configure a IP address. This means you’ll need to:
- Go to the Local Area Connection Properties dialog box
- Click Internet Protocol (TCP/IP)
- Click Properties
- Click Use the following IP address
- Enter the information for the server’s IP address, subnet mask, and default gateway
- Go to preferred DNS field and enter the server’s IP address
- Go to the Alternate DNS field and enter another internal DNS server’s IP address or leave this field blank
- Click OK and close out of the software
After you’ve closed the Windows Components Wizard your Configure a DNS Server Wizard will start. You’ll want to follow these steps here:
- Go to the Select Configuration Action page
- Select the Create a forward lookup zone check box
- Click Next
- Specify that your DNS host has a zone that contains DNS resource records for your network resources
- Go to the Primary Server Location page
- Click This server maintains the zone
- Click Next
- Go to the Zone Name page
- Specify your network name of the DNS zone in Zone name (This should be the same name as your DNS name.)
- Click Next
- Go to the Dynamic Update page
- Click allow both nonsecure and secure dynamic updates
 Click allow both nonsecure and secure dynamic updates
- Click Next. (This ensures that your network’s DNS resource records update automatically.)
 Click Next. (This ensures that your network’s DNS resource records update automatically.)
- Go to the Forwarders page
 Go to the Forwarders page
- Click Yes (This should forward any queries to your DNS servers that have your IP addresses)
 Click Yes (This should forward any queries to your DNS servers that have your IP addresses)
- Click Next. When you select this configuration, you forward all DNS queries for DNS names outside your network to a DNS at either your ISP or central office.
 Click Next. When you select this configuration, you forward all DNS queries for DNS names outside your network to a DNS at either your ISP or central office.
- Type one or more IP addresses that either your ISP or central office DNS servers use.
 Type one or more IP addresses that either your ISP or central office DNS servers use.
- Go to the Completing the Configure a DNS Wizard page of the Configure a DNS Wizard.
 Go to the Completing the Configure a DNS Wizard page of the Configure a DNS Wizard.
- Click Finish to apply your selected settings.
 Click Finish to apply your selected settings.
When you’ve completed the Configure a DNS Wizard, the Configure Your Server Wizard will display a message telling you that “This Server is Now a DNS Server page.”
If you need to review the changes you’ve made to your database server or ensure that you’ve installed a new role successfully, simply click on the Configure Your Server log.
Configure Your Server log. Once you’re done, you’ll want to close the Configure Your Server Wizard. For this you need to just click Finish.
Set Up A DNS Forward Lookup Zone
A Forward Lookup Zone is the specific zone that resolves a domain name with an IP address. At this point, if you’ve followed the configuration instructions above, you should already have your lookup zone set up.
However, if you still need to set up your forward lookup zone, here’s what you need to do:
- Navigate to your start menu, then administrative tools to open your DNS
- Right-click on Forward Lookup Zones
- Click New Zone then next
- Select what type of zone you want to create:
-
- Primary: This is the original zone and the primary information source for that zone.
- Secondary: This is a read-only copy of the primary zone which can only retrieve updates from it.
- Active Directory-integrated: This is a primary DNS zone that’s stored in Active Directory so it can use both multi-master replication and Active Directory security features.
- Stub: This is a copy of a DNS zone that only contains resource records identifying that zone’s DNS servers.
- Reverse lookup: This DNS zone primarily resolves IP addresses to network resource names.
 Primary: This is the original zone and the primary information source for that zone.
- Choose what method you want to use to replicate zone data throughout the network (This depends on the type of zone you’re creating.)
- Enter the name of the zone.
- Decide what type of updates you want to allow.
- Click next.
- Click finish.
Changing The DNS Server For Network Interfaces
There are a few reasons why you may want to change the DNS server for different network interfaces.
These reasons include things like making your dedicated hosting run faster, making it more reliable, or to better protect it.
If you want to change the DNS server for your network interfaces you’ll need to:
- Go to Network Connections
- Right-click the local area connection
- Click Properties
- Go to Local Area Connection Properties
- Select Internet Protocol (TCP/IP)
- Click Properties
- Click Use the following DNS server addresses
- Enter the IP addresses into the Preferred DNS server and Alternate DNS server
If you want to add more DNS servers, you can click on the Advanced button to do so.
Flush The DNS Resolver Cache
DNS resolver cache is the temporary database server that a server creates to store data of your recent DNS lookups. This cache helps make the lookup process faster for returning IP addresses.
To see what entries are currently being stored there type in the following command: ipconfig /displaydns
If a virus were to hijack your server’s DNS cache it could result in “cache poisoning.” This is when they use your DNS to re-route requests. It’s the primary reason why you may want to flush the DNS cache.
You’ll know this was completed successfully when you receive a message stating that “Windows IP configuration successfully flushed the DNS Resolver Cache.”
Create A DNS Entry For The Web Servers
One of the most important things you need to remember about running your own website is that you always want it to be accessible to your users.
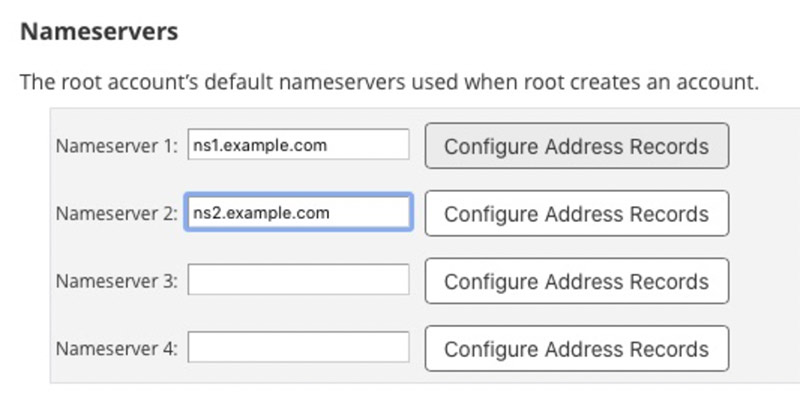
For this you’ll want to create a Canonical Name (CNAME) for the DNS server where then Internet Information Services (IIS).
This is an important step because it ensures that you can connect to your external web hosting computers to your web server through your “www” host name. To create this new DNS entry you’ll need to:
- Open the DNS snap-in: Start > Administrative Tools > DNS
- Expand “Host name” (the “Host name” is the DNS server’s web hosting name)
- Expand the Forward Lookup Zones
- Right-click the zone you want
- Click New Alias (CNAME)
- Type “www” in the Alias name box
- Type the fully qualified web hosting name of the DNS server on which IIS is installed in the target host box
- Click OK to finalize your changes
Get A Domain Name And Make Sure It Works
Once you configure your home server so that internet users can reach it, you’ll need to set up a domain name.
While people can navigate to your server via the external IP address, having a domain name makes this easier for them. This will give you a name that people can easily remember rather than a series of numbers that are too complicated to recall.
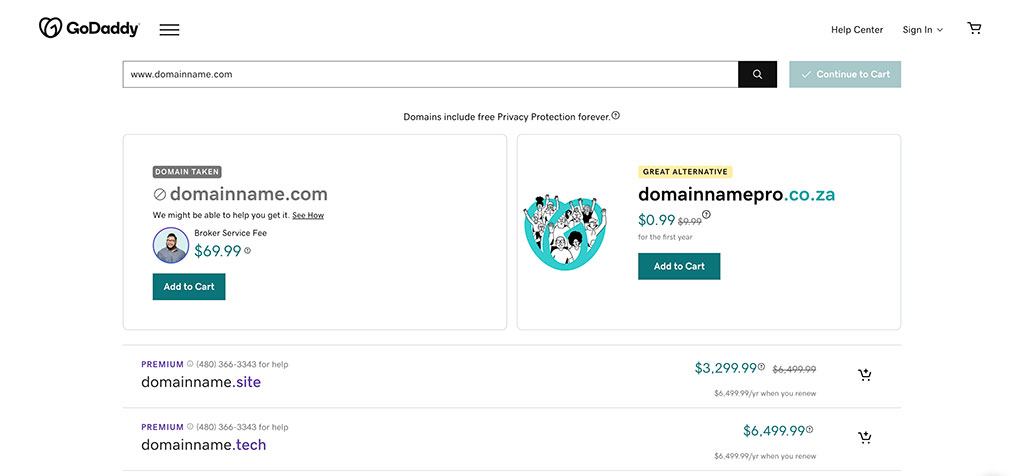
Upon deciding on your server’s name, go to a domain name registrar to check if it’s available. When you find an available name you must register it so it’s officially yours.
If you don’t want to pay for this, you can go to a service like No-IP and register a free subdomain.
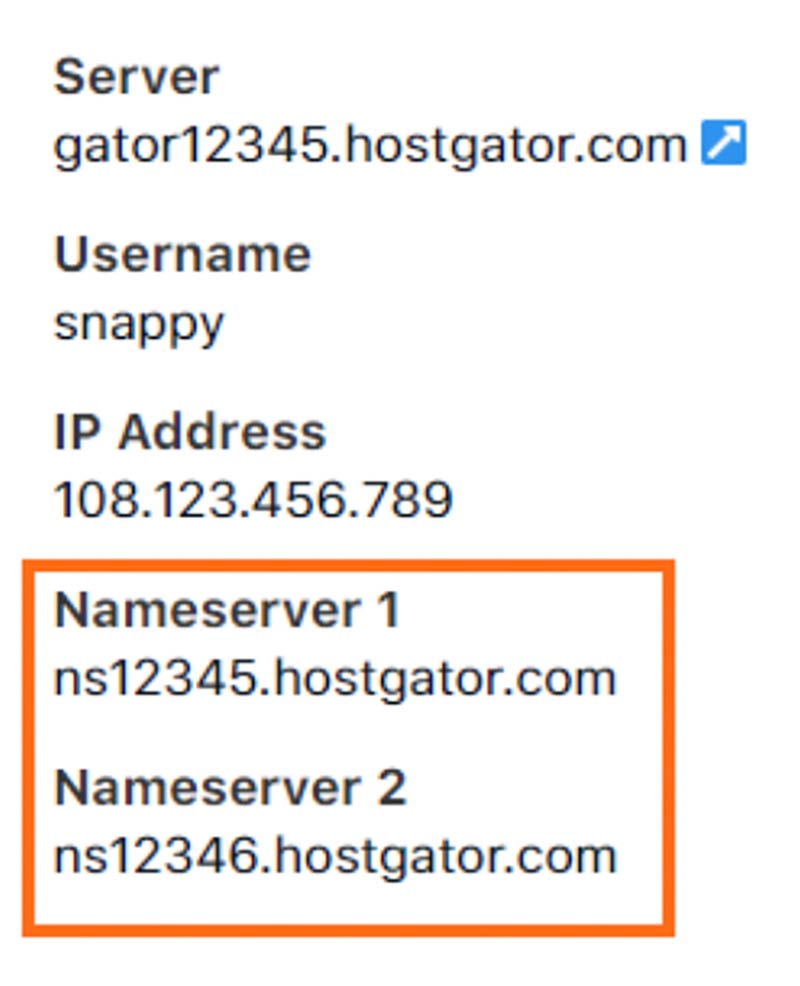
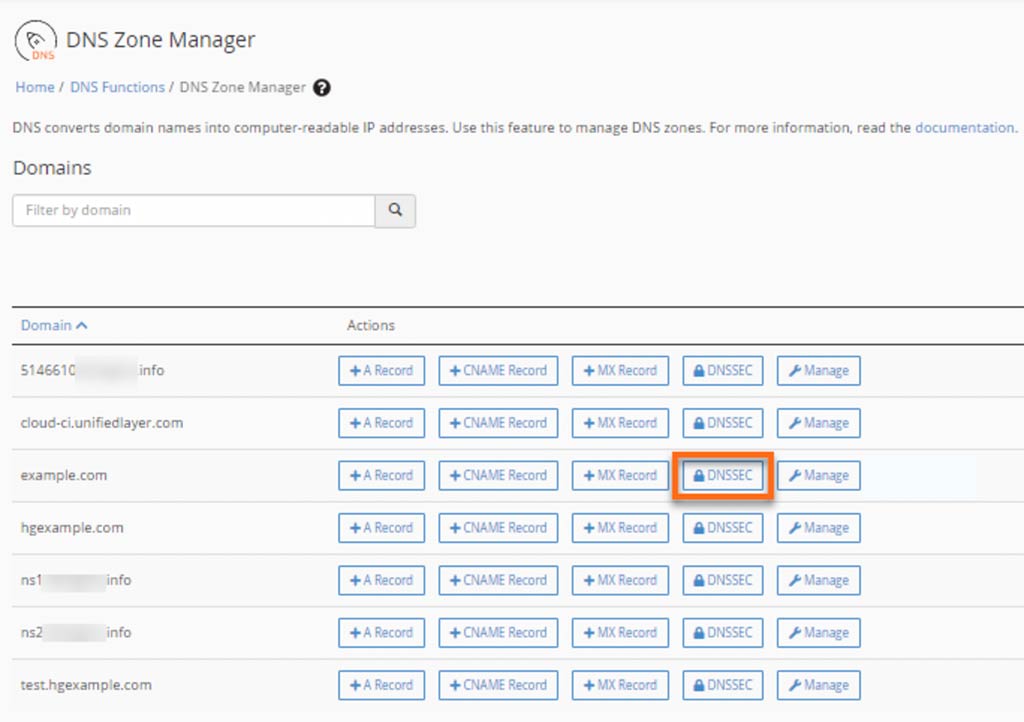
Now that you have a domain (or subdomain) it’s time to set up your domain’s relevant DNS entries so that it points to your server’s IP address.
To do this you’ll need to create an A record (the domain’s address record which is part of the DNS system, mapping the domain name to the IP address).
Your domain’s name server stores this record for you once you set it up. To do this you’ll need to:
- Log into your control panel
- Click on the DNS settings
- Go to your DNS records
- Click A
- Leave the hostname empty unless you’re entering a subdomain
- Enter the IP address
- Leave TTL empty
- Click create record and save your settings
Your server will be ready in a few hours.
Test The Server
The only thing left to do with your own server at home is to test it.
You’ll see a page that asks for your FTP username and password.
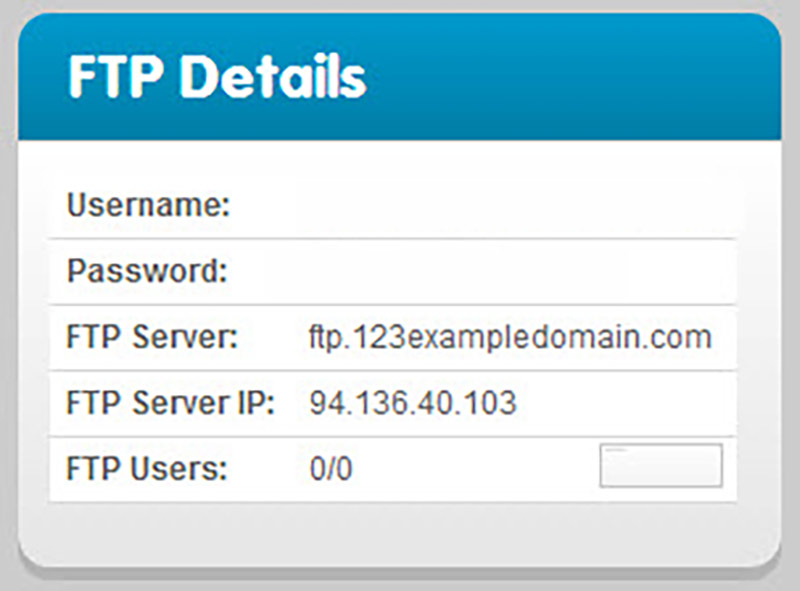
When neither of these work it means your server isn’t working and you’ll need to start over. Make sure you also test FTP.
FAQ
Is There Any Way To Create Your Own Server?
You can create your own server at home. But, before getting started, you’ll want to make sure that it’s worthwhile to do so. While the process isn’t complicated, it does take some time.
Do You Need a Server for Web Hosting?
You need a server for web hosting because your website or application is made of files and images, which must be stored somewhere.
What Are Some Of The Drawbacks To Me Setting Up My Own Web Hosting?
Some of the drawbacks to setting up your own server include higher electricity bills, slow websites, IP addresses that continually change, slow websites, and the need to maintain the hardware and software that are being used.

Is Self-hosting A Website Common?
Self-hosting a website is not common. Using hosting providers is more common than running your own dedicated server. Even the larger websites don’t maintain their own servers.
Will I Be Able To Self-host A WordPress Site?
You will be able to self-host a WordPress site. Most WAMP (Windows, Apache, MySQL, and PHP) software will allow you to install content management systems (CMS).
Ready To Set Up Your Home Web Server?
Once you set up your own home web server, you’ll be in control. It’s great to know that the data is in your hands instead of in the hands of some company.
However, DIY hosting isn’t right for everyone.
Before you decide what type of web servers you want to use, take some time to read more about this topic.
References
- https://www.zdnet.com/home-and-office/networking/can-the-internet-exist-without-linux/
- https://www.helpsystems.com/blog/10-essential-tips-securing-ftp-and-sftp-servers