Working With readlink Command in Linux
The syntax for using the readlink command is the following:
For this example, we will create symbolic links for text files and a directory and attempt to get their actual path using readlink.
To create our files and symbolic links, here are the following commands:
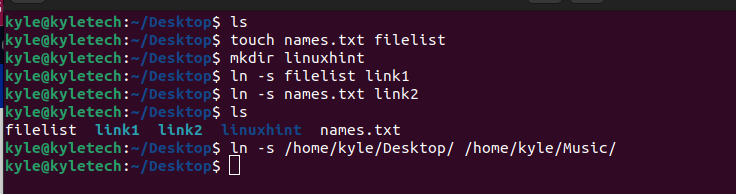
Note that the symbolic link for the directory gets created in the /Music directory.
Let’s move the links to a different directory and use readlink to print the path to the files they represent. We will move them in the /Music directory.

All our symbolic links are now in a different directory from their actual files and directory.
If you have symbolic links, skip the previous commands.
To view the actual path for our directory, run the following readlink command; our directory is /Desktop:
We get the actual path as shown in the output below:

readlink Options
1. -f: the option allows the readlink to canonicalize following each symbolic link in the name passed as an argument, and all components must exist, except the last one.

2. -e: it works similar to the -f, but for this case, all the components must exist for readlink to canonicalize the symbolic link.
Let’s note the difference when we used the -e option with the same file link we used with -f.
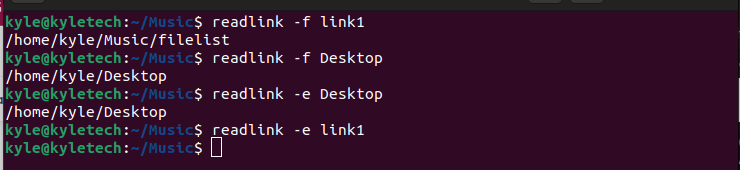
Note that no path gets printed as not all components exist in the name. Similarly, if we try to get the path of a file by specifying an option, no output gets printed. Instead, it prints the file’s name represented by the symbolic link.

3. -m: unlike the -e and -f, this option canonicalize recursively following each symbolic link in each component of the provided name.

4. -n: to pint the output without adding a new line, use the -n flag.

You can achieve the same using the -z option, which ends each output with NUL instead of a new line.

5. -q: you can suppress error messages by quietly printing the output using -q.

All commands get executed in quiet mode. Even if they contain an error, the error won’t get printed. The same is true if you use the -s option, which suppresses all error messages.

6. -v: in contrast, you can display all error messages by adding the -v flag.

Adding the verbose command ensures all details and error messages get printed.
7. –version: to check the version of the readlink command, use the –version option.

For this case, the version shown is 8.32, which is the latest version when writing this article.
8. –help: it prints the help page for readlink.
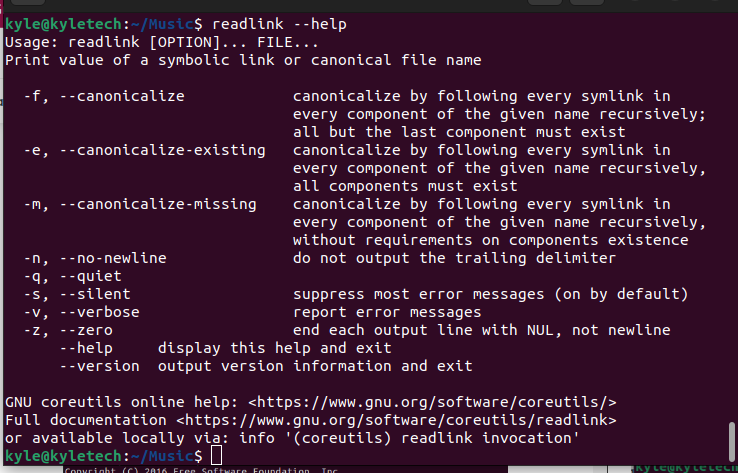
When stuck with any command using readlink, quickly open the help page for more details about each option.
Conclusion
We’ve seen how to use the readlink command to get the actual path of symbolic links. This article gave a hands-on guide from creating symbolic links for files and directories to using the readlink command to get the path for the created symbolic links. Also, we’ve discussed the various options to use with readlink. Hopefully, you now have a firm understanding of working with the readlink command in Linux.