


How to Cut a Video in DaVinci Resolve (and Delete)
Learn how to cut your videos like a pro in DaVinci Resolve with this beginner's guide to the various methods to use when editing and deleting video clips.
DaVinci Resolve | Software | By Jeff Collier
Shotkit may earn a commission on affiliate links. Learn more.
Learning how to cut in Davinci Resolve is the most fundamental process needed to edit together professional-looking videos.
I’ve been using DaVinci Resolve to edit home movies for some time, and there are several methods for cutting that I use to speed up my workflow.
In this brief tutorial, I’ll run through a few quick and easy ways you can cut in Davinci Resolve when putting together your video content.
How to Cut in Davinci Resolve – The Key Methods
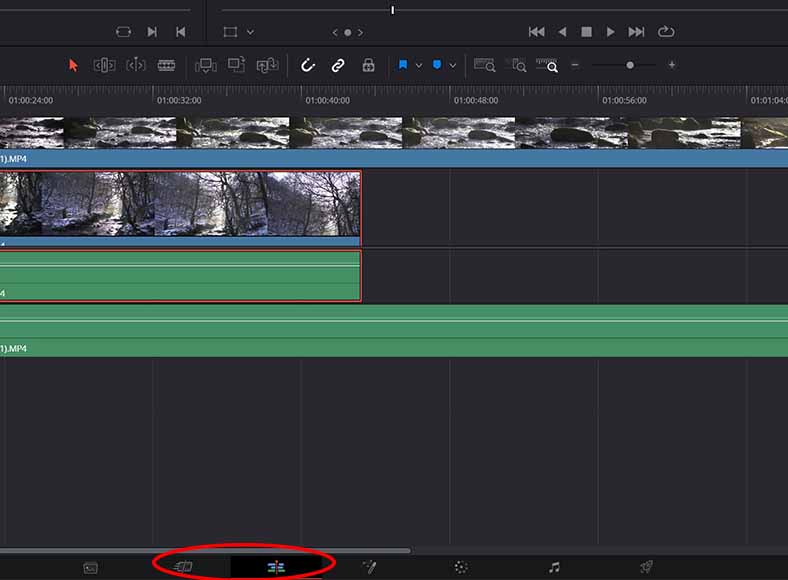
Cut and Edit Modes can be accessed via the mode icons at the bottom of the screen
Cutting is one of the most commonly-performed actions when editing videos, and Davinci Resolve provides multiple methods you can use to accomplish this.
Cut Mode and Edit Mode both allow users to add cuts to their clips and trim these down to a precise length.
Let’s begin with how to perform basic cuts when viewing your project’s clips in the software’s Cut Mode.
Basic cuts in Cut Mode
Adding cuts in Cut Mode using the Blade Tool keyboard shortcut is simple
There are two main modes in Davinci Resolve where users can cut and trim the clips in their project, beginning with the Cut Mode.
Cut Mode allows for fine-tuning of the start and end frames of a given clip as well as adding basic cuts using the appropriate keyboard shortcut.
Performing this cut is simple:
- Load your clips into your project library
- Head to Cut Mode and drag your desired clip into the timeline so it displays in the preview window.
- Using the red play head marker, find the point in the clip you wish to cut and press CTRL + B to apply the Blade Tool
You can add multiple cuts on a given clip, as well as add multiple clips to cut independently or together based on the clips selected in the timeline.
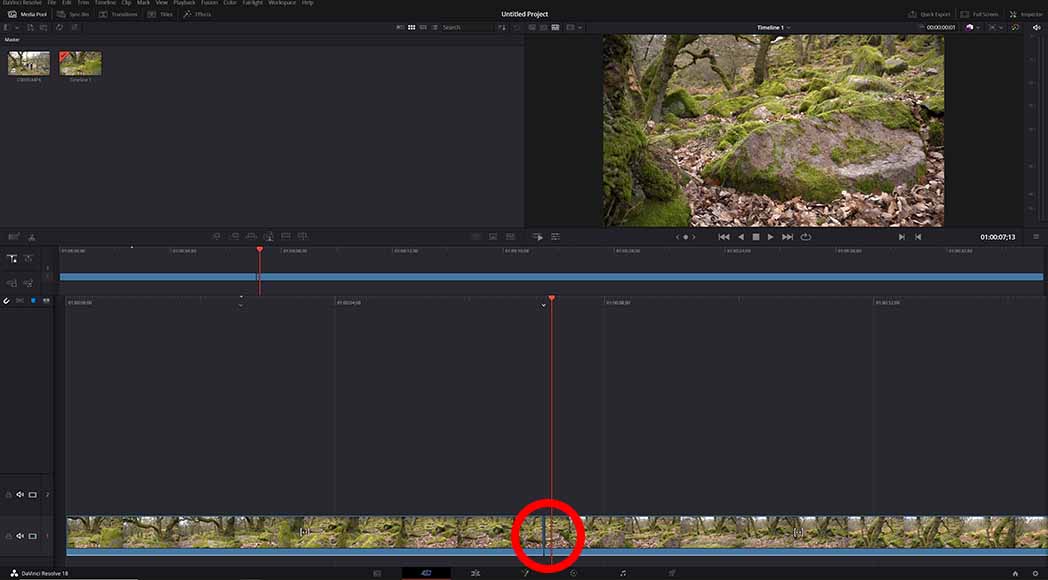
Changing start and end frames in Cut Mode’s Timeline preview

Cut Mode allows you to alter the start and end frames of your clips
Once you’ve made the basic cuts to your clips, you can then use the timeline preview window to fine-tune the start and end frames of each clip.
To make these adjustments:
- Click on the clip timeline at the point where the cut has been made to bring up the frame adjustments in the timeline video preview.
- In the timeline preview, click and drag the white markers between each clip left or right to add or remove additional frames.
It’s a quick and easy method for making more precise adjustments to one or more clips in your movie project.
Selecting in and out points in Edit Mode
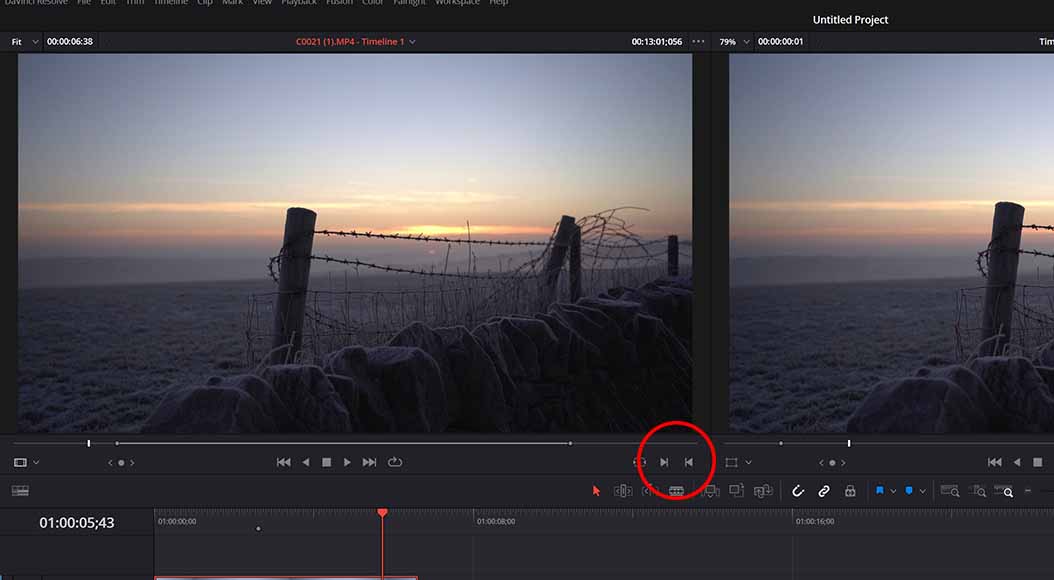
You can cut and trim clips in Edit Mode by setting Mark In and Mark Out points in the preview window
Davinci Resolve also allows for a selection of cutting methods when viewing a project in Edit Mode.
The first method involves setting in and out points of a selected clip in the Edit Mode’s preview window.
To cut and trim a selected clip using this method:
- Highlight the clip you want to cut in the timeline so it appears in the left-hand preview window.
- Play the clip in the preview window and find the desired start point where you want to cut the clip.
- Set the in-point using the Mark In button.
- Continue playing the clip until you reach the point where you want it to end.
- Set the out-point using the Mark Out button.
Your clip will now be edited down to the desired length. If you want to fine-tune the in- and out-point, you can use the left and right arrow keys to make frame-by-frame adjustments.
As you shorten or lengthen a given clip using this method, it will automatically update according to your changes in the timeline.
Using the Blade Tool in Edit Mode
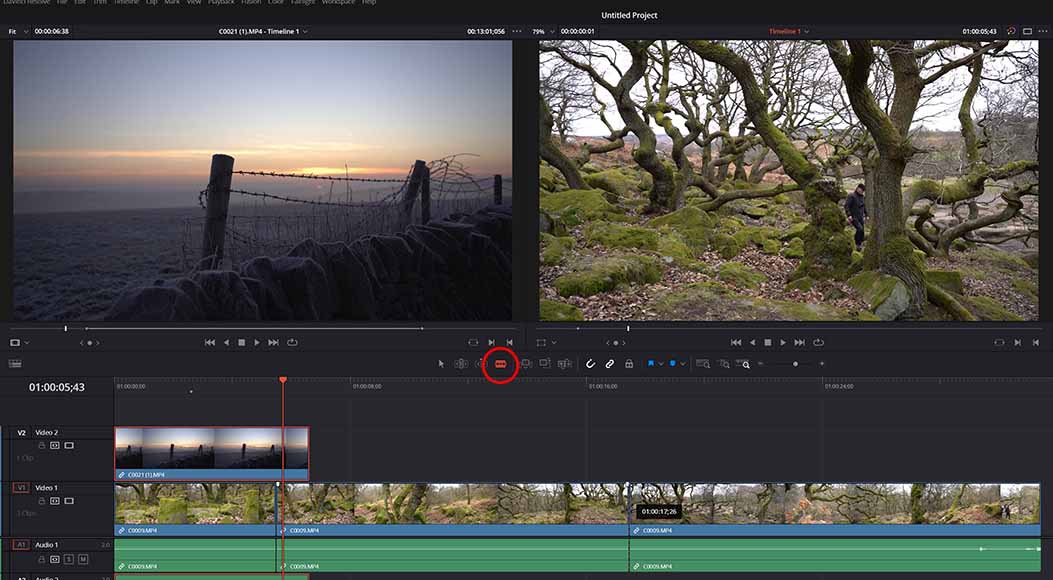
Davinci Resolve’s Blade Tool lets you cut clips directly on the timeline
The Blade Tool can be used for adding quick cuts anywhere on your project timeline with a simple click.
To use the Blade Tool:
- Select the Blade Tool from the list of tools located directly above your project’s timeline.
- Find the point in a clip where you want to apply a cut.
- Click the mouse over the desired point, and a cut will be applied.
You can also use the Blade Tool without the need to select it directly by using the keyboard shortcut CTRL + B when the red play head marker passes the desired point you require a cut.
This can be used to cut multiple clips at once or a specific clip in the timeline if you have one selected independently.
You can then delete the discarded portions of the clip and keep the footage you want to be included in your video.
How Do I Cut and Delete in Davinci?
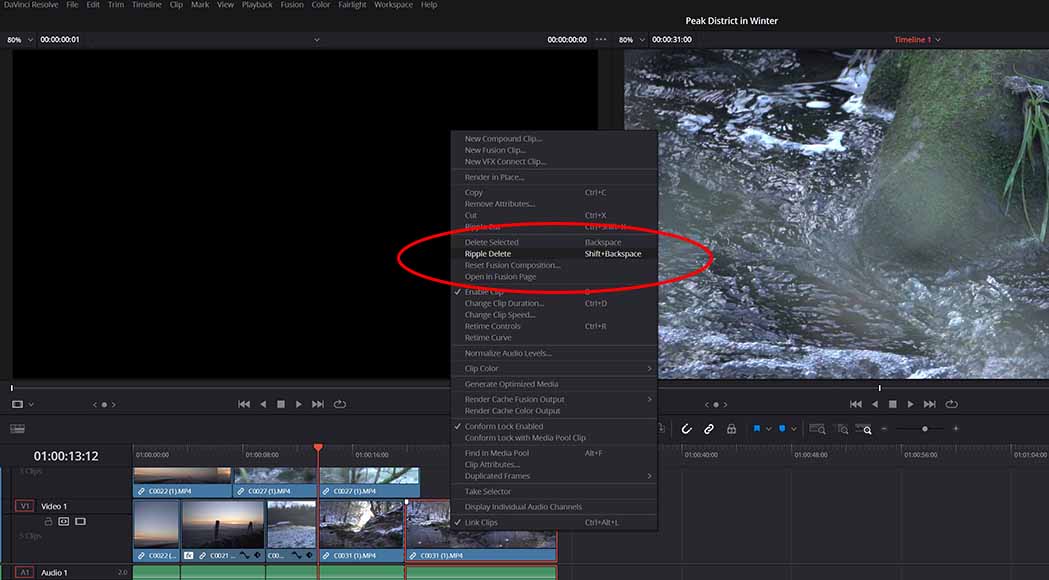
Save time removing gaps and unwanted clips with the Ripple Delete function
Once you’ve cut a clip in Davinci Resolve, sometimes you’ll be left with a gap in your timeline between the edit point and the next clip.
This gap can be removed by simply highlighting the area and pressing Delete, which will bring the next clip back in line with the previous clip.
You can also go to the Edit dropdown menu and select Delete Gaps to bulk remove all gaps in your timeline.
Lastly, Davinci Resolve includes the Ripple Delete operation, which deletes a clip or gaps while moving any clips to the right-hand side towards the left and closing any gaps.
The Ripple Delete function can be accessed by right-clicking on a clip and selecting it from the menu or using the keyboard shortcut SHIFT + Backspace.
What are the ShortCut Keys for Cutting in DaVinci Resolve?
Here are some of the shortcut keys for cutting in DaVinci Resolve:
- Cut:
Ctrl/Cmd + X - Copy:
Ctrl/Cmd + C - Paste:
Ctrl/Cmd + V - Delete:
Backspace - Trim:
T - Blade:
B - Razor:
Ctrl/Cmd + B - Pointer:
A - Insert edit:
F9 - Overwrite edit:
F10 - Replace edit:
F11 - Place on top edit:
F12


Jeff Collier is an experienced film photographer who enjoys experimenting with modern digital photography equipment, software and apps. He’s also an ex-world champion triathlete and avid cyclist, clocking hundreds of km each week in the beautiful Tweed Valley of northern NSW, Australia.
👋 WELCOME TO SHOTKIT!

🔥 Popular NOW:
