frankie's guide to building a darkroom at home
There's something pretty rad about watching your snaps come to life.
So you’ve decided to ditch high-tech digital cameras in favour of old-school film. Woohoo! There’s no need to spend your hard-earned dosh on processing your photos in a commercial lab – in fact, you can build a no-muss, (relatively) no-fuss darkroom in the comfort of your home. Whether it’s permanent or popping up for a day or two of printing, there’s something pretty rad about watching your snaps come to life. The guide below won’t describe the developing process itself – there’s plenty online to help you with that – but it will teach you how to construct a functional DIY darkroom of your own.
WHAT EXACTLY IS A DARKROOM?
There are special processes needed to take an analog photo from film to print, and since even the teeniest bit of light can stuff the whole thing up, they generally take place in a pitch-black space – aka a darkroom. Processing colour film can be rather tricky, so darkrooms are mostly reserved for black-and-white snaps. Some of the things that happen under the cover of darkness include developing film negatives, projecting them onto special photographic paper, processing the paper with a series of chemicals, and rinsing and hanging the prints up to dry.
WHERE CAN I SET MY DARKROOM UP?
Darkrooms can be set up in the tiniest of spaces, from a bathroom to a garage, laundry or large cupboard. (Apparently in the early 1900s, Frank Hurley, official photographer for the Shackleton expedition, set up a makeshift darkroom in an Antarctic hut.) There are, however, a few things the room will need – starting with the ability to become light-tight. To keep pesky light from leaking in and overexposing or ‘fogging’ your pics, a space without windows is ideal. You could always hang some blackout curtains, though, or cover the windows with dark cardboard and tape. Rugs are great for covering light leaks under doors, as well. Just turn off all the lights and let your eyes adjust to check if your light-proofing has been successful.
You’ll also need access to power for some equipment, and ventilation is super-important to protect you from chemical fumes. (This could be an exhaust fan, a vent, or if you’re only in there for short stretches, simply opening the room up whenever you can.) Running water is handy, but not essential – though most darkrooms, makeshift or not, have two distinct areas: a ‘wet’ side, where you’ll handle chemicals, water and processing materials, and a ‘dry’ side for film, paper and other equipment. If space is limited, just focus on separating wet and dry as much as possible. A partition on your work surface could do the trick, or even setting up the ‘wet’ area on the floor.
OK, SO WHAT WILL I NEED?
Once you’ve got your darkroom space ready to roll, it’s time to gather all the necessary photo-developing bits. This doesn’t have to be a very exxy process – you can often find secondhand gear online, buy cheap supplies from two-dollar stores, or borrow from photography-savvy friends.
The centrepiece of the dry side of the room is your enlarger: a projector used to shine light through a negative and transfer it onto photo paper. This will probably be the most expensive thing you invest in, but we promise it’s worth it – without a good enlarger and lens, it can be hard to produce high-quality images. (Just make sure you choose a model that matches the size and type of photo you want to create.) The dry side will also need a developing tank and reel for processing film, some photo paper, a timer to keep track of what you’re doing when, and a darkroom easel to hold the paper flat under the enlarger, improving the sharpness of your prints.
Developing photos requires a series of chemicals, which is where the wet side of your new darkroom comes in. Most photography stores will stock developer, stop bath and fixer – the hard-working solutions that bring your images to life. Simply put, the developer makes your image appear on the paper, the stop bath brings the process to a halt, and the fixer makes it permanent. (A heads-up, thrifty folks: apparently pickling vinegar is a handy stop bath replacement.)
You’ll need to (carefully) prepare your chemicals, mixing them with water and separating them for each unique step. So, it’ll help to stock your darkroom with a funnel, a measuring cup or cylinder, plus three deep, rectangular trays – dishwashing tubs will do – and three corresponding sets of tongs. (Be sure you mark everything clearly to avoid contaminating and ultimately stuffing up your prints.)
Finally, your DIY darkroom requires a tray of water to rinse your pictures and stop them from smudging. A real-deal photo studio will likely have a special drying cabinet to finish things off – but for your home setup, pegging the prints on a line to dry will suffice.
A FEW THINGS TO NOTE
Though light will wreak havoc on film and photo paper, there are ways to avoid fumbling around in the dark. You can transfer film to the developing tank inside a light-proof ‘changing bag’ – meanwhile, red or amber-coloured ‘safe lights’ will allow you to see what you’re doing without damaging the paper. Some people make their own safe lights with a bicycle light or a bulb and some coloured cellophane or plastic. Just make sure to test it out before you try to print something important.
There’s a nifty way of checking if your space is adequately light-proof: with only your safe light on, take out a piece of photographic paper and pop it on the table. Quickly place a coin on top and leave it there for 20 to 30 minutes. Then, process the paper through your chemicals as normal. If there’s no light leaking in, the paper will be pure white – otherwise, you’ll spot the outline of the coin on a slightly grey background.
Dust is another nuisance when it comes to developing film; the pesky particles can leave unsightly marks on your prints. When drying your photos or film, choose a spot that’s as dust-free as possible – the shower is a good place in the bathroom, for instance.
Manually processing film is a fickle art and science – every element, from the air to the light and space, can impact the outcome of your pics. A DIY darkroom won’t be perfect, but with a bit of care (and plenty of trial and error) it can wield top-notch results. So, don’t be deterred if at first you don’t succeed – the most important thing is that you enjoy the process.
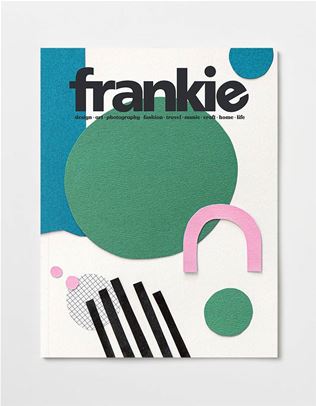
This handy dandy guide comes straight from the pages of frankie 97. Head here to find your closest stockist, pick up a copy from our online store or subscribe.
.jpg&q=80&h=682&w=863&c=1&s=1)


.jpg&q=80&w=316&c=1&s=1)