Using Backing Tracks - A Beginners Guide

Introduction
Back in the day, it used to be considered to be some sort of “cheating” for musicians to use pre-recorded backing tracks as part of their live performances. But in the modern world, the use of backing tracks is widespread and accepted as an essential part of today’s live music experience. Even bands that present themselves as having a traditional guitar-bass-drums straight ahead rock & roll sound frequently have computer systems behind or below the stage, either to supplement the live sound with extras such as synth sounds or more guitar tracks as backup in case of problems during the show. You would be amazed at how many well-known bands do this (spoiler alert - almost all of them!).
Artists using backing tracks range from solo or duo “coffee shop” performers who need a convenient rhythm section and don’t have the space for a drum kit; to electronic acts that use multi-tracked synths and plugins as part of their sound; to mega touring acts who need to reproduce the sound of their hit records which may have been recorded with dozens of musicians and hundreds of original tracks.
Your author knows of one very successful live reggae band who had their entire performance on multi-track because frequently members of the band were so stoned while they were playing that they couldn’t keep time!
Each different type and size of act will have different requirements, but there are some common features and things to bear in mind when setting out to use backing tracks for your own live performances. Let’s look at the different possibilities…
2 Tracks
The simplest form of backing track is the good old basic stereo mixdown file. Despite its limitations, it does have some advantages:
It’s easy to do - if you want to recreate the sound of your album, just open up your DAW, mute the tracks with the vocals / guitars / etc. that you intend to play live, and leave in the other stuff that you can’t play live. Instant backing track that will get you close to your recorded sound instantly.
You don’t need any special equipment to play it back on. Let’s face it, everything can play back stereo files. You don’t need an expensive interface or playback system - you can even use your phone in a pinch.
It also has several disadvantages. The most obvious of these is that it’s not very flexible - you can’t remix the sound to suit the venue. This can mean major headaches, especially in large concert halls.
For example, maybe you put a deep EQ on your original kick drum - now when you get into a large hall which already has a big reverb and a massive bass peak in the middle of the room, your kick drum is going to just vanish completely in a huge wash of undefined bass.
If your kick drum was on a channel of its own, no problem, you could EQ that stuff out. But since it’s mixed into the stereo file already, you’re stuck with it.
What you will need
If you’re going to run your backing track straight out of a computer / tablet / phone headphone socket, you’ll need a cable with a stereo ⅛” / 3.5mm minijack on one end and 2 normal sized mono jacks on the other.
This will work ok, but the sound quality coming out of that headphone jack probably won’t sound anything close to what it should be - the Digital to Analog converters are usually pretty bad. And those sockets are prone to damage and crackling, so you might have problems.
That will then have to go to a couple of DI (Direct Inject) boxes so that it can be converted to a signal that a PA system can work with. Most PA companies will already carry the DI boxes you will need, but it’s worth getting your own just in case.
We strongly recommend getting a professional audio/MIDI interface as soon as possible. You will get significantly better audio quality and it will be a lot more reliable. Even though you only need 2 outputs at the moment I strongly recommend getting one with at least 4 outputs, because you will want those extra outputs later.
As regards software, if you are just using stereo files there’s no need for a complex DAW to run your tracks, any audio player will do. However there are some great apps designed specifically for the job of playing audio stereo backing tracks - one of our favourites is Stage Traxx for the iPad, which not only allows you to easily re-order playlists for specific gigs, it also can display lyrics too.

Stage Traxx for iPad - a great app for running running stereo backing tracks with lyrics.
Things to watch out for
You probably won’t be using a proper Front-of-House sound mixer, instead you’ll probably just be hitting play at the start of the show and hoping for the best. So your biggest issue is going to be getting all your stereo files at the same basic volume and equalisation beforehand, so you don’t have to worry about levels during your show. Using a good quality Limiter can help a lot with this, but be careful not to overdo it!
This goes double for on-stage monitoring - since you are just getting a stereo feed you can’t tweak the monitor sound onstage much to get rid of unwanted bass peaks for example. If you have an interface with 4 outputs you might consider setting up Outputs 1&2 as the main mix feed to the PA, and a duplicate stereo mix doing directly from Outputs 3&4 to use as your monitor mix. That way at least you can get some limited individual control over the monitor sound.
4 Tracks
The next step up in the world of backing tracks is to move beyond stereo and start using 4 tracks of audio instead. This might not seem like much of a step but it actually can make a huge difference, in that now you have some (limited) ability to remix your tunes and tweak them to fit different shows and venues.
Your first question should be: which instrument goes on which track? To a certain extent that depends on what instruments you have in your backing tracks, but after talking to a lot of live sound engineers, the general consensus that I’ve gathered is that the best track split will probably be:
Kick drum
Bass
Stereo Mix L
Stereo Mix R
i.e. channels 3&4 should contain a stereo mix of everything except the Kick drum and the Bass.
There are several reasons we split them up like this:
Instruments with a lot of low frequency energy don’t need to be stereo. In a live venue, stereo low frequency sounds can be hugely problematic, so splitting out the low end into mono signals makes sense.
Low frequency sounds have a lot of energy, so balancing them correctly is really difficult, especially if you are mixing your original backing tracks on small home studio speakers instead of a big PA. So it’s best to get the Kick & Bass separate so their volumes can be balanced correctly over the PA system at each show.
Many venues have significant issues with bass peaks and resonance. Splitting out the Kick & Bass means your sound engineer can EQ or compress those instruments separately from the rest of the mix and get their sound dialled in the best way possible.
Of course, this is assuming that your backing tracks contain drums and bass - yours may not. The general principles remain the same, however.
Multitrack Applications
You will need a program that can play back at least 4 simultaneous tracks. Luckily there are plenty of Digital Audio Workstation programs that can do that.
The most commonly used one these days is Ableton Live running on a Mac or Windows machine, though pretty much any DAW will do for live playback purposes.
Other great bespoke alternatives include Multitracks Playback (iPad and iPhone) or Loop Community PRIME (iPad or Mac) - these two also have the advantage of being free to download!
Native Instruments Stem format
An interesting development worth looking at is Native Instruments new Stem format, which enables you to pack 4 tracks of audio into one multi-channel file. You can find out how to do that on their Stem Creator page. This is a very interesting format but unfortunately currently there isn’t much playback software out there that supports it. But if you are happy to use NI’s Traktor app to play back your backing tracks, this is a great solution.

Interface choices
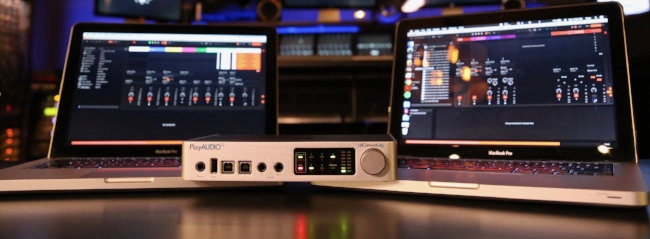
Whether you’re using two tracks or four tracks for playback, the obvious choice is the AUDIO4c. You’ll get four, phantom safe, balanced line outputs that you can safely run directly into a venue’s stage box.
You’ll also get a dedicated stereo headphone output which can be used, for example, for your drummer. You can also use the headphone output with a Y-Split cord for six tracks… but we’ll get onto that in a moment!
You’ll also appreciate that the AUDIO4c can be used with Windows and mac computers, as well as Android and iOS devices. You can even share audio routing between the two if you want to do some live processing, for example.
Also note that all of the iConnectivity audio interfaces come with a free copy of Ableton Live Lite, so if you need live playback software that will have you covered there as well.

6+ Tracks
Once you get beyond 4 tracks things get a lot more flexible. As before you will definitely want to split out the Kick and Bass tracks, but now you have room for more. Some people will want to get the Snare out on its own track, since it’s an instrument that is a very prominent part of the sound.
Beyond that, everything else starts opening up; maybe synths or backing vocals on the 6th track? Others may want to have all the keyboard/synth sounds on a dedicated stereo synth track in order to be able to balance them correctly against the drum sounds. The extra channels give you much more flexibility.
If you want to go all-in, you can go up to about 10 channels, and put every single instrument on its own track. This can be handy if you have the original multitrack recordings of your album available - just pick the tracks you need for the backing track and copy them.
If you have a good and experienced live sound engineer this will definitely give you the best sound. However on the downside, if your live sound engineer is going to be the local guy who knows nothing about your music, this could be a recipe for disaster, especially if you have complex mixes. Think carefully before deciding!
One thing to bear in mind here is that once you have this many tracks to play with you might want to lower the amount of effects you have on each of the backing tracks, especially reverb. It’s going to be easier for your sound engineer to add these in later during the live mix.
Interface choices
If you’re using up to 6 tracks, the aforementioned AUDIO4c is a great all-around interface that will work well for your shows. You’ll need to use a Y-Split cable to turn your headphone output into an additional two channels. Do also note that the headphone output isn’t balanced and doesn’t offer phantom protection.
If your budget allows for it, we’d strongly suggest considering the iConnectivity PlayAUDIO12 from this point onwards.

Although the 12 outputs on the PlayAUDIO1212 maybe seem like overkill if you are just using 6 tracks of audio, the extra outputs can be useful for headphone mixes etc.
All of the main outputs have protection against phantom power surges which is really important in a live environment.
The most important reason for choosing a PlayAUDIO12, however, is that you get redundancy i.e. you can plug in two computers to it at the same time, and if one should crash during the show, the second one can take over automatically, without you having any break in the music.
If you are running any kind of professional show, this can be a complete life saver. It does mean you need to have a second computer, but with even very powerful computers costing only a few hundred bucks these days, for professional use this makes a lot of sense.