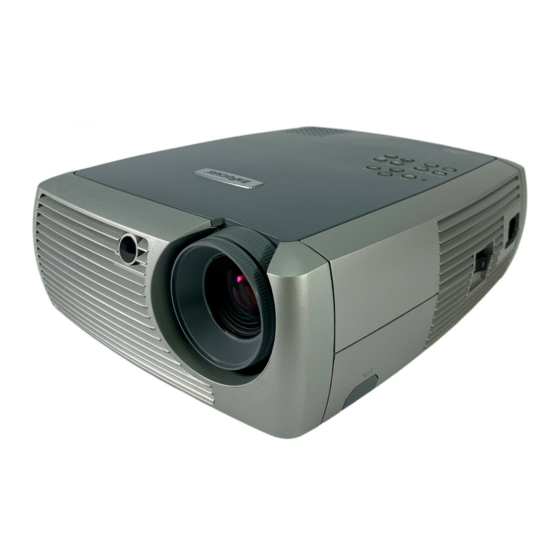
InFocus X1 Service Manual
X1
Hide thumbs
Also See for X1:
- Service manual (94 pages) ,
- User manual (50 pages) ,
- Specifications (4 pages)
Table of Contents
Advertisement
Advertisement
Table of Contents

Related Manuals for InFocus X1


Summary of Contents for InFocus X1
- Page 1 Service Guide for the...
-
Page 2: Table Of Contents
Check the Color Wheel and Reseat the Cable ..............84 Check the Thermal Switch ....................86 Check fan operation ......................87 Check Ballast/Power Supply Voltages and Signals ............88 Check I/O ECA Voltages and Signals .................90 Parts Lists........................93 Parts Exploded View ......................93 FRUs by alphabetic listing....................94 X1 Service Guide... -
Page 3: Safety Precautions
SAFETY PRECAUTIONS WARNING: TO REDUCE THE RISK OF FIRE OR ELECTRIC SHOCK, DO NOT EXPOSE THIS APPLIANCE TO RAIN OR MOISTURE. DANGEROUS HIGH VOLTAGES ARE PRESENT INSIDETHE ENCLOSURE. DO NOT OPEN THE CABINET. REFER SERVICING TO QUALIRED PERSONNEL ONLY. CAUTION: Laser beam is emitted when the laser button of the remote control is pressed. -
Page 4: Important Safety Instructions
IMPORTANT SAFETY INSTRUCTIONS CAUTION: PLEASE READ AND OBSERVE 1. Read Owner's Manual 3. Source of Light ALLWARNINGS AND After unpacking this product, read the Do not look into the lens while the lamp INSTRUCTIONS GIVEN IN THIS owner's manual carefully, and follow all is on. -
Page 5: Parts Replacement
Lamp door Retainer studs Lamp module Ballast/power Controller ECA Focus ring supply insulator Color wheel shield Optical engine Bottom EMI shield Zoom ring Elevator actuator Elevator spring Front bezel Inner grill Lamphouse 80mm fan 60mm fan Bottom case X1 Service Guide... -
Page 6: Remove And Replace The Ballast/Power Supply Eca
Rear bezel (page 49) Top case (page 52) Detach the lamp cable connector from the side of the lamphouse. Squeeze the two tabs on the side of the connector and slide it rearward through the retainer on the lamphouse. X1 Service Guide... - Page 7 Unplug the power supply/controller ECA cable from the ballast/power supply ECA Remove the M4x6 Phillips screw that fastens the ground terminal to the chassis. X1 Service Guide...
- Page 8 Remove the seven M3x12 Plastite Phillips screws that fasten the ballast/power supply ECA to the chassis. Squeeze the tabs on each of the two retainer studs that secure the ballast/power supply ECA to the chassis. Then lift the ECA away from the chassis. X1 Service Guide...
- Page 9 Connect the power supply/controller ECA cable to CN651 on the ballast/power supply ECA. ♦ Insert the lamp cable connector into the slot on the side of the lamphouse. Ensure that the slot for the connector lock faces outward. X1 Service Guide...
-
Page 10: Remove And Replace The Bottom Emi Shield
Rear bezel (page 49) Top case (page 52) Ballast/power supply ECA (page 6) Chassis (page 12) Controller ECA (page 19) Color wheel shield (page 17) Optical engine (page 24) Lift the bottom EMI shield away from the bottom case. X1 Service Guide... - Page 11 Make sure the shield isn't bent and that the fingers on the shield will contact the bottom housing on the optical engine when it's replaced. ♦ Position the bottom EMI shield between the guide tabs on the bottom case. Then press the shield into position to secure it in the bottom case. X1 Service Guide...
-
Page 12: Remove And Replace The Chassis
Remove the Chassis and Ground Spring Remove the following items: Lamp module (page 42) Focus ring (page 30) Zoom ring (page 30) Front bezel (page 32) Rear bezel (page 49) Top case (page 52) Ballast/power supply ECA (page 6) X1 Service Guide... - Page 13 Remove the four #4-40 jack screws that fasten the chassis around the 15-pin D-sub connectors on the I/O panel. X1 Service Guide...
- Page 14 Press down on the chassis to position it over the two 15-pin D-sub connectors on the I/O panel. Replace the four jack screws and torque them to 2 in-lbs (.226 Nm). ♦ Replace and tighten the seven M3x10 Plastite Phillips screws securely. Do not overtighten the screws. X1 Service Guide...
- Page 15 Turn the chassis over. Then lift the insulator away from the chassis. Assembly Notes ♦ Place the triangular hole in the ballast/power supply insulator over the mounting tab on the chassis. Then lay the insulator flat against the chassis. X1 Service Guide...
- Page 16 ♦ Insert the two retainer studs into the chassis slots. Then place the four tabs on the insulator into the corresponding slots on the chassis. X1 Service Guide...
-
Page 17: Remove And Replace The Color Wheel Shield
Zoom ring (page 30) Front bezel (page 32) Rear bezel (page 49) Top case (page 52) Remove the two M3x10 Plastite Phillips screws that fasten the color wheel shield to the top of the lamphouse and the optical engine. X1 Service Guide... - Page 18 Be careful as you replace the color wheel shield. Don't allow it to contact the color wheel. ♦ Make sure that the holes in the color wheel shield align properly with the two pins on the lamphouse. ♦ Replace and tighten the two M3x10 Plastite Phillips screws securely. Do not overtighten the screws. X1 Service Guide...
-
Page 19: Remove And Replace The Controller Eca
Rear bezel (page 49) Top case (page 52) Ballast/power supply ECA (page 6) Chassis (page 12) Unplug the safety switch cable, the two fan cables, the color wheel ribbon cable, and the photodiode cable from the controller ECA. X1 Service Guide... - Page 20 Lift the rear of the controller ECA away from the bottom case. Then gently pull the controller rearward to separate the two connectors at the DMD ECA. Lift the controller ECA away from the projector. Store the controller ECA in a static-free container while it is removed from the projector. X1 Service Guide...
- Page 21 - Photodiode cable to CN300 - Color wheel cable to CN301 - 60mm fan cable to CN704 - 80mm fan cable to CN705 ♦ Replace and tighten the three M3x10 Plastite Phillips screws securely. Do not overtighten the screws. X1 Service Guide...
-
Page 22: Remove And Replace The Elevator
Depress the elevator actuator as you pull the elevator shaft out from the bottom side of the projector. Assembly Note ♦ Make sure that the grooves on the elevator shaft face the lamphouse. Then depress the elevator actuator and replace the elevator shaft in the bottom case. X1 Service Guide... - Page 23 Gently slide the elevator actuator out of the bottom case. Slide the elevator spring off of the end of the actuator. Assembly Note ♦ Replace the elevator spring on the end of the actuator. Then replace the elevator actuator in the bottom case. X1 Service Guide...
-
Page 24: Remove And Replace The Optical Engine
Focus ring (page 6) Zoom ring (page 30) Front bezel (page 32) Rear bezel (page 49) Top case (page 52) Ballast/power supply ECA (page 6) Chassis (page 12) Controller ECA (page 19) Color wheel shield (page 17) X1 Service Guide... - Page 25 As you lift the optical engine, gently pull these cables through the retainer guide and out from beneath the lamphouse. CAUTION Avoid touching or damaging the color wheel. Lift the optical engine away from the projector. Place the engine on a soft, static-free surface or in an ESD-protected container. X1 Service Guide...
- Page 26 As you lower the optical engine into the projector, route the photodiode and color wheel ribbon cables through the retainer guide beneath the lamphouse. ♦ Replace and tighten the two M3x10 Plastite Phillips screws securely. Do not overtighten the screws. X1 Service Guide...
-
Page 27: Remove And Replace The Cooling Fans
Removing the 60mm Fan Remove the two M3x25 Plastite Phillips screws that fasten the fan to the lamphouse. Then remove the fan cables from the retainer guide on the lamphouse. Lift the fan away from the lamphouse. X1 Service Guide... - Page 28 ♦ Make sure that the cables are clear of the fan blades. Removing the 80mm Fan Remove the two M3x30 Plastite Phillips screws that fasten the fan to the lamphouse. Lift the fan away from the lamphouse. X1 Service Guide...
- Page 29 The cables should exit the fan at the recess on the side opposite the label. ♦ Replace and tighten the two M3x30 Plastite Phillips screws. Do not overtighten the screws. ♦ Make sure that the cables are clear of the fan blades. X1 Service Guide...
-
Page 30: Remove And Replace The Focus And Zoom Rings
Grasp the focus ring and pull it off of the lens barrel. The retainer tabs disengage from the lens ring. Grasp the zoom ring and pull it off of the lens barrel. The retainer tabs disengage from the lens barrel. X1 Service Guide... - Page 31 Press the focus ring onto the lens. Then rotate the ring to ensure that the retainer tabs engage to lock it in place on the inner lens barrel. ♦ Place the lens cap over the focus ring. X1 Service Guide...
-
Page 32: Remove And Replace The Front Bezel
The two tabs and slotted receiver on the front bezel disengage from the projector. You may need to use a small flat-blade screwdriver to depress the slotted receivers on the top case to get them to disengage from the tabs on the front bezel. X1 Service Guide... - Page 33 CAUTION Don't pry the front bezel to remove it. Pull the front bezel away from the projector. Remove the Inner Grill Remove the two M3x8 Plastite Phillips screws that fasten the inner grill to the front bezel. X1 Service Guide...
- Page 34 Align the front bezel against the front of the projector. Press the bezel into position to lock the two tabs and slotted receiver against the top case. ♦ Tighten the two M3x10 Plastite Phillips screws securely. Do not overtighten the screws. X1 Service Guide...
-
Page 35: Remove And Replace The I/O Eca
Front bezel (page 32) Rear bezel (page 49) Top case (page 52) Ballast/power supply ECA (page 6) Chassis (page 12) Unplug the connectors at the ends of the three ribbon cables that connect the I/O ECA to the controller ECA. X1 Service Guide... - Page 36 CN700 and CN701 on the controller ECA. ♦ Make sure that the holes in the I/O ECA align properly with the two pins on the bottom case. ♦ Replace and tighten the M3x10 Plastite Phillips screw securely. Do not overtighten the screw. X1 Service Guide...
- Page 37 Pull the I/O EMI shield off of the connectors on the I/O ECA. Take care not to bend the shield or the contact fingers as you work the shield off. Assembly Notes ♦ Make sure the shield and contact fingers aren't bent and that the shield contacts the I/O connectors. X1 Service Guide...
-
Page 38: Remove And Replace The Keypad
Place the top case face down on a soft work surface. Remove the four M3x10 Plastite Phillips screws that fasten the keypad to the top case. Then then lift the keypad ECA out of the top case. X1 Service Guide... - Page 39 Lift the key set out of the top case. Lift the LED cover out of the top case. Remove the M3x10 Plastite Phillips screw that fastens the front IR receiver ECA to the top case. X1 Service Guide...
- Page 40 Make sure that the alignment holes in the LED cover fit over the pins in the top case. ♦ ♦ Position the key set in the top case such that the holes in the key set frame fit over the pins in the top case. X1 Service Guide...
- Page 41 Position the front IR receiver ECA between the retainers in the top case. ♦ Route the IR receiver cable beneath the retainer near the mounting location of the IR receiver ECA. ♦ Replace and tighten the M3x10 Plastite Phillips screws securely. Do not overtighten the screws. X1 Service Guide...
-
Page 42: Remove And Replace Lamp Module
Gently pry the top of the door away from the projector. The door detaches from the projector. Squeeze the locking tab on the lamp cable connector and unplug it from the connector inside the lamphouse. X1 Service Guide... - Page 43 To remove the lamp, loosen the two captive screws that secure it in the projector. Slide the lamp module straight out of the lamphouse. X1 Service Guide...
- Page 44 After you reset the lamp timer, read the timer value to make sure it was reset. Navigate to the About screen from the Main Menu, then view the Lamp Hour value. It should show 0 hours. X1 Service Guide...
-
Page 45: Remove And Replace The Lamphouse
Focus ring (page 30) Zoom ring (page 30) Front bezel (page 32) Rear bezel (page 49) Top case (page 52) Ballast/power supply ECA (page 6) Chassis (page 12) Controller ECA (page 19) Color wheel shield (page 17) X1 Service Guide... - Page 46 Remove the fan cables from their retainers in the bottom case. Remove the two M3x10 Plastite Phillips screws that fasten the lamphouse to the bottom case. X1 Service Guide...
- Page 47 As you lower the lamphouse into the projector, route the photodiode and color wheel ribbon cables through the retainer guide. Make sure that the lamphouse aligns properly with the two pins on the bottom case. ♦ Replace and tighten the two M3x10 Plastite Phillips screws securely. Do not overtighten the screws. X1 Service Guide...
-
Page 48: Remove And Replace The Leveling Foot
Replace the retainer in the groove at the top of the leveling foot shaft. Make sure the retainer fully seats in the groove. ♦ Adjust the leveling foot to be level with the bottom of the projector. X1 Service Guide... -
Page 49: Remove And Replace The Rear Bezel
Place the projector upside down on a soft work surface. Remove the two M3x10 Plastite Phillips screws that fasten the rear bezel to the bottom case. Remove the M2.6x10 Plastite Phillips screw that fastens the rear bezel to the chassis. X1 Service Guide... - Page 50 ♦ Tighten the two M3x10 and the M2.6x10 Plastite Phillips screws securely. Do not overtighten the screws. When you install a new rear bezel: ♦ Adhere a new I/O panel label to the outside of the bezel. X1 Service Guide...
-
Page 51: Remove And Replace The Rubber Feet
If you need to remove an old rubber foot, gently pry it away from the bottom case. To replace the rubber foot, peel the protective paper from the replacement foot. Then press the foot into the recess in the bottom case. X1 Service Guide... -
Page 52: Remove And Replace The Top Case
Place the projector upside down on a soft work surface. Remove the four M4x18 Plastite Phillips screws from the bottom case. Holding the top case against the bottom case, turn the projector over and place it right side up on the work surface. X1 Service Guide... - Page 53 Connect the keypad cable at the keypad ECA and the speaker cable at the power supply ECA. ♦ Make sure that the top case fits flush over the bottom case. ♦ Tighten the four M4x18 Plastite Phillips screws securely. Do not overtighten the screws. X1 Service Guide...
-
Page 54: Remove And Replace The Speaker
Place the top case face down on a soft work surface. Remove the three M3x10 Plastite Phillips screws that fasten the speaker to the top case. Then lift the speaker away from the top case. Lift the speaker grill away from the top case. X1 Service Guide... - Page 55 Position the speaker grill in the top case. The recesses in the grill align with ribs and mounting studs in the top case. ♦ Position the speaker in the top case with the leads facing toward the rear of the projector. Tighten the three M3x10 Plastite Phillips screws securely. Do not overtighten the screws. X1 Service Guide...
-
Page 56: Functional Tests
S-video capability player should also have a Composite video output port (RCA). InFocus strongly suggests you use a DVD player to test the video quality. DVD players reproduce colors better and project sharper images. The least preferable is a VCR. If you must use a VCR, make sure you use a commercially produced recording, not one recorded from a broadcast source. -
Page 57: Before Beginning
2. Disconnect any other video sources. S-Video from DVD player Verify that the video automatically synchronizes. 1. Disconnect any other Verify there is no distortion, noise or other video abnormalities. video sources. 2. Connect the S-video cable to the projector. X1 Service Guide... - Page 58 Verify that the white space is visible on all 5 bar/line icon areas (between green). Verify that the image focuses through the full zoom range. Verify that the image remains in focus when the Image Shift knob is turned. X1 Service Guide...
- Page 59 Verify that the image synchronizes. On the Display menu, select Reset All. Power Down Verify unit is powered off before disconnecting cables. After all tests are complete, turn the power off and disconnect all cables. Attach the lens cap. X1 Service Guide...
-
Page 60: Troubleshooting
What do you want to check? ♦ The controller ECA (page 19) ♦ The ballast/power supply ECA (page 6) ♦ The I/O ECA (page 35) X1 Service Guide... -
Page 61: Power And Start-Up Problems
The lamp has more than 2,980 hours of use. Requires replacement. LED flashes red two times Projector shuts down. LED flashes red three times Lamp failure. Projector shuts down. LED is solid red Undiagnosed error. Projector shuts down. X1 Service Guide... - Page 62 Confirm that unit is command or is good by starting again. operating normally. A flashing green Replace keypad ECA means the (page 37) projector is either attempting to light the lamp or is shutting down. X1 Service Guide...
- Page 63 Run the projector long enough to ensure (page 19) that the problem is solved. If the lamp goes out and the LED turns red, go to error codes (page 64). Repeat process to confirm the problem fixed. X1 Service Guide...
- Page 64 The lamp failed to strike after lamp use of 2000 hours internal error and shutdown five attempts. or more. the lamp. Diagnose lamp strike failure. Replace the lamp. Diagnose lamp shutdown. (page 65) (page 42) (page 66) X1 Service Guide...
- Page 65 (page 45) Voltages good Replace the ballast/ at power supply/ power supply ECA. controller (page 6) connector? (page 88) Solve the problem? Replace controller ECA (page 19) Verify the repair by restarting the Power Diagnosis process. (page 62) X1 Service Guide...
- Page 66 LED flash a repeated single-flash sequence indicating that the lamp won't strike. Go to page xxx to solve failure to strike problems. Repeat the diagnostic process to ensure that the problem is solved. (page 62) X1 Service Guide...
-
Page 67: Image Problems
Dim image Missing logo, VGA, composite video, or S- (page 70) Vertical or horizontal video Distorted image, noisy, rolling, torn, lines. frozen, 'plaid', repeated, or shifted image Sparkley picture. (page 69) Clusters of dark pixels. (page 68) X1 Service Guide... - Page 68 No image No image. Vertical lines. Horizontal lines. Sparkly picture. Clusters of dark pixels. Replace the controller ECA. (page 19) Is the image correct? Replace the optical engine. (page 24) X1 Service Guide...
- Page 69 Missing startup screen, VGA, composite video or S-video. Distorted image, excess noise, rolling image, torn image, frozen image, 'plaid' image, repeated single image, or shifted image. Make sure cables are good. Is the image correct? Replace the controller ECA. (page 19) X1 Service Guide...
- Page 70 (page 42) seconds to achieve full brightness. Is the image Replace the lamp. brighter? Substitute a known good controller ECA. (page 19) Is the image Replace the controller ECA. brighter? Replace the optical engine. (page 24) X1 Service Guide...
-
Page 71: Keypad Problems
For this test, make sure that you The IR ECA mounts permanently point the remote control directly at to the keypad ECA. You replace the IR receiver on the front of the both parts at the same time. projector. X1 Service Guide... -
Page 72: Remote Problems
Make sure that you aim the remote directly at the IR receiver on the front of the Does the projector. remote work? Replace the keypad ECA. (page 37) Does the remote work? Replace the controller ECA. (page 19) X1 Service Guide... -
Page 73: Audio Problems
Run the projector with audio for 30 minutes. If the problem returns, replace both the controller ECA and the top case if the resistance across either speaker coil no longer measures approximately 16 ohms. Problem solved. X1 Service Guide... -
Page 74: Block Diagram
The diagram below illustrates the projector's electrical architecture. This section also contains information about: ♦ Controller ECA functions (page 75) ♦ System memory (page 75) ♦ System states (page 76) ♦ Remote control features and functions (page 79) X1 Service Guide... - Page 75 The Pixelworks processor is interfaced to a single 8Mbit word-wide FLASH memory for code storage, and a 32kbit serial EEPROM for unit-specific and dynamic data storage. The FLASH is attached to the PW164B’s word-wide memory interface. An EEPROM is also located on the DMD board. This EEPROM stores DMD and engine-specific data. X1 Service Guide...
- Page 76 Image message below it. If the source is locked, the projector switches to the Display state. If the source is locked but then lost, the projector switches to the Search state. If a signal is detected but cannot be X1 Service Guide...
- Page 77 The LED lights solid green and the projector displays a blank curtain screen. Only the Power key is active. If it is not pressed in less than 3 seconds, power down is cancelled. The projector displays the message “Powering down. Press Power to confirm.” X1 Service Guide...
- Page 78 The magnification level is not indicated to the user. The LED remains steady green. When Zoom mode is no longer needed, it can be cancelled by again pressing the Effect key on the remote. X1 Service Guide...
- Page 79 Presenter Remote The Presenter Remote is a hand held remote control device that can be used with the X1 and other InFocus projectors. It consists of an electronic circuit board including a microcontroller with embedded firmware, IR interface, batteries, an elastomeric keypad and plastic case.
-
Page 80: Prepare For Power Up With Top Case Removed
Check the thermal switch (page 86) ♦ Check the color wheel cable (page 84) ♦ Check the fans (page 87) ♦ Check the ballast/power supply ECA voltages and signals (page 88) ♦ Check the I/O ECA voltages and signals (page 90) X1 Service Guide... -
Page 81: Check Controller Voltages
This also leaves you room to access the controller ECA with measurement probes. Connect the lamp to the lamp cable connector at the side of the lamphouse. Make sure the connector fully engages the connector on the lamp module. X1 Service Guide... - Page 82 Power up the projector, and check the voltages using the illustration on the next page. CAUTION When you start the projector, there is voltage present on the controller ECA and power supply. Be very careful where you probe and where you touch. X1 Service Guide...
- Page 83 Use measurement equipment to check the controller ECA for voltages and signals. X1 Service Guide...
-
Page 84: Check The Color Wheel And Reseat The Cable
Examine the color wheel to see if it is spinning. The color wheel is located between the lamphouse and the optical engine. If the color wheel is not spinning, check the ribbon cable connection. The ribbon cable inserts into a connector at the color wheel motor. X1 Service Guide... - Page 85 Check and reseat the color wheel cable at the controller ECA. To reseat the cable, pull it out of the connector on the controller ECA. Re-insert the cable fully, making sure it seats all the way into the connector. X1 Service Guide...
-
Page 86: Check The Thermal Switch
80). Let the projector run until it shuts down. Measure resistance across the terminals at the thermal switch. If the resistance is infinite (Ω), replace the lamphouse, which includes the thermal switch. Go to remove and replace the lamphouse. (page 45) X1 Service Guide... -
Page 87: Check Fan Operation
If a fan fails to operate, check the voltage at the connector on the controller ECA (page 81) to verify that the fan is receiving power. Or unplug the fan cable from the controller ECA and substitute a known good fan. If a fan has failed, remove the fan and replace it (page 27). X1 Service Guide... -
Page 88: Check Ballast/Power Supply Voltages And Signals
Connect the projector to AC power. Power up the projector. CAUTION When you start the projector, there is voltage present on the controller ECA and power supply. Be very careful where you probe and where you touch. X1 Service Guide... - Page 89 Use measurement equipment to check the ballast/power supply ECA for voltages and signals. DANGER Do not attempt to measure the output voltage from the ballast when the lamp strikes. High voltage produced by the ballast to strike the lamp can ruin test instruments as well as cause personal injury. X1 Service Guide...
-
Page 90: Check I/O Eca Voltages And Signals
ECA. Be sure that there is enough space above the I/O ECA to allow use of measurement probes. Connect the lamp to the lamp cable connector at the side of the lamphouse. Make sure the connector fully engages the connector on the lamp module. X1 Service Guide... - Page 91 Connect the projector to AC power. Power up the projector. CAUTION When you start the projector, there is voltage present on the controller ECA and power supply. Be very careful where you probe and where you touch. X1 Service Guide...
- Page 92 Use measurement equipment to check the I/O ECA for voltages and signals. X1 Service Guide...
-
Page 93: Parts Lists
Parts Lists Parts Exploded View X1 Service Guide... -
Page 94: Frus By Alphabetic Listing
Lamp Module SP-LAMP-009 LED Cover 340-1123-xx Lens Cap 505-1247-xx Leveling Foot 340-1118-xx Nameplate 020-1777-xx Optical Engine 505-1506-xx Rear Bezel 505-1510-xx Retainer Studs 340-1115-xx Rubber Foot 328-0155-xx Speaker 526-0151-xx Speaker Grill 330-0967-xx Top Case 505-1508-xx Zoom Ring 340-1116-xx X1 Service Guide...