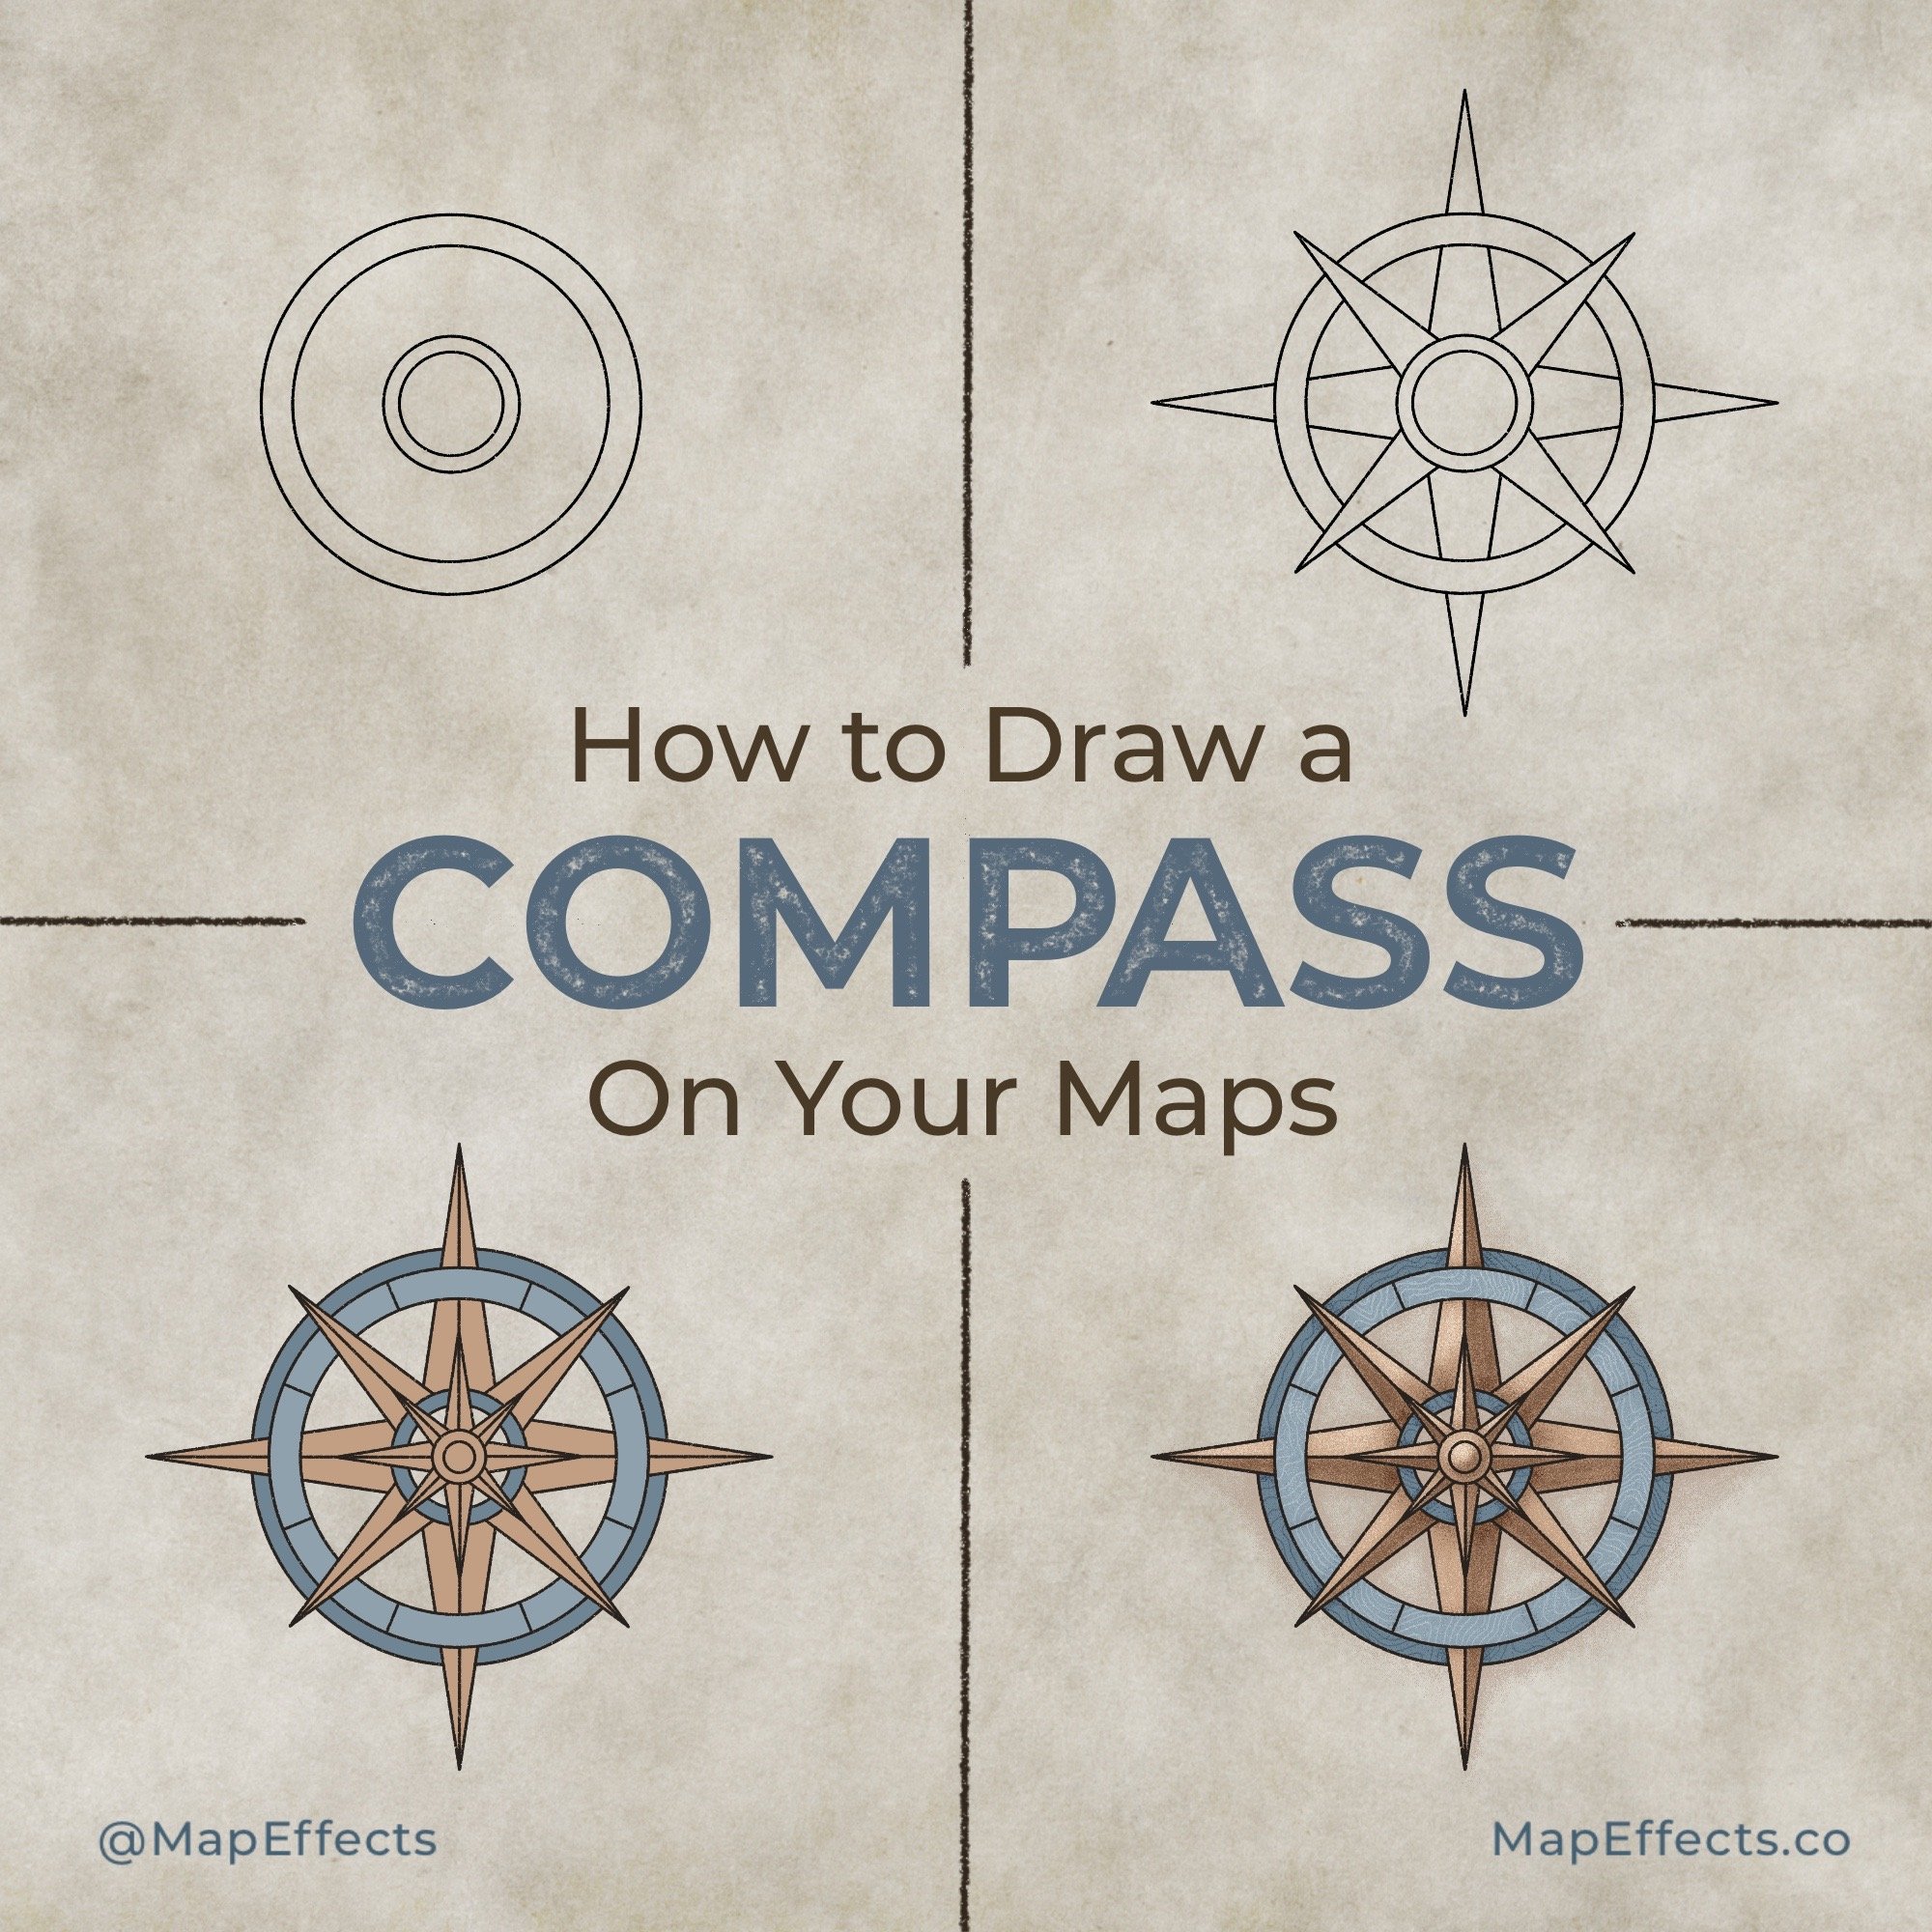
How to Draw a Compass

Drawing a tomb on your map is a great way to add intrigue and a sense of history to your world. They are a compelling feature that gets your imagination going and asking questions, which is exactly the reaction you want from a viewer. In this tutorial, you will learn how to easily draw a tomb on your maps.
All of the brushes I will be using for this tutorial are available in the Map Maker Essential Brushes pack for Procreate & Photoshop.

Begin With the Shape
Begin by drawing some circles to define the main rings that will make up your compass. You can get quite a bit of variety in your compass design just by varying the size of your starting rings. So play around with it until you come up with something you’re happy with.
Add the Main Points
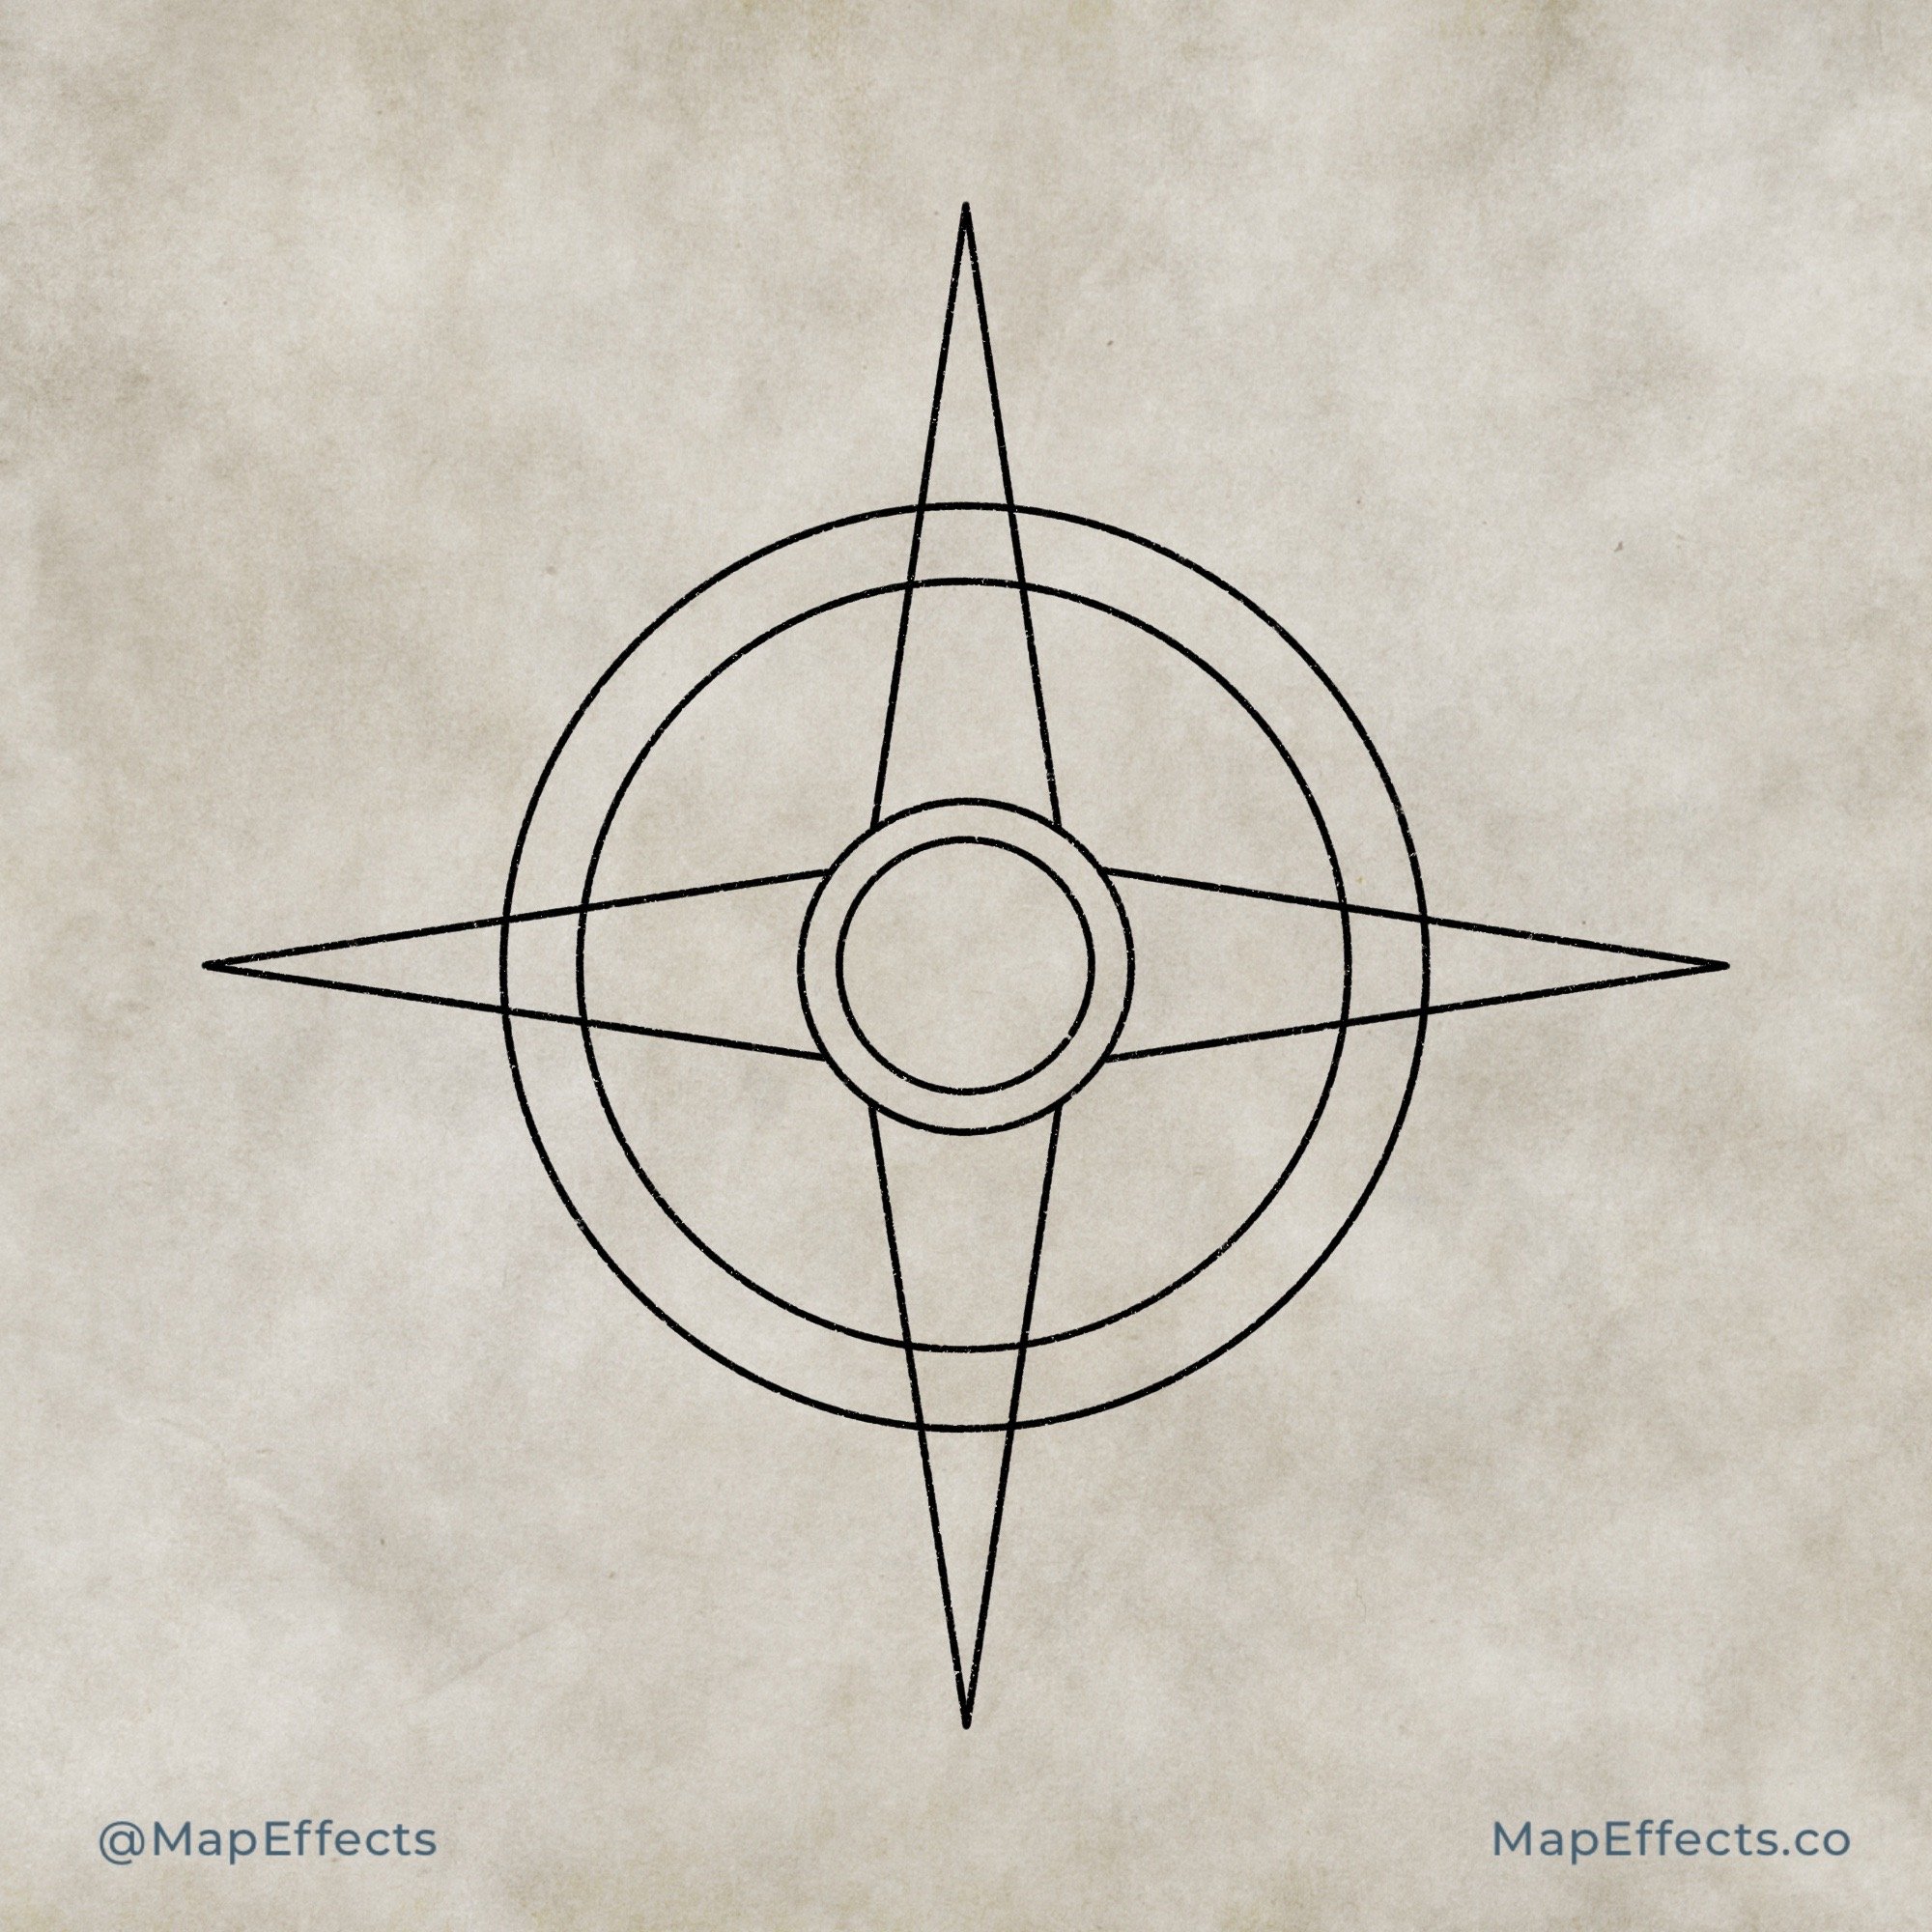
Add four triangles to make up the primary directional points of the compass rose.
If You Were Wondering
The majority of societies throughout history have utilized a system with four points of “cardinal direction”.While the names for each point obviously varied between cultures, the principle was based on the direction the sun would rise and set to determine East and West.

Draw the Secondary Points
Put triangles in between the ones you just added, and erase some of the lines on the circle and triangles to give the impression they are overlapping. In this case I made the smaller points overlap the outer circle while the larger points are behind it. Weaving elements like this is a great way to give the compass depth and visual interest.
More Tutorials You May Enjoy

Divide the Points
Add a smaller circle directly in the middle and draw a line that spans the length of each point. In order to keep them even it is easiest to draw from the point to the circle.
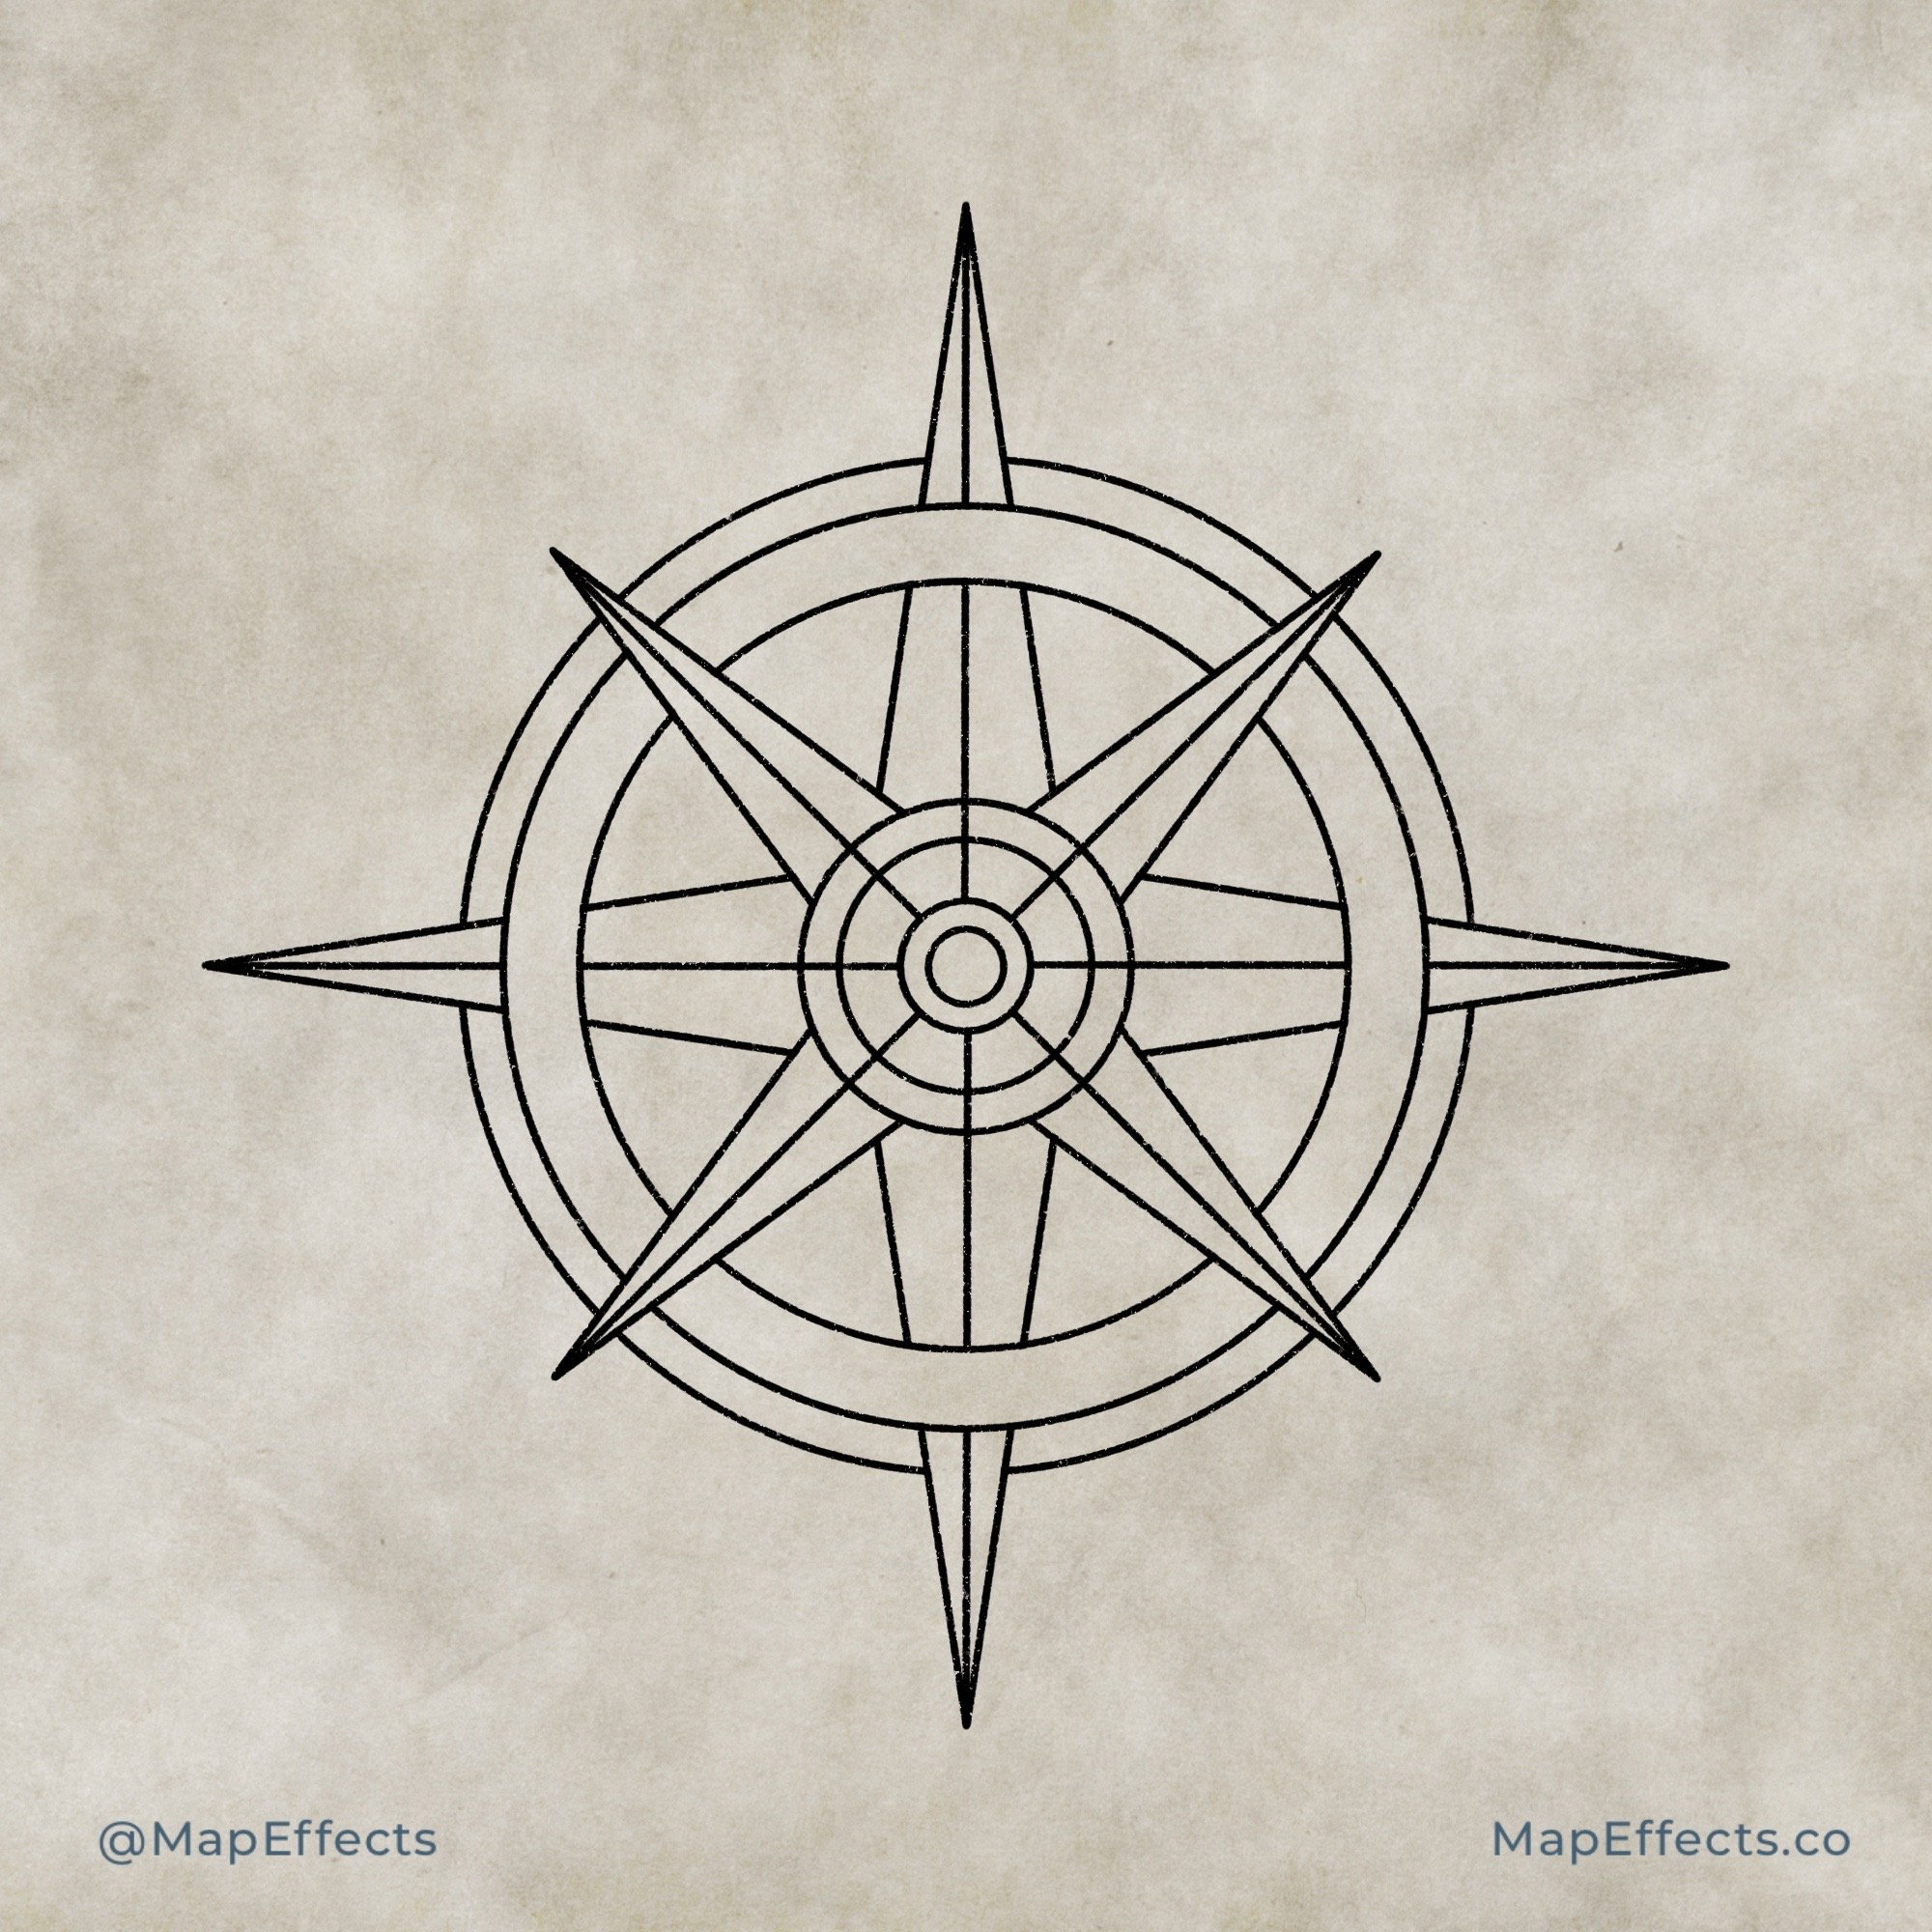
…Add More Circles!
Place a larger circle around the outside and erase where it will go behind the outer points. Then add another small circle to the center of the compass.

Duplicate the Compass
If you are working digitally, make a copy of the compass and shrink it down until it fits inside the main compass. This is a fun way to give a compass within a compass design.

Block in Your Colors
Now comes the fun part of adding some color. As you are usually adding a compass to an existing map, it is important to pick colors that match the overall color scheme.
But for this example I have included the hex codes if you want to do an exact copy of this design. Since the background is an aged paper texture I opted to go with some blues to compliment the paper.

Paint Your Shadows
Determine where your light source is coming from. Add shading to the undersides of each point. Also, paint some subtle shadows where one object overlaps another; such as where the large points overlap the outermost circle.
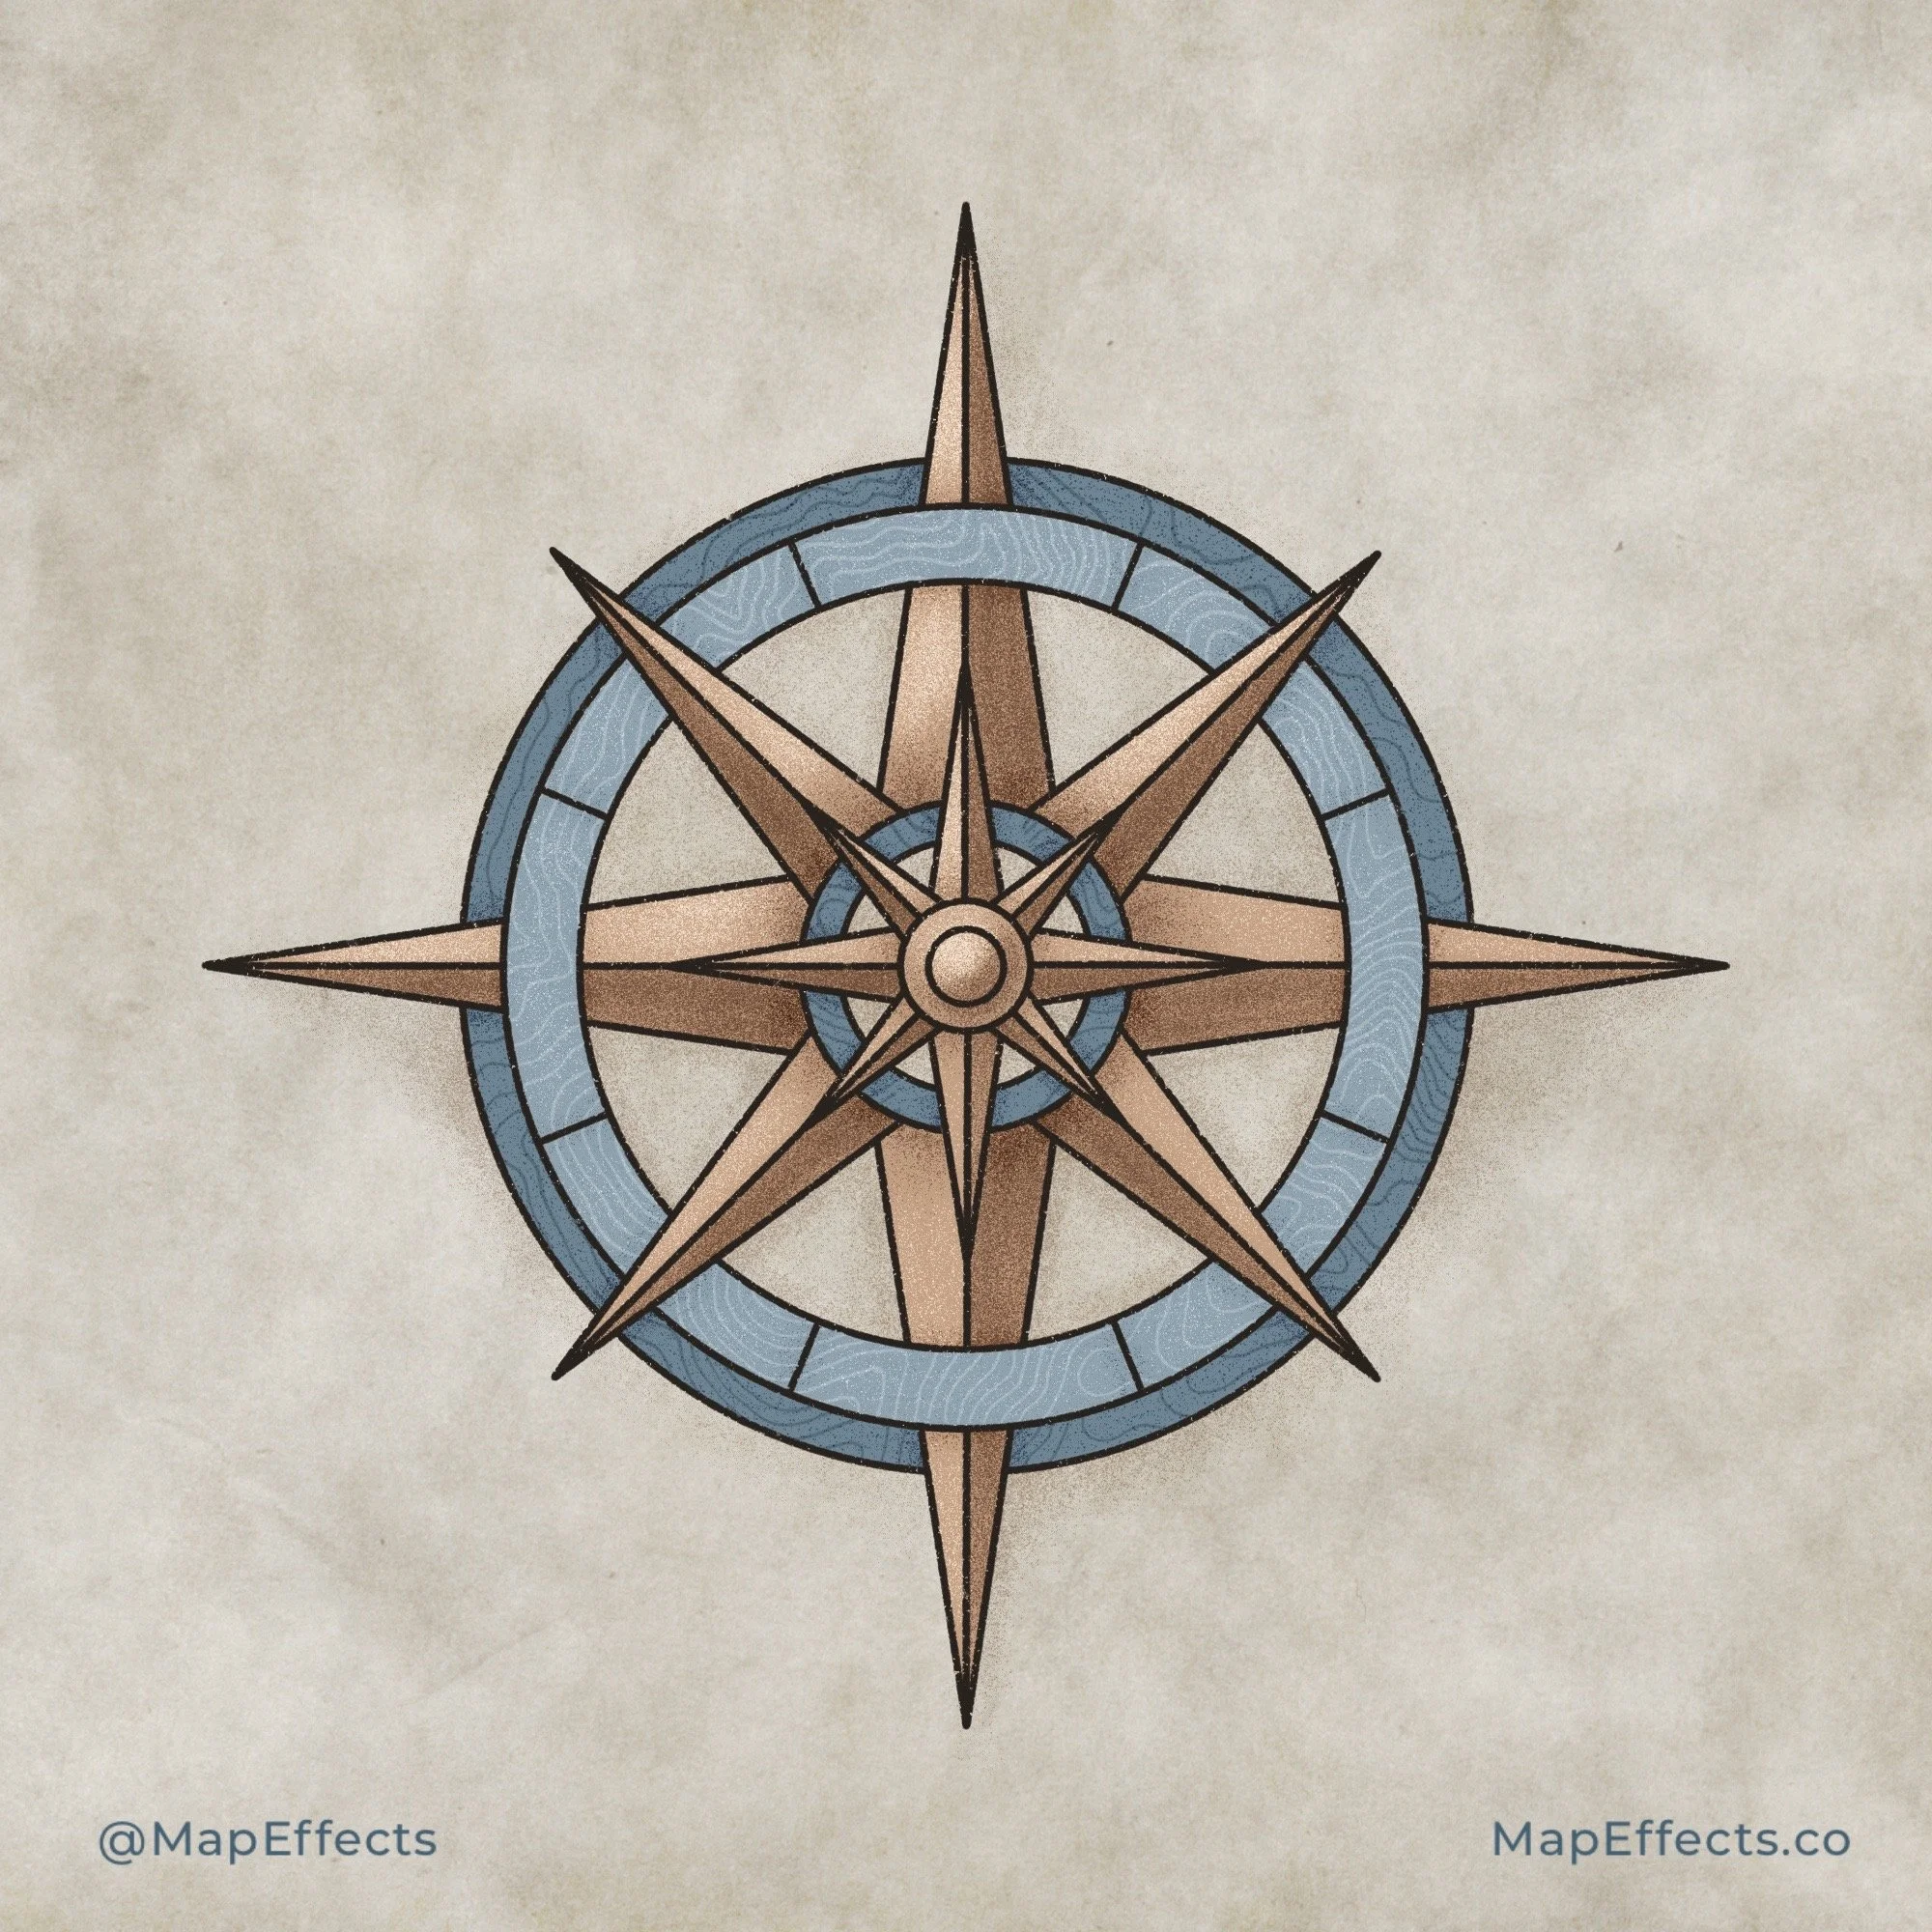
Paint in the Highlights
Place some highlights on the opposite side of where you put shadows, with the brightest highlights where the light would hit more directly.
I wanted to add a little more visual interest as well so I placed a topographic map texture I drew over the blue layers and selected "clipping mask" so it would only appear in those sections. Click the image to see it in more detail.
There are nearly endless possibilities to the variation in how you draw your compass. Which means you can easily modify them to reflect different cultures and match the theme of your map. Just experiment and have fun with the process!
If you found this tutorial helpful be sure to follow MapEffects on Instagram and tag me with the map you create and I may feature your work. Thank you, and I look forward to seeing your map!
Josh