What is Superuser Access in Linux?
In Linux systems, a superuser is a user account with elevated privileges. The super user in Linux has unrestricted access and can modify any file, execute any command, and change any system configuration. This access allows the super user to make changes that affect the entire system which is denied for the regular user.
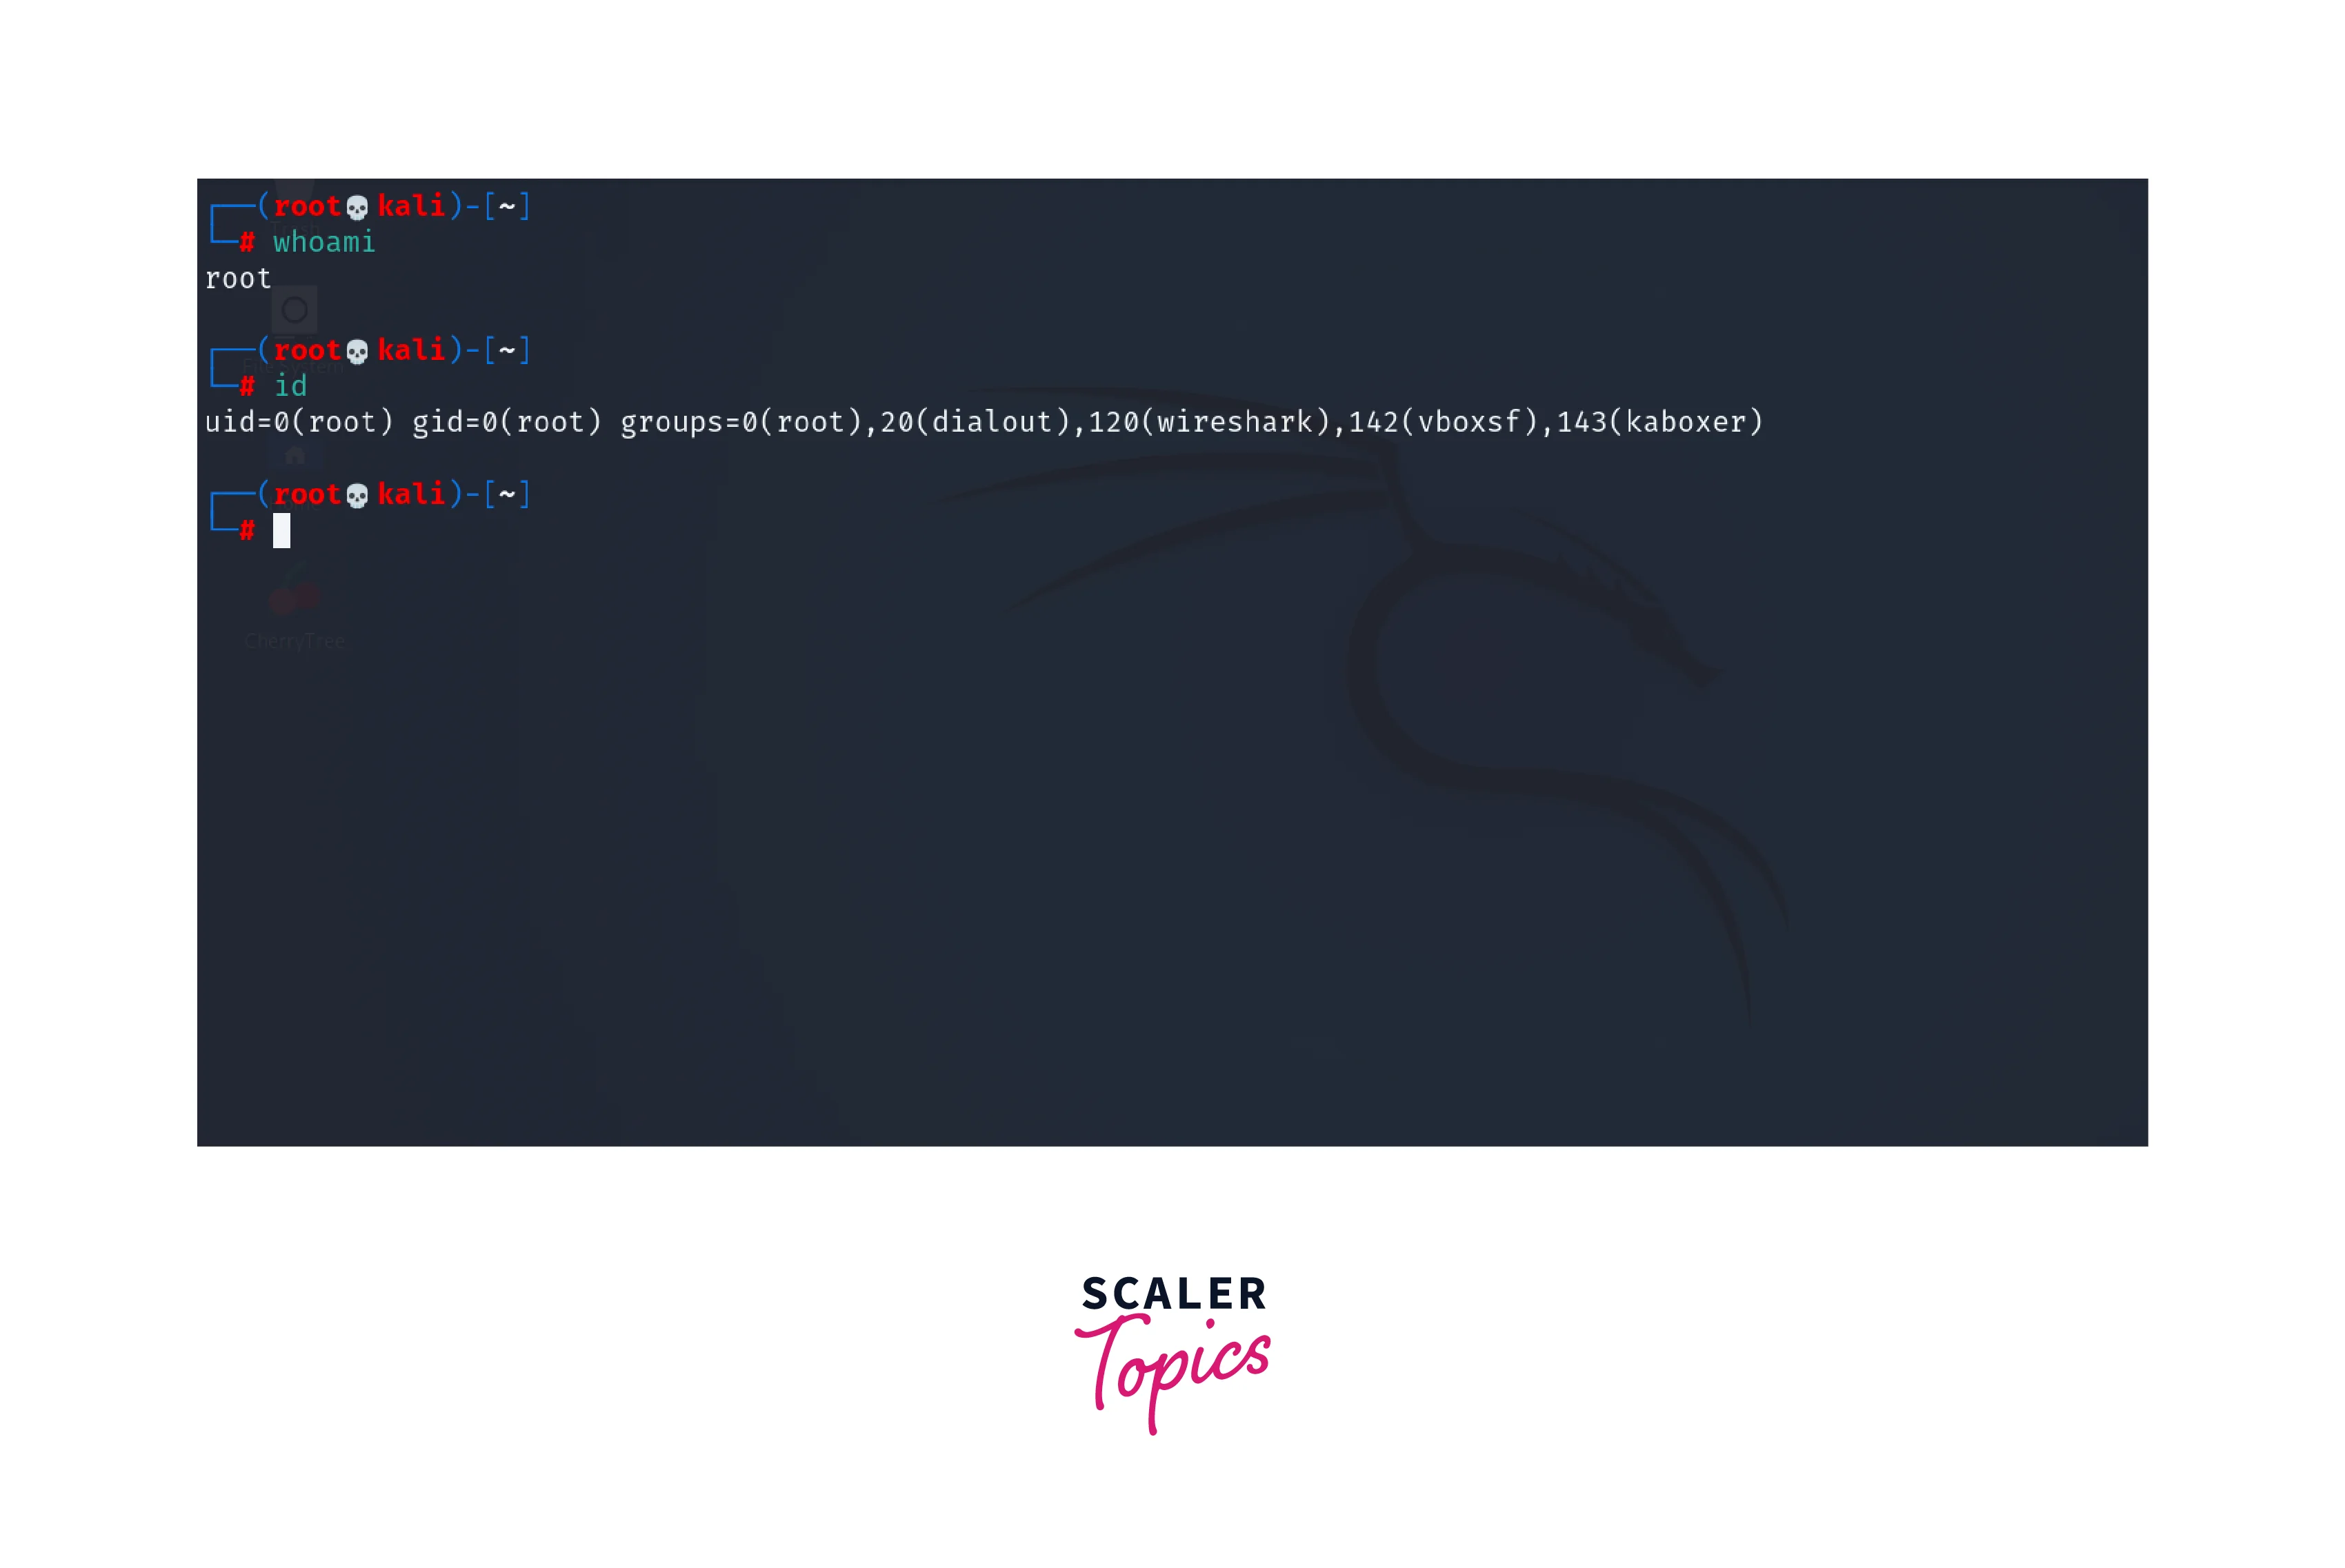
To check if the current user is a Superuser, you can use any of the following commands,
-
The whoami command in Linux is used to display the username of the current user who is logged in to the system.
-
The id command, provides detailed information about the current user including the username.
We can log in directly as a root user or can also switch to a root user account using the su command in Linux. The syntax of the su command is,
To switch to a superuser account, we can use the following command,
The hyphen after indicates that you want to switch to the superuser account. After the command, we have to enter the password and if the password is correct, the session will be switched to a superuser account.
Lock Root at Installation
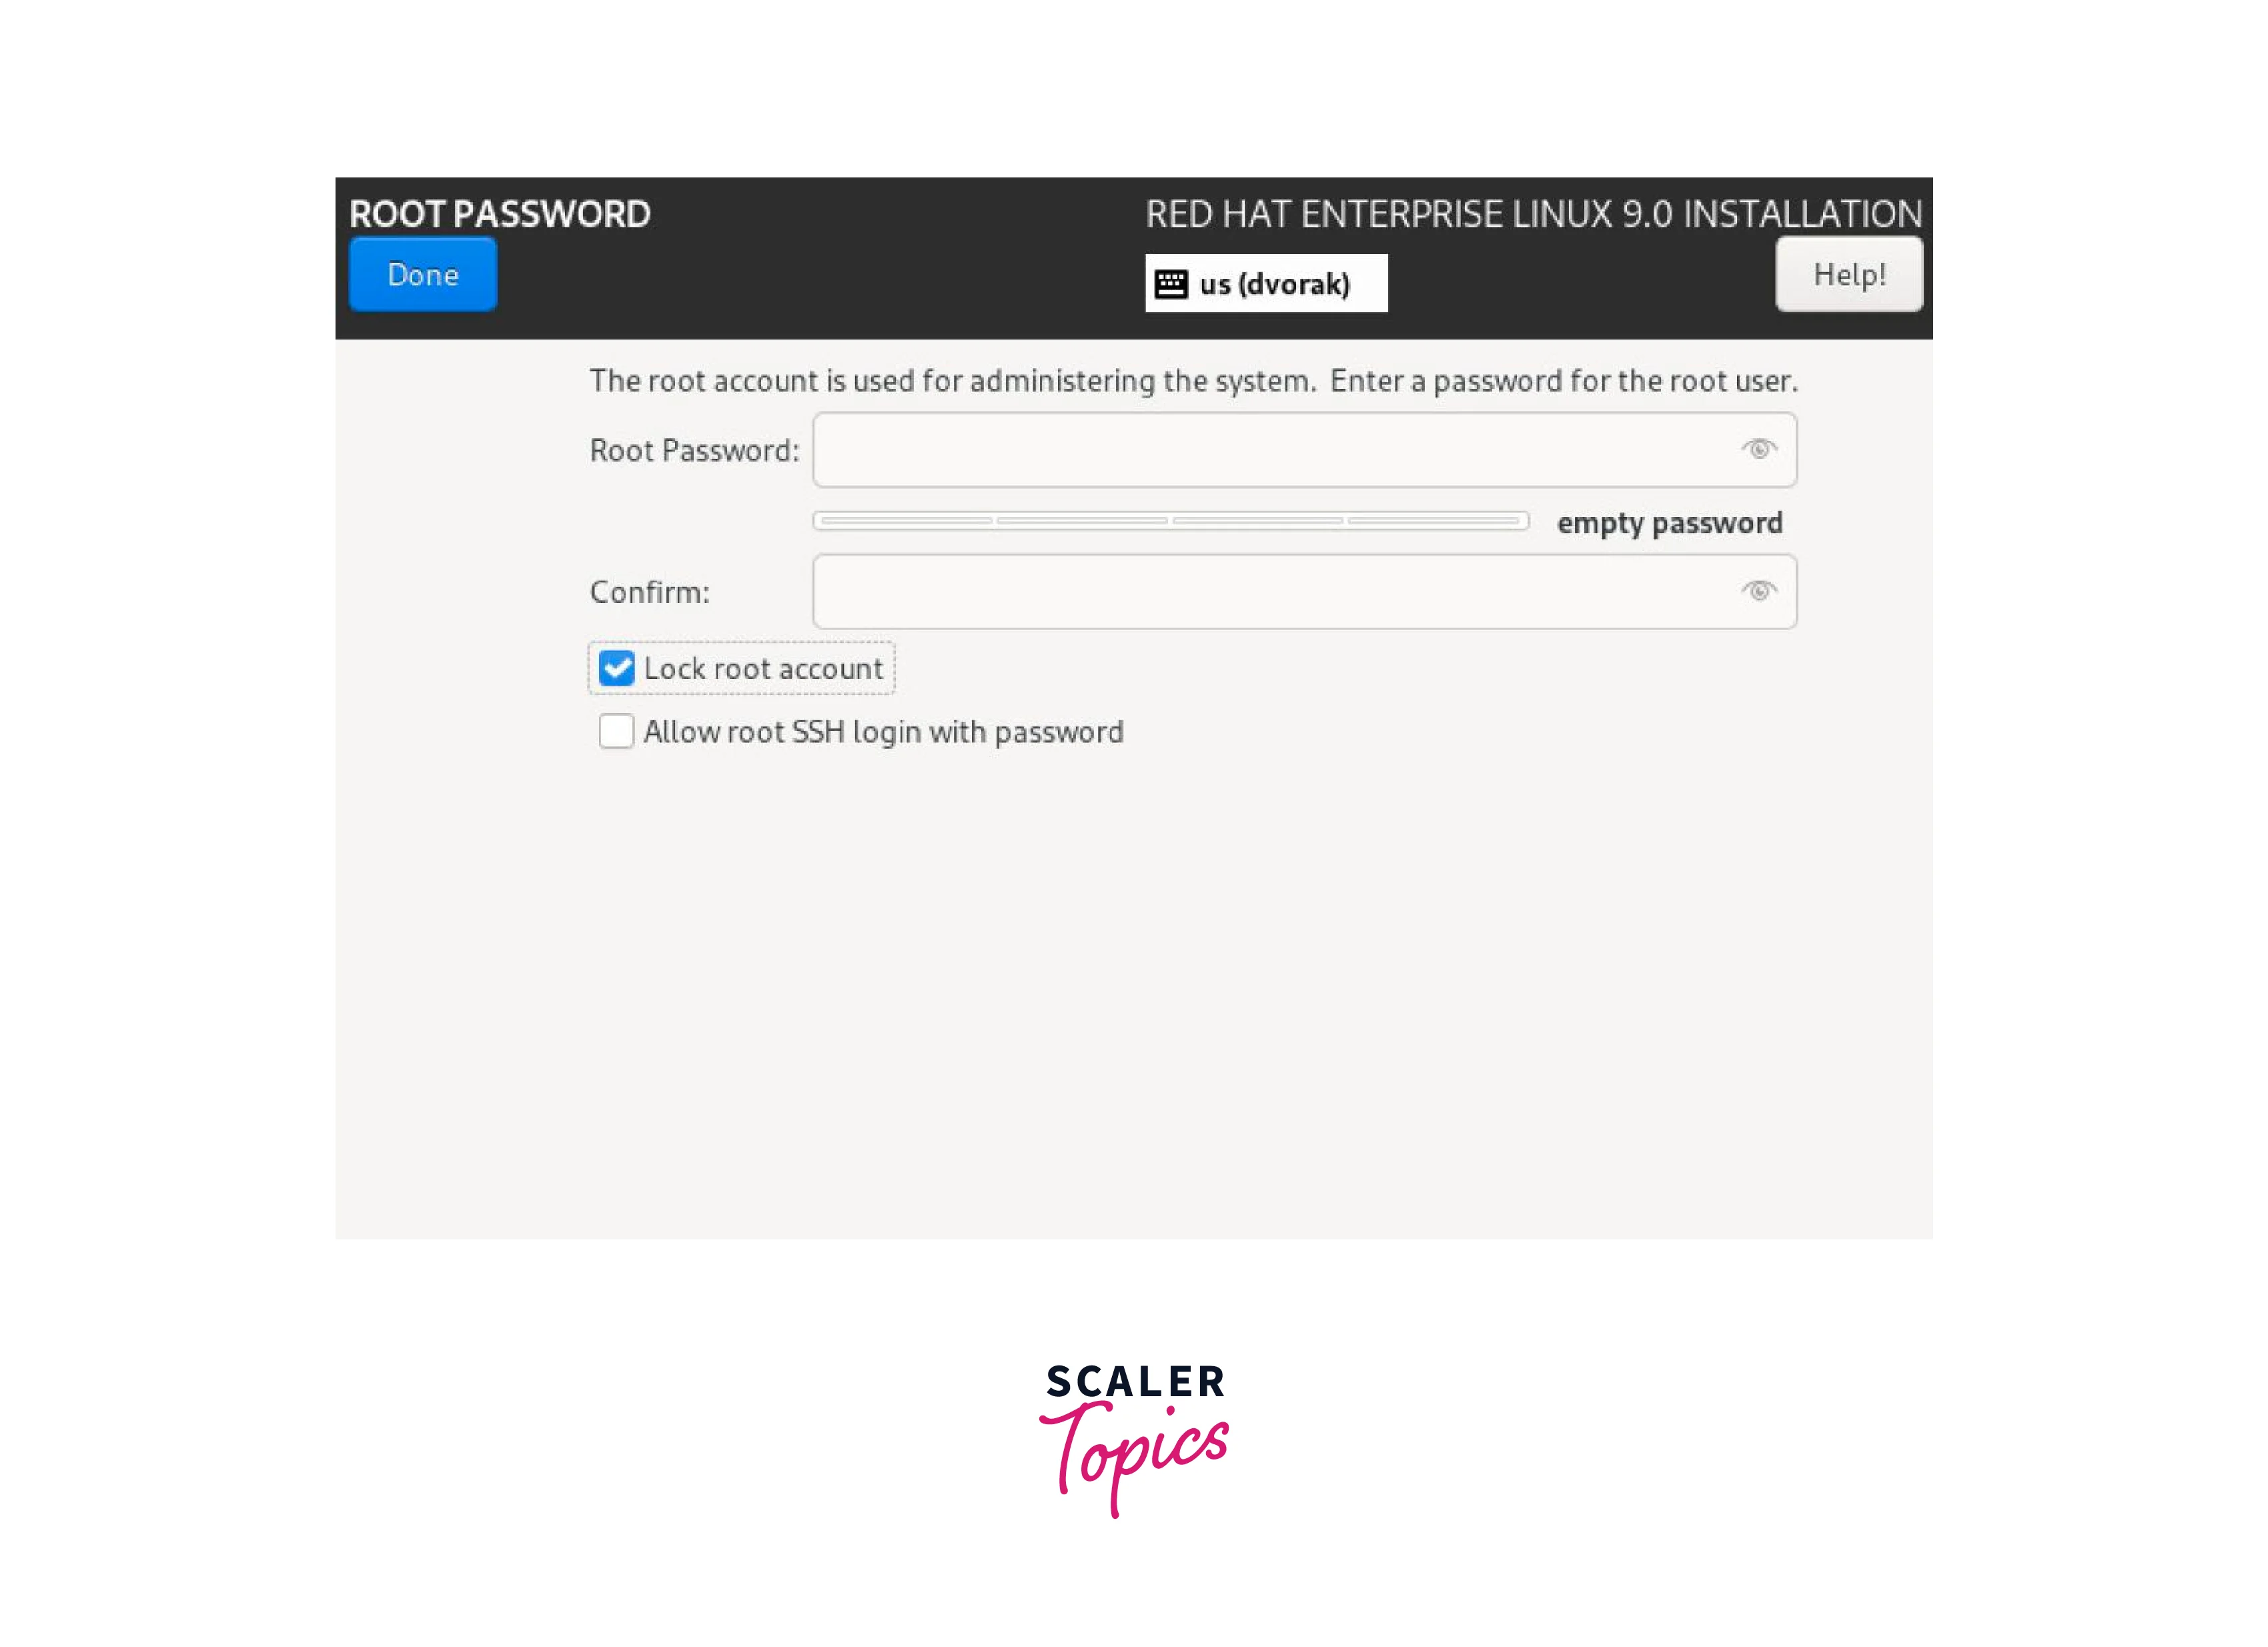
Locking of the root account is done to deny direct login to the root account. Most Linux distributions discourage logging in directly as the root user to enhance security. During the installation process, we can lock the root user and create a regular user account with limited privileges. This improves security and minimizes the risk of unintentional system changes or malicious actions.
The following image shows the lock root option during installation of Red had linux,
We can check if the root user is locked by using the following methods,
-
Check the /etc/passwd file which has information about user accounts on a Linux system. We can use the cat command to print the content of the file.
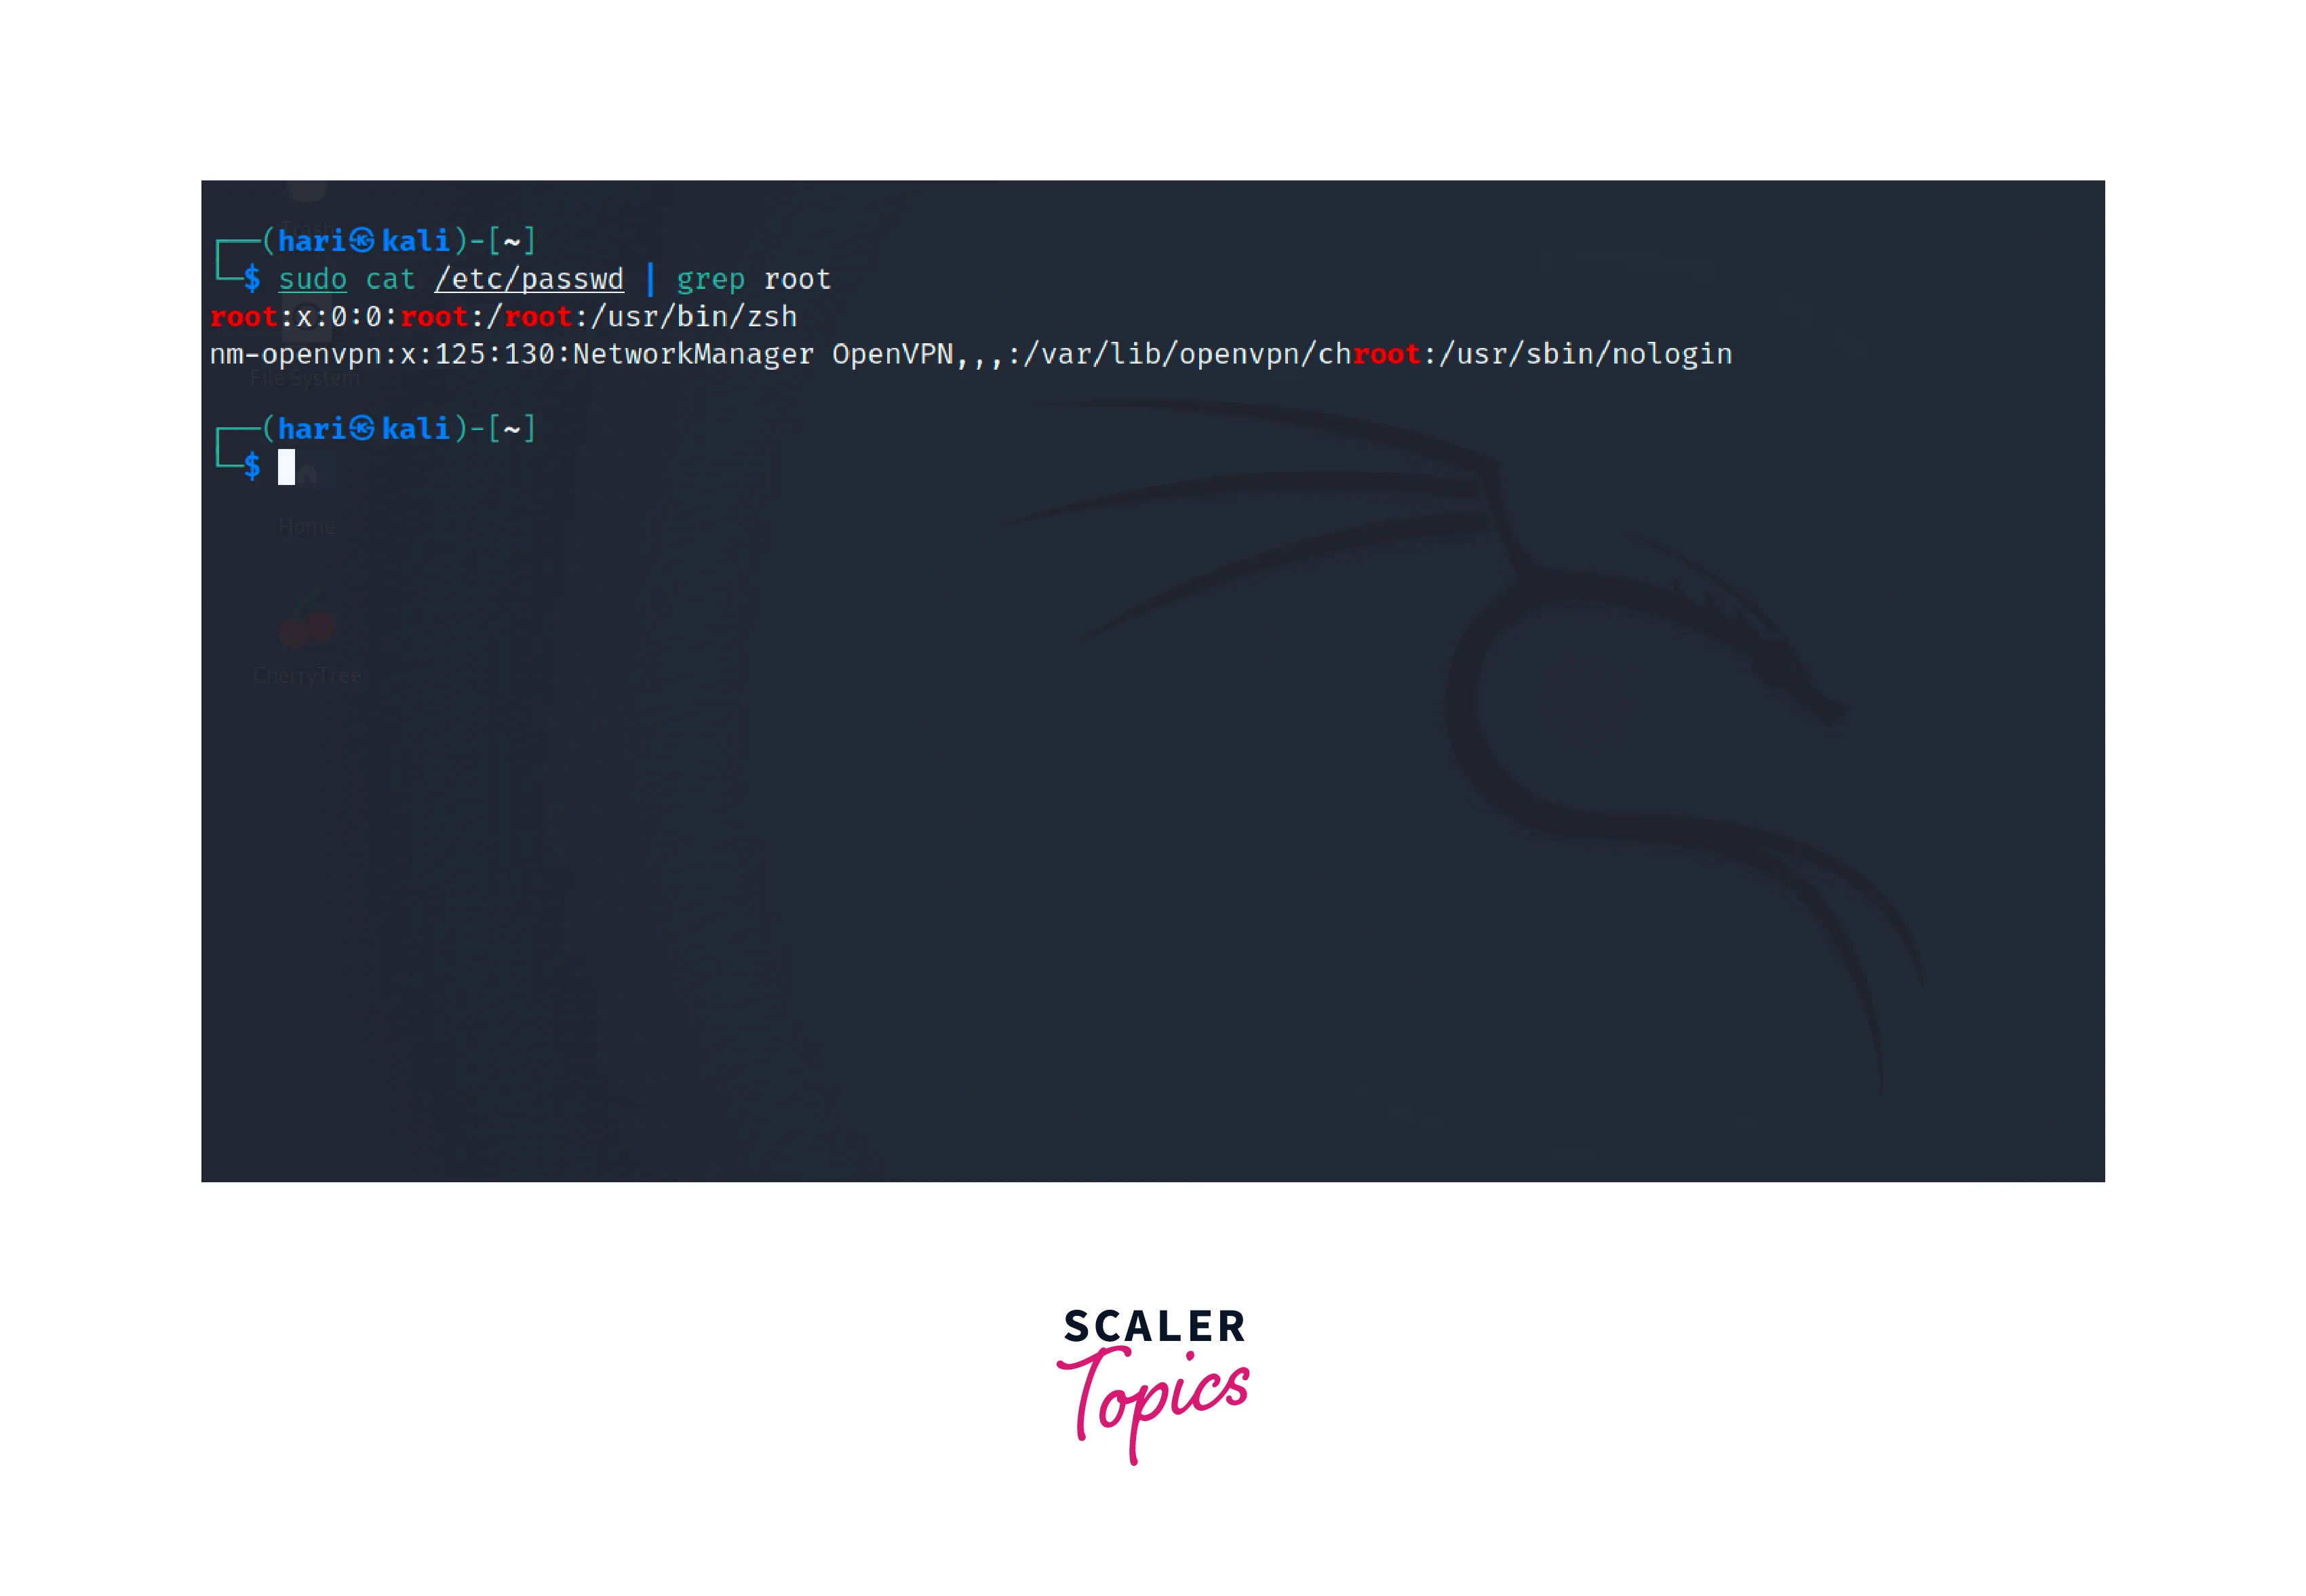
If the output ends with /sbin/nologin or /usr/sbin/nologin, it indicates that there is no login shell and the root user is locked.
-
Check the /etc/shadow file which stores encrypted passwords and other password-related information.
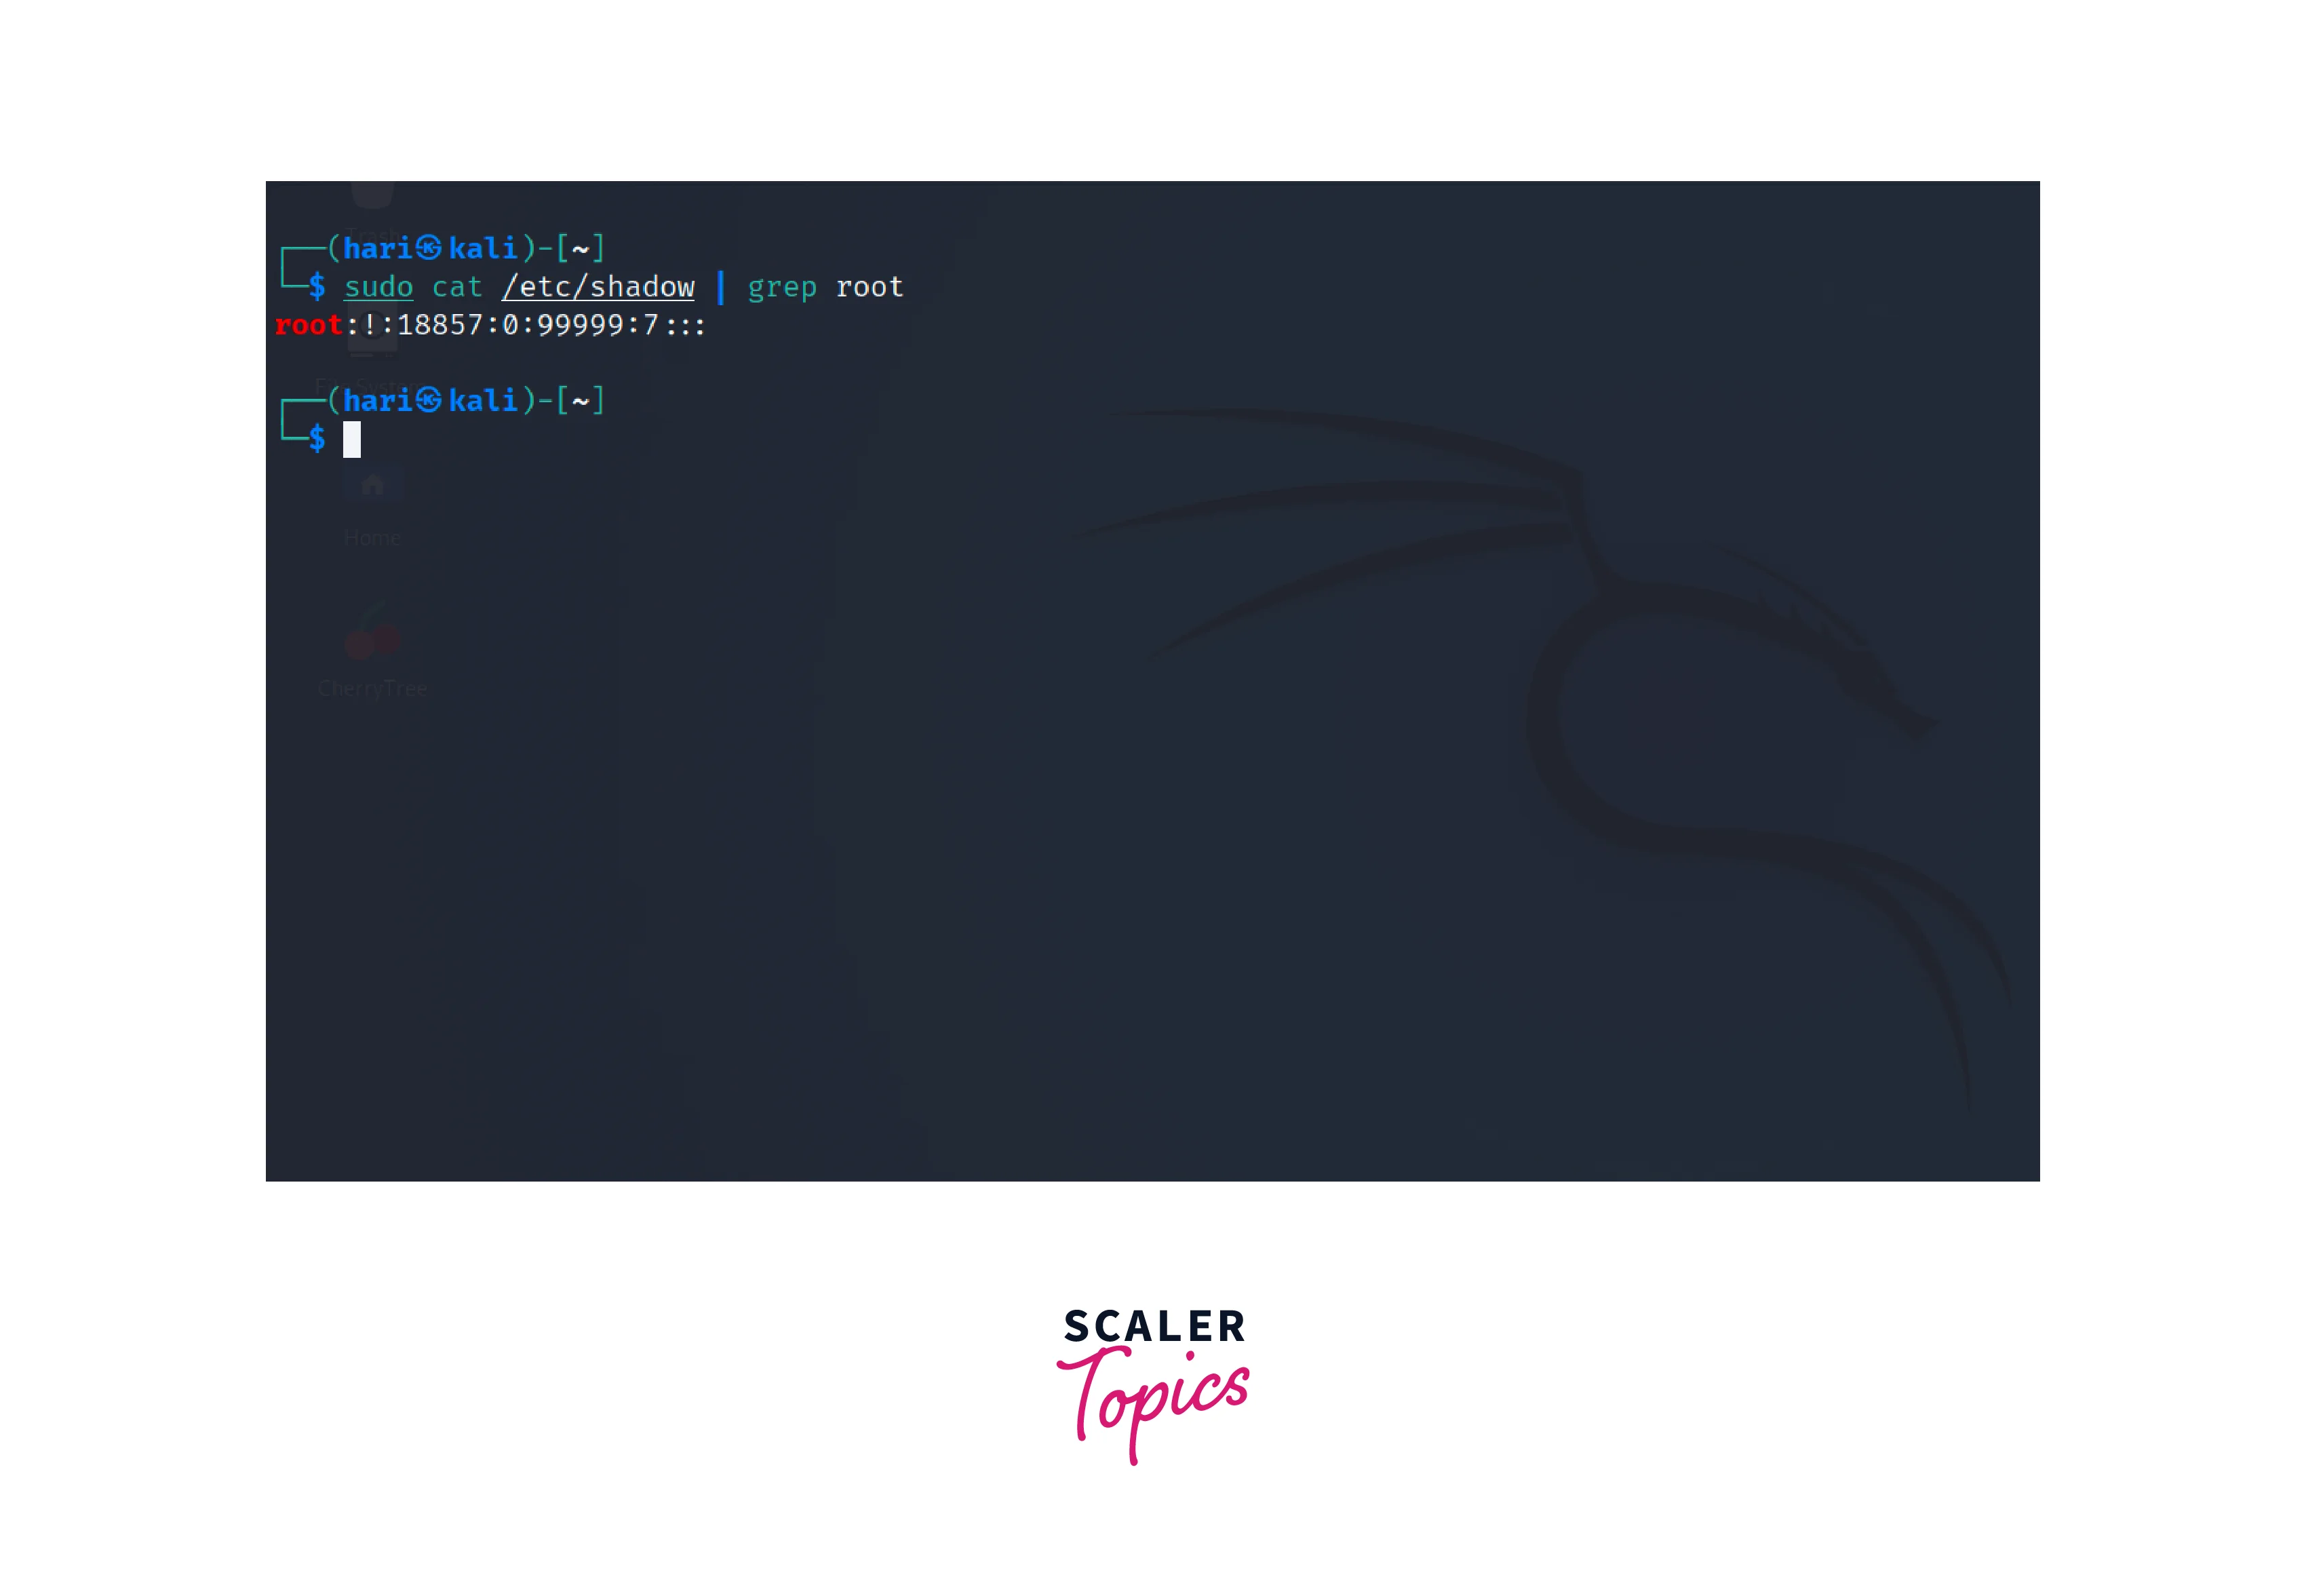
If the second field in the output is an exclamation mark (!), it indicates that the root user is locked.
Disable Root
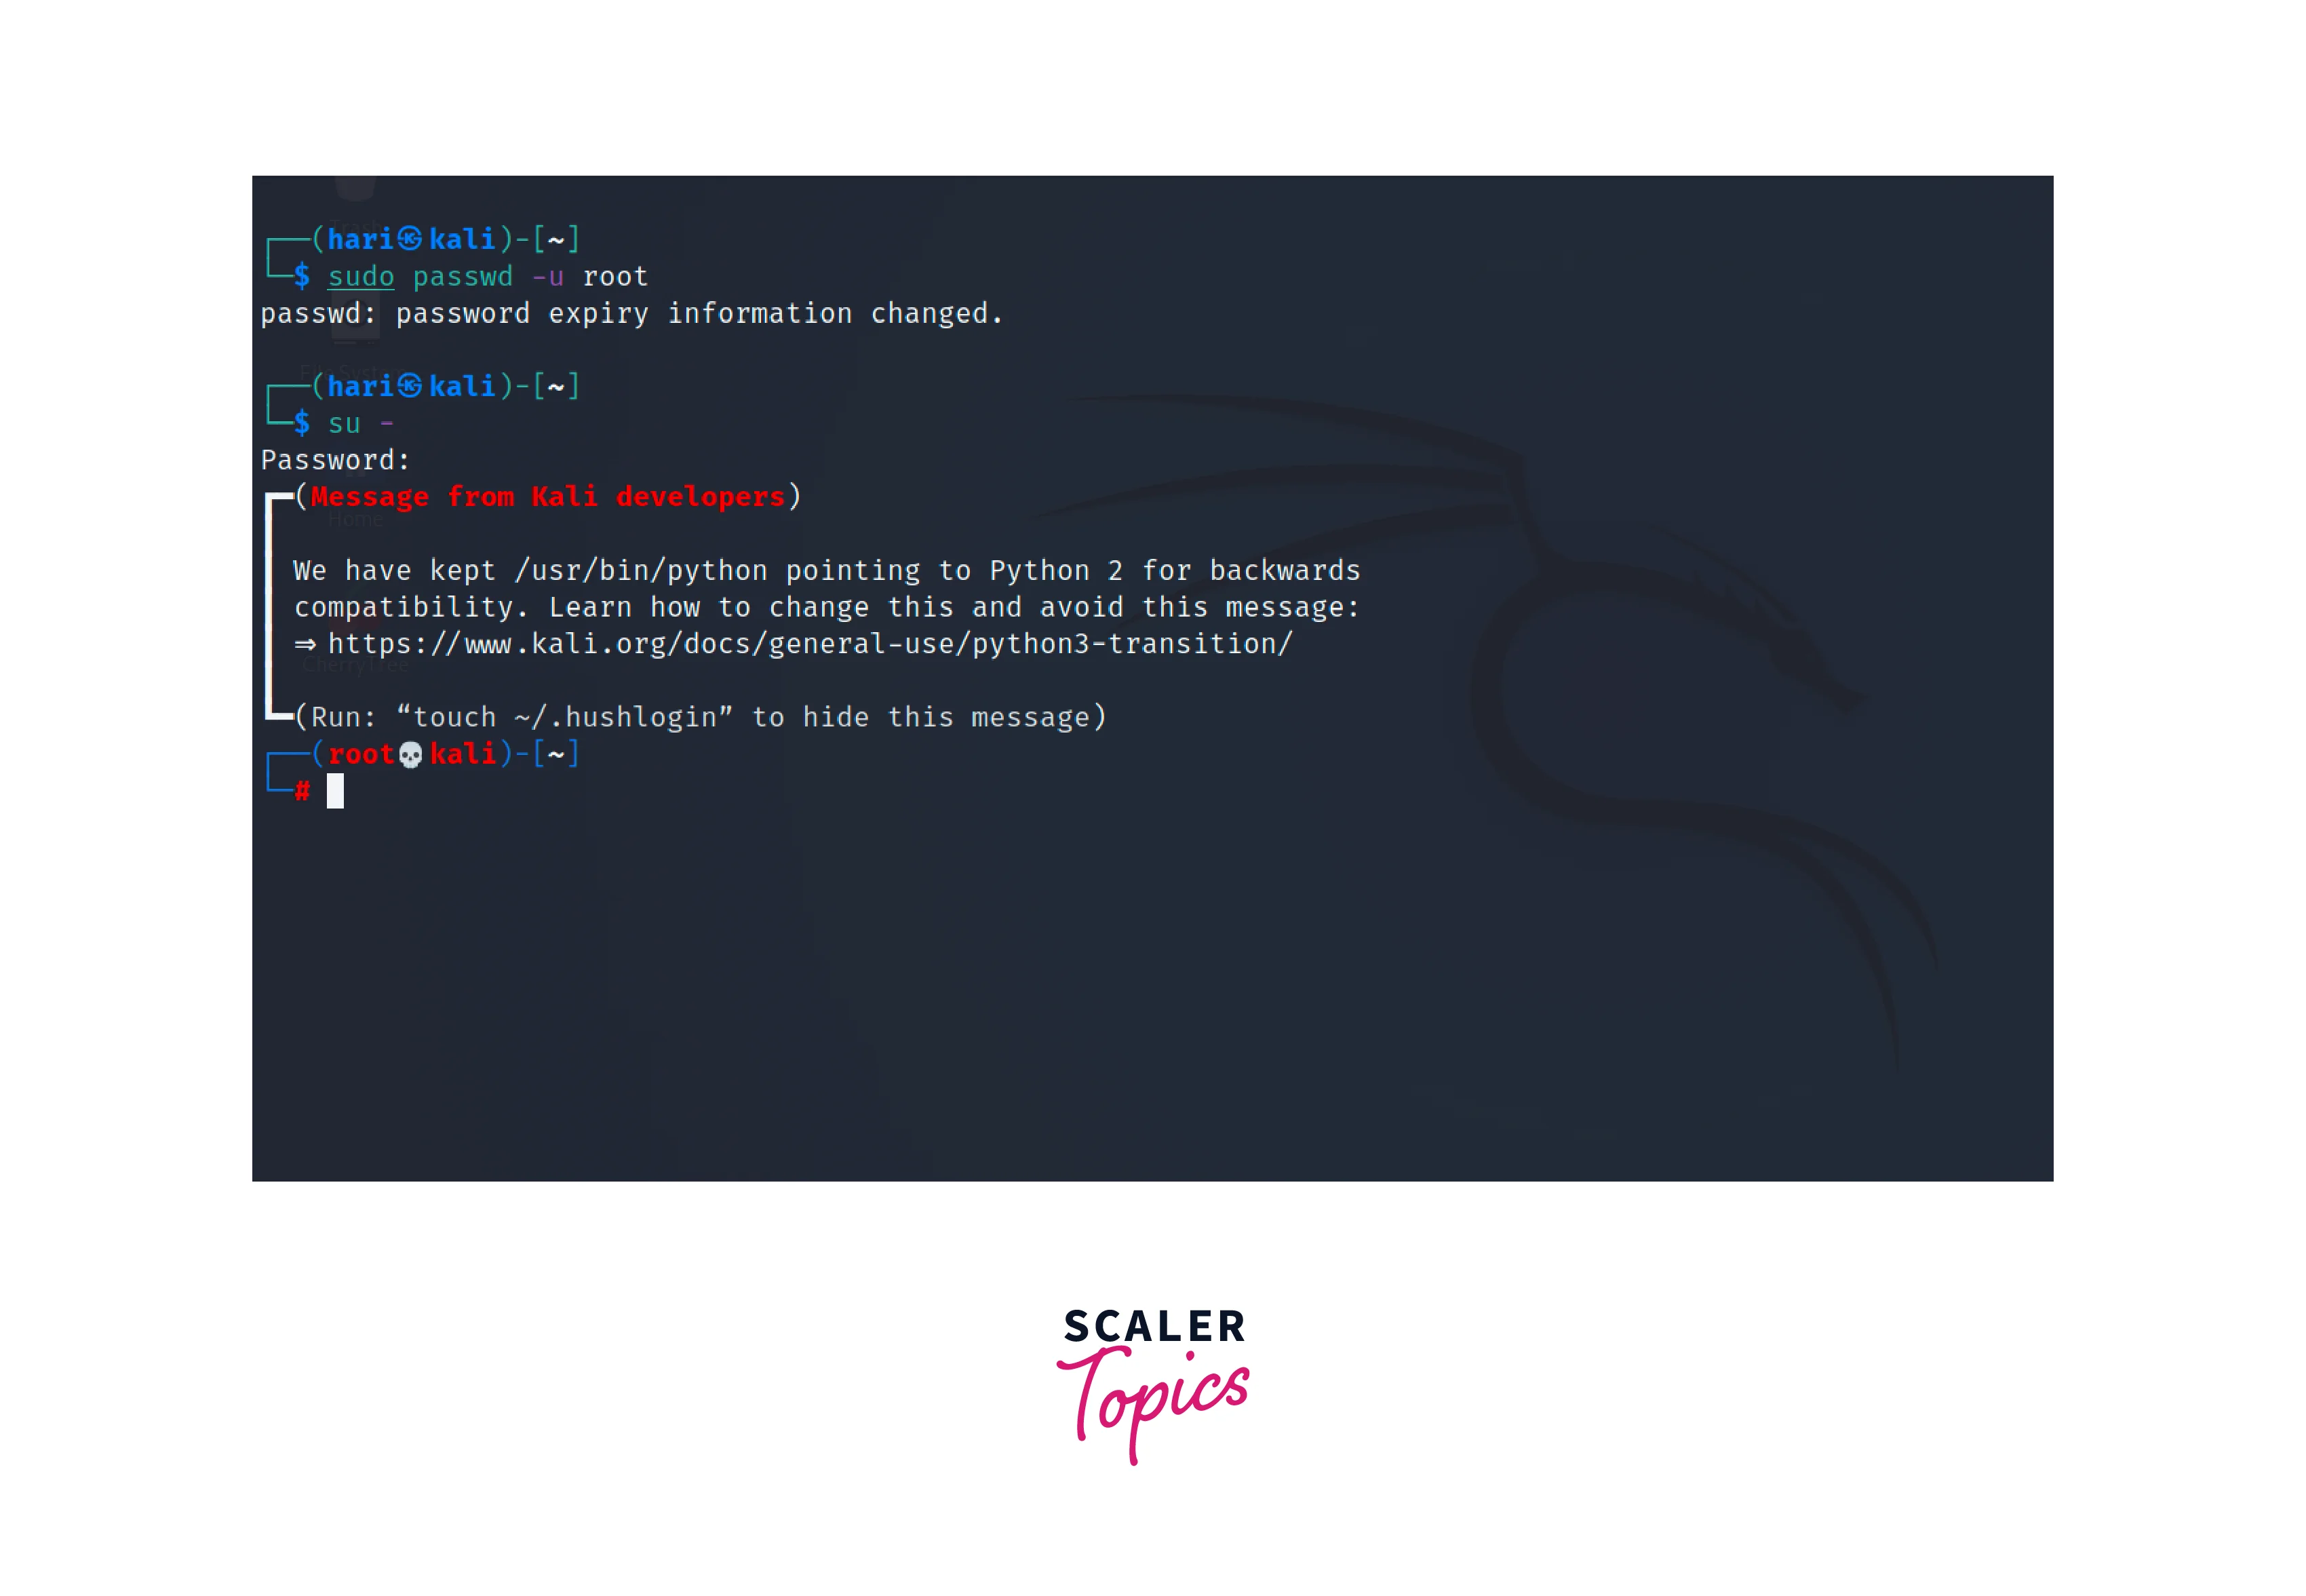
Another way to secure the system is to disable the root account entirely. As a result, it becomes impossible to log in directly as root. Instead, users should use the sudo command to execute administrative tasks. We can achieve this by using the passwd command for locking the super user in Linux to prevent anyone from logging in as the root user.
The following command can be used to lock the root account.
The -l option is used to lock the root account. After this command the superuser account in Linux is disabled.
The following command can be used to unlock the root account.
The -u option is used to unlock the root account, allowing the super user in Linux to log in again.
We can also change the login shell to /sbin/nologin in the /etc/passwd file to disable the super user in Linux. The sed or stream editor tool to modify the content of the file,
The command replaces the pattern root:/bin/bash with root:/sbin/nologin and the -i option is used to perform an in-place edit.
Delegate Administration
Delegating administration in Linux involves assigning specific administrative tasks or privileges to trusted users or groups, allowing them to perform those tasks without granting them full superuser access. This is usually used to enhance security and for effective system management. Here are the steps and commands to delegate administration in Linux:
-
Open a terminal or access the command-line interface on your Linux system.
-
Log in as a super user or use the sudo command for the following steps.
-
Identify the specific administrative tasks or privileges you want to delegate. Consider the actions or commands required for those tasks.
-
Create a new user or identify an existing user or group to whom you want to delegate administrative tasks. Use the adduser or useradd command, depending on your Linux distribution, to create a new user if needed.
-
Grant the necessary permissions to the user or group to perform the delegated tasks. This can be done in various ways, depending on the specific task and the Linux distribution you are using.
-
Add the user or group to the sudoers file to grant them sudo access. Use the visudo command to edit the sudoers file:
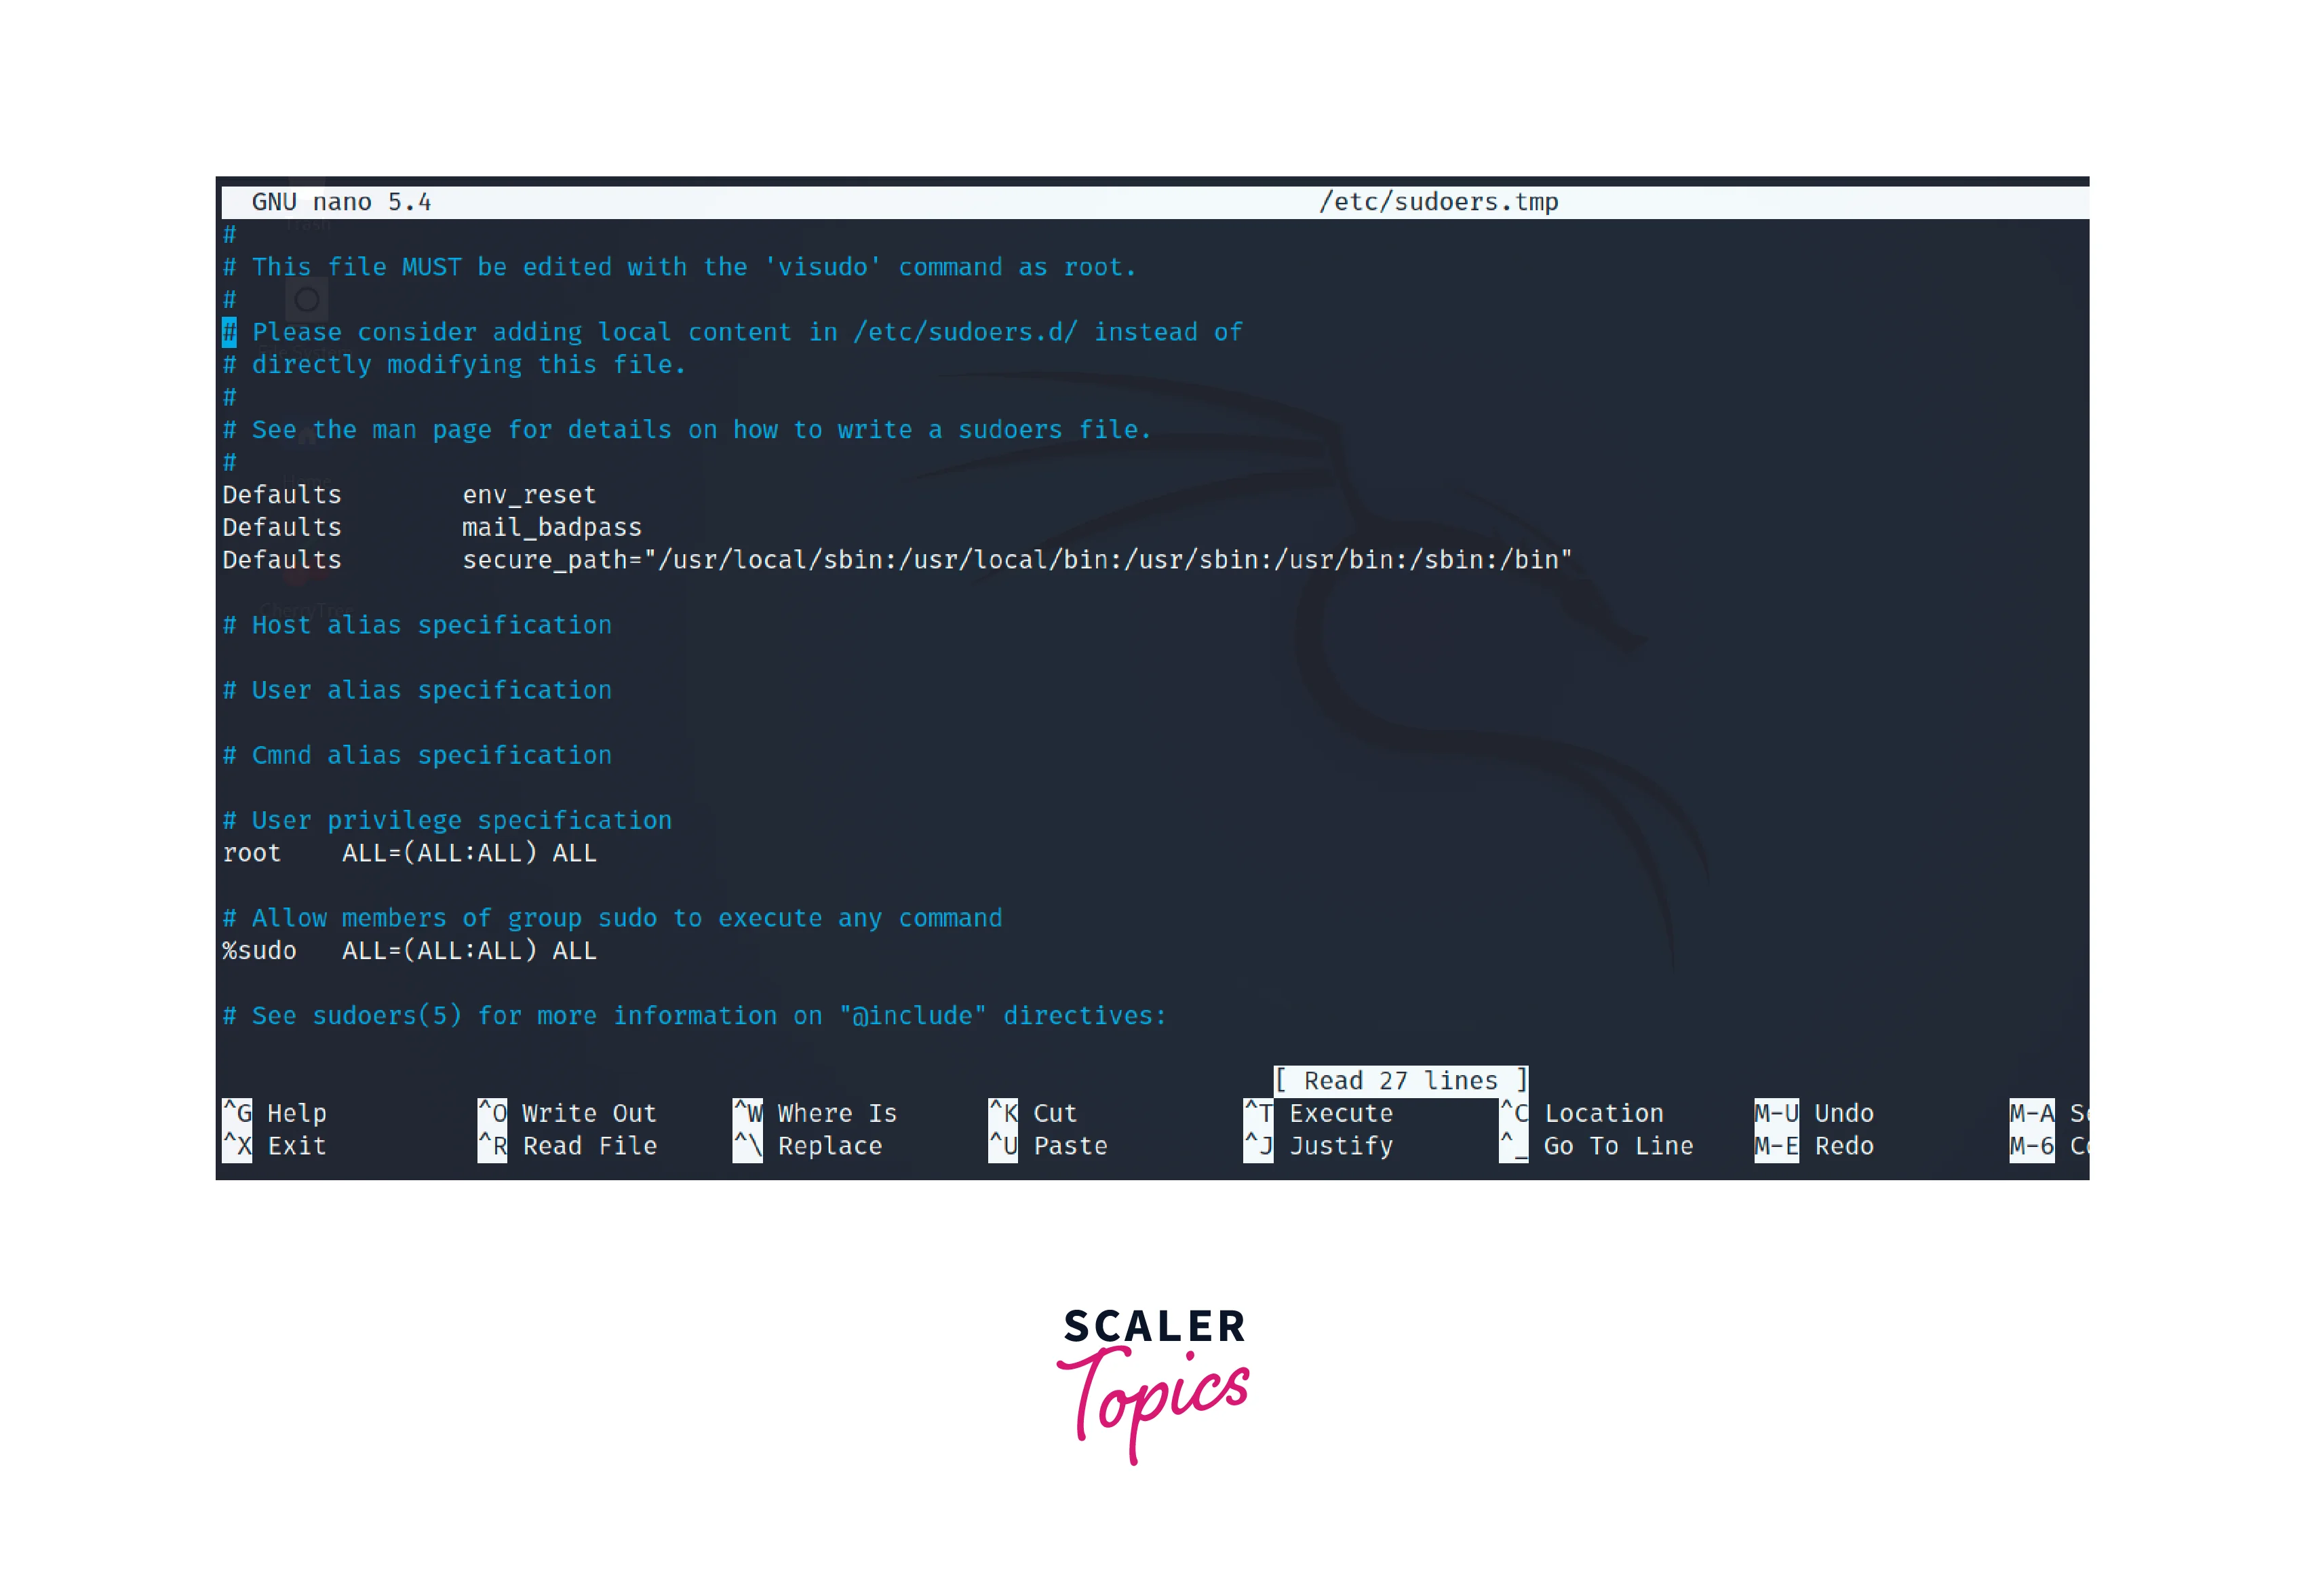
This command opens the sudoers file and we should add a line in the format within the file.
- The ALL keyword grants the user the ability to execute the command with superuser privileges.
- The (ALL) keyword denotes that the user can execute the command from any host or IP address.
- Replace username with the actual username or the %groupname for a group, and /path/to/command with the specific command or commands they should be able to execute with elevated privileges.
For example, to allow the user bob with the privilege to cat all files in the system, we can add the following line.

We can also use an access control list to grant specific users or groups permission to access and modify specific files or directories. The setfacl command can be used to modify ACL (Access Control List).
Sudo Aliases
Sudo aliases in Linux provide a way to define shortcuts or alternative names for specific commands that users are authorized to execute with superuser privileges using the sudo command. These aliases make it easier for users to remember and execute commonly used administrative tasks without having to type the full command each time.
Sudo aliases are defined in the sudoers file, which is the configuration file for the sudo command. This file determines who can execute commands with superuser privileges and what commands they are allowed to execute. Follow the steps to create an alias:
-
The sudoers file is typically located at /etc/sudoers or in the /etc/sudoers.d/ directory. It is recommended to use the visudo command to edit the sudoers file, as it performs syntax checks and helps prevent any accidental misconfigurations. Run the following command to open the sudoers file,
-
Within the sudoers file, locate the section that defines user-specific settings or the User_Alias section that groups multiple users. Add a line in the following format to define a sudo alias:
Replace Alias_Type with the appropriate alias type, such as
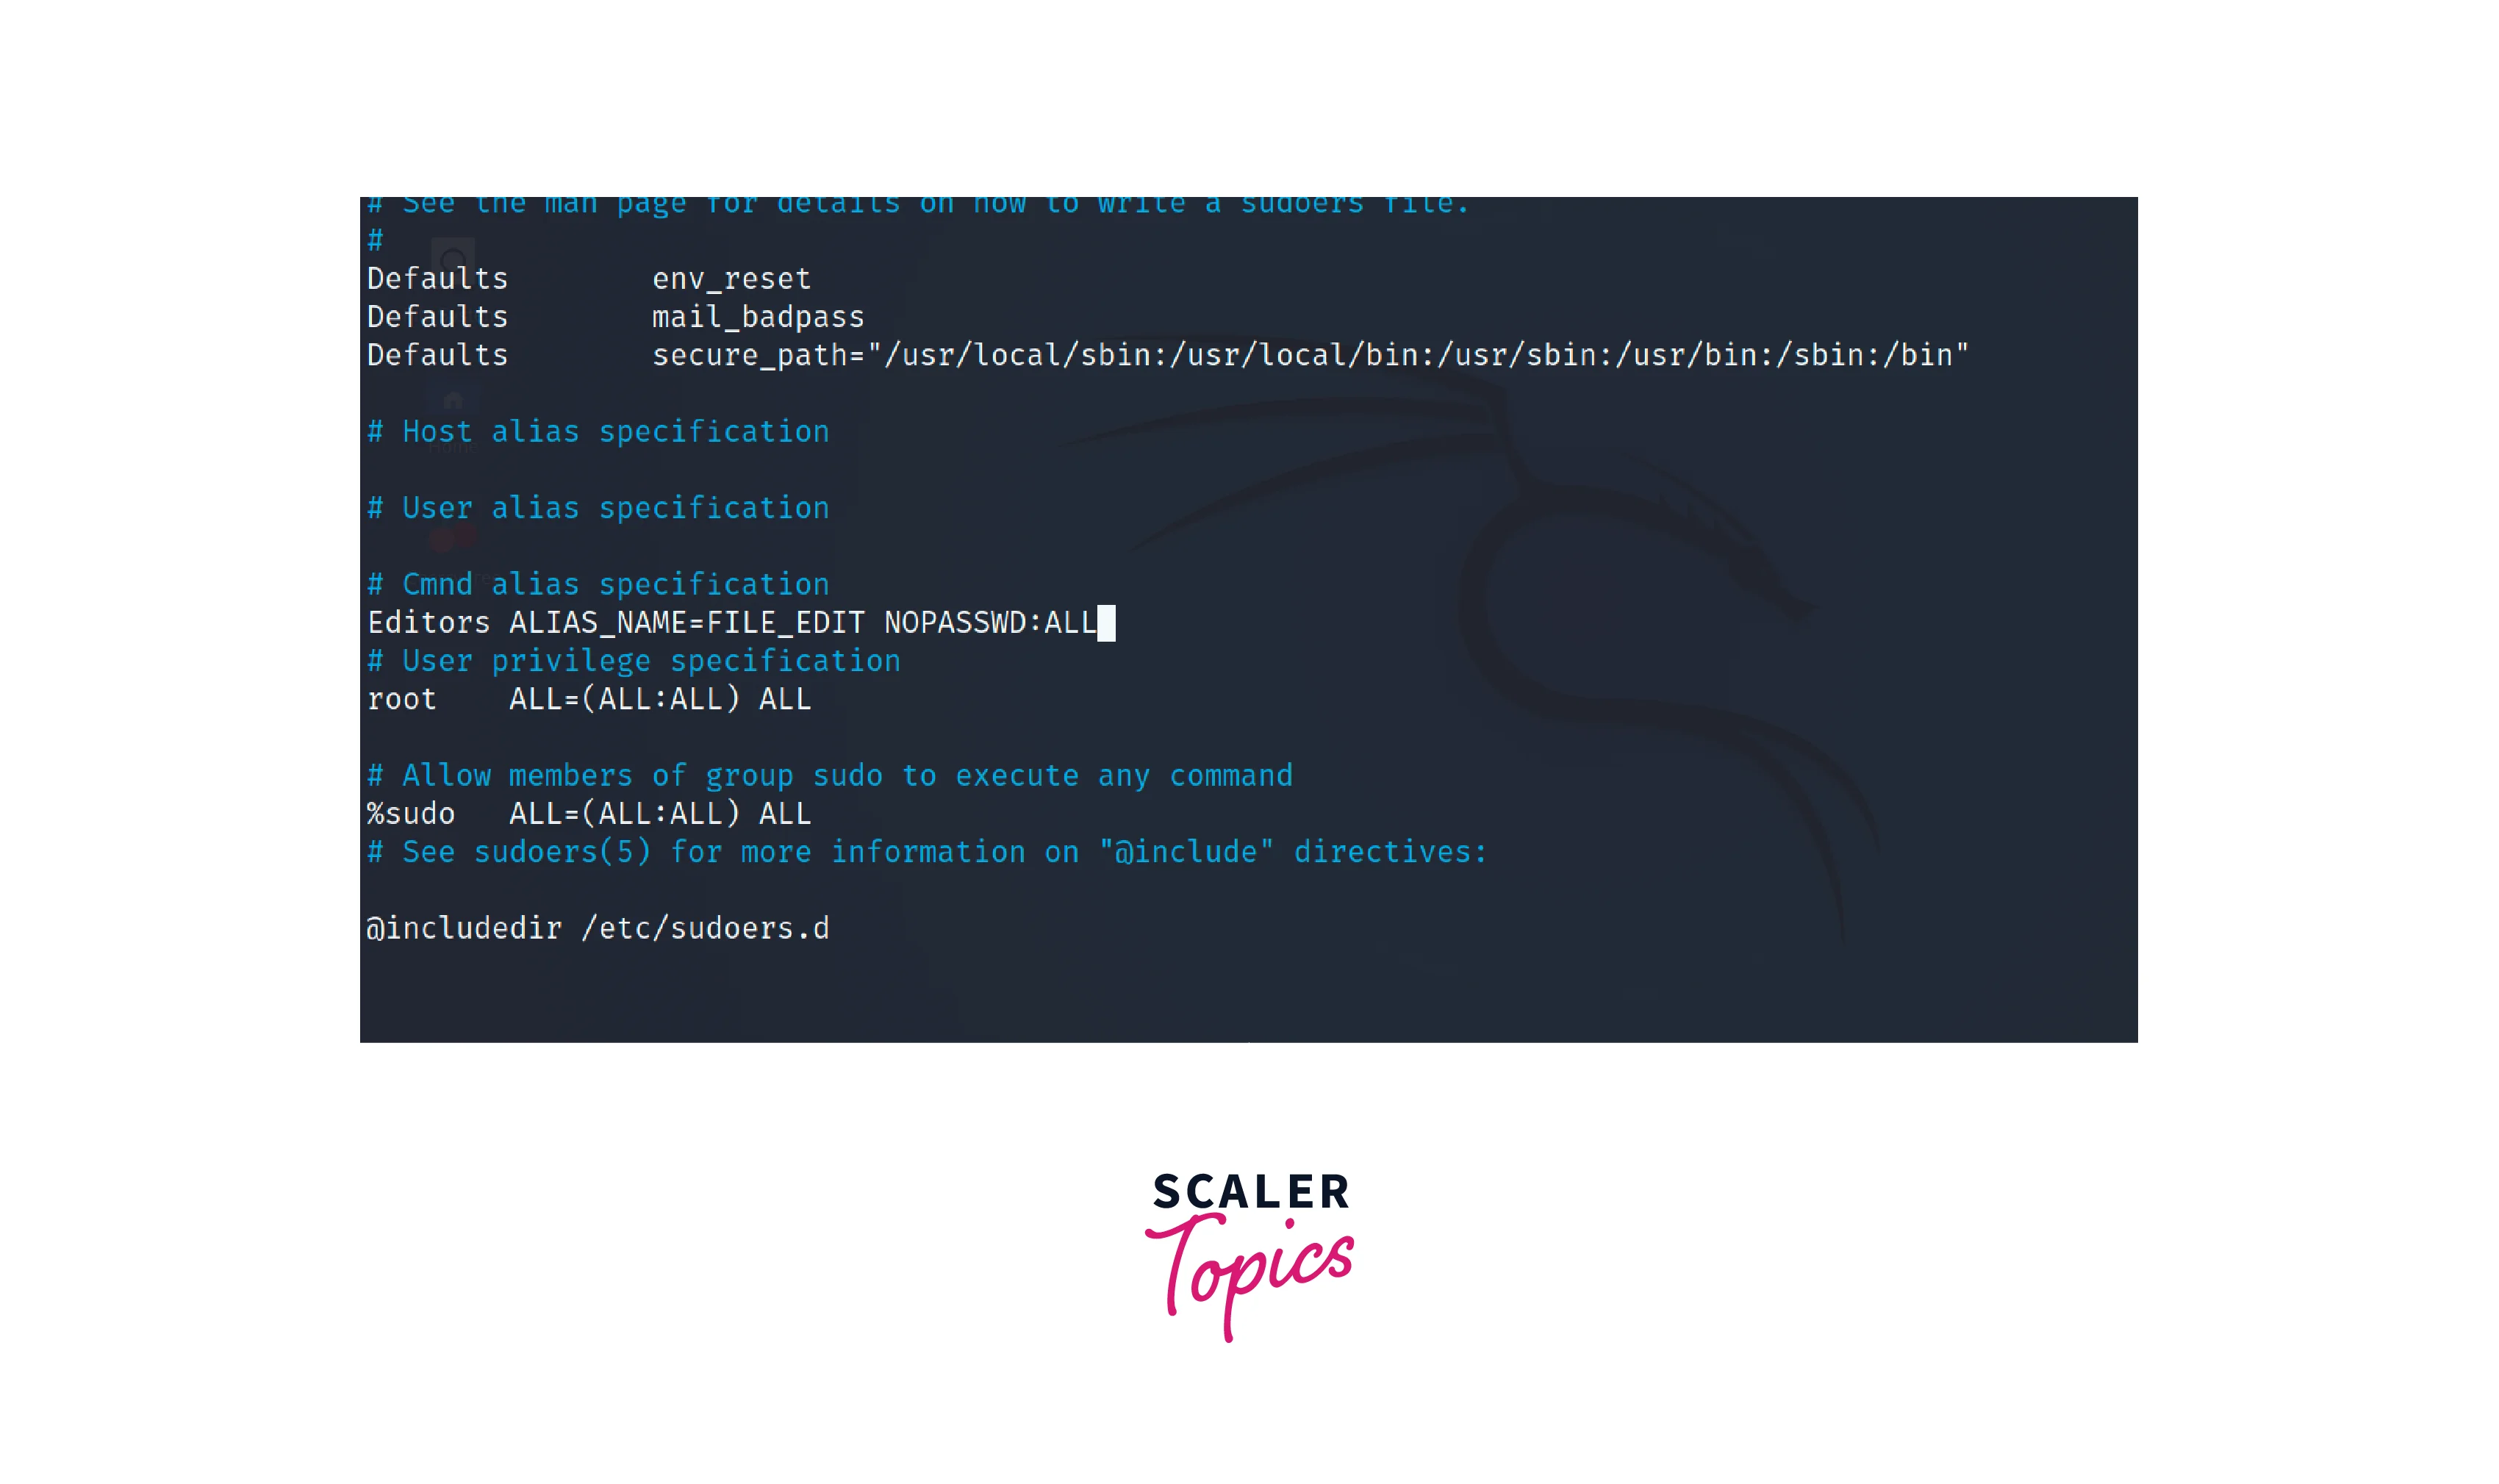
- Cmnd_Alias: Group of commands. An example of restricting edit to files,
- User_Alias: Grouping multiple users under a single alias name. An example is,
- Runas_Alias: Define alternative names for users. An example is,
Replace ALIAS_NAME with the desired name for the alias, and COMMANDS with the specific command or commands to be associated with the alias. Multiple commands can be separated by commas.
- Cmnd_Alias: Group of commands. An example of restricting edit to files,
-
After defining the alias, you need to grant the appropriate users or groups access to execute commands associated with the alias. Add a line in the following format:
Replace USER_OR_GROUP with the username or group name, and ALIAS_NAME with the name of the alias defined in the previous step.
The (ALL) keyword allows the alias to be used with any host. The NOPASSWD:ALL option allows execution without requiring a password prompt. Add the following line to allow the Editors group to use the FILE_EDIT alias.
-
After making the necessary changes to the sudoers file, save the file and exit the text editor.
Protect the Admin Privileges
Maintaining the security of superuser access is essential for Linux systems. The following points are to be considered when protecting the admin privileges in Linux,
-
Ensure that strong passwords are set for all user accounts, especially for those with administrative privileges.
-
Secure Shell (SSH) is commonly used for remote administration. To protect admin privileges, restrict SSH access to trusted IP addresses or prevent SSH for root users through the following steps. + Edit the SSH daemon configuration file.
-
Locate the line that contains the word PermitRootLogin. By default, it is usually set to yes. + Modify the PermitRootLogin directive to no.
-
Restart the SSH daemon to apply the new configuration.

-
Restrict network access using firewall rules to prevent unauthorized access to administrative services.
-
Follow the principle of least privilege, granting administrative privileges only to trusted users who require them for specific tasks.
-
Implement monitoring and auditing tools to track administrative activities and identify any suspicious or unauthorized actions. For example, host-based intrusion detection tools like OSSEC (Open Source Security) and AIDE (Advanced Intrusion Detection Environment) are used for detecting unauthorized modifications, providing real-time monitoring and centralized log management.
Conclusion
- Superuser access in Linux refers to a user account with elevated privileges and unrestricted access to the system.
- Superuser access can be checked using commands like id or whoami to identify the user's privileges.
- We can lock the root account during installation to prevent direct logins, and users are encouraged to use sudo or delegated administrative accounts for actions requiring elevated privileges.
- The passwd command can also be used to lock the super user in Linux. There are also various methods to check if the account is locked.
- We can also create aliases for users or commands and also achieve Delegate permission by editing the sudoers file.
- Linux distributions encourage the use of regular user accounts for day-to-day activities and recommend granting superuser privileges only when necessary.